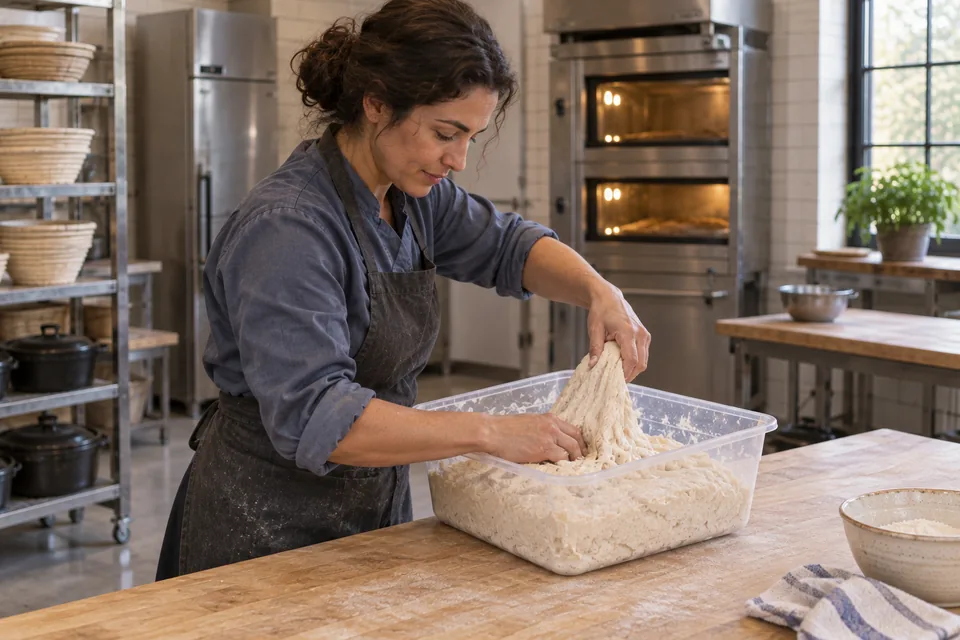
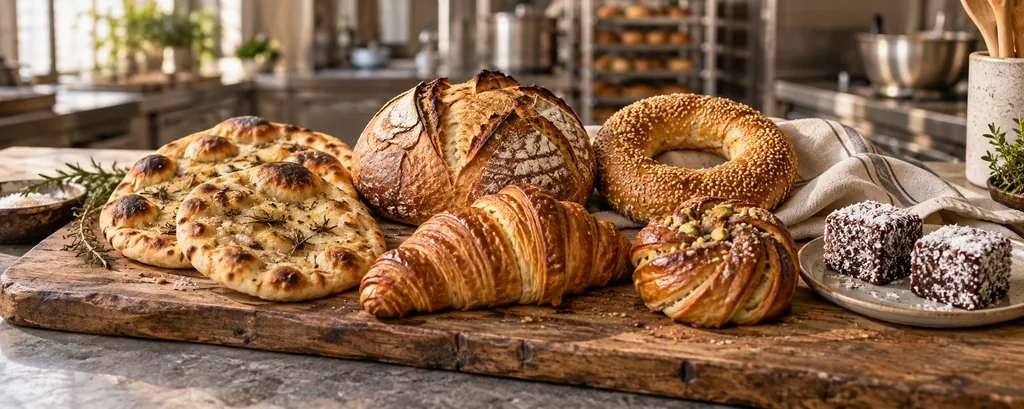
Fresh breads, a croissant, a spiral bun and coconut-covered cakes on a bakery workbench.

Recipes

Explore breads, pizza, pastries and sweets from around the world, with clear steps and practical tips for every bake.

Explore by method or style

Combine tags to narrow your search. Tags describe the main recipe; variations may differ.

Find your next bake

119 core recipes / 183 variations and guides

← All recipes

Mix, match and make it yours

Cake builder

Choose a cake, add a filling, then pick its finish and toppings. Get one ingredient list and a clear plan for putting it all together.

1. Choose your flavours
2. Choose the size

Each layer uses a separate round tin, at least 5 cm deep. You can bake in batches.

Eggs, whites and yolks are used in whole counts, with the other ingredients scaled to match. Small doses stay metric when easier to measure.

Utensil checklist

Tick the tools you have ready. The last three rows depend on your chosen filling and finish.

Recommended Tools Regular BakerCasual Baker Workarounds Hacks
Read the cake component recipes

These are the reference batches before resizing or assembly. Use the builder above for the quantities and baking sequence for your chosen combination.

Vanilla cake

Pan diameter: 20 cm · Layers: 2

GroupIngredientAmountPreparation
DryCake flour290 gSifted; all-purpose flour gives a slightly firmer crumb
DryBaking powder10 mlLevel measure
DryBaking soda2.5 mlLevel measure
DryFine salt5 mlLevel measure
BatterUnsalted butter170 gSoft, not melted
BatterGranulated sugar300 g
BatterLarge eggs2 Room temperature
BatterLarge egg whites2 Room temperature
BatterFull-fat sour cream120 g
BatterAlcohol-free vanilla flavouring15 ml
BatterWhole milk240 mlRoom temperature
  1. Prepare the pans and dry ingredients. Heat the oven to 175°C conventional. Grease and line one round pan per layer selected in your plan, each at least 5 cm deep. Whisk the flour, baking powder, baking soda and salt together. 10 min Leaveners evenly dispersed; no flour lumps.
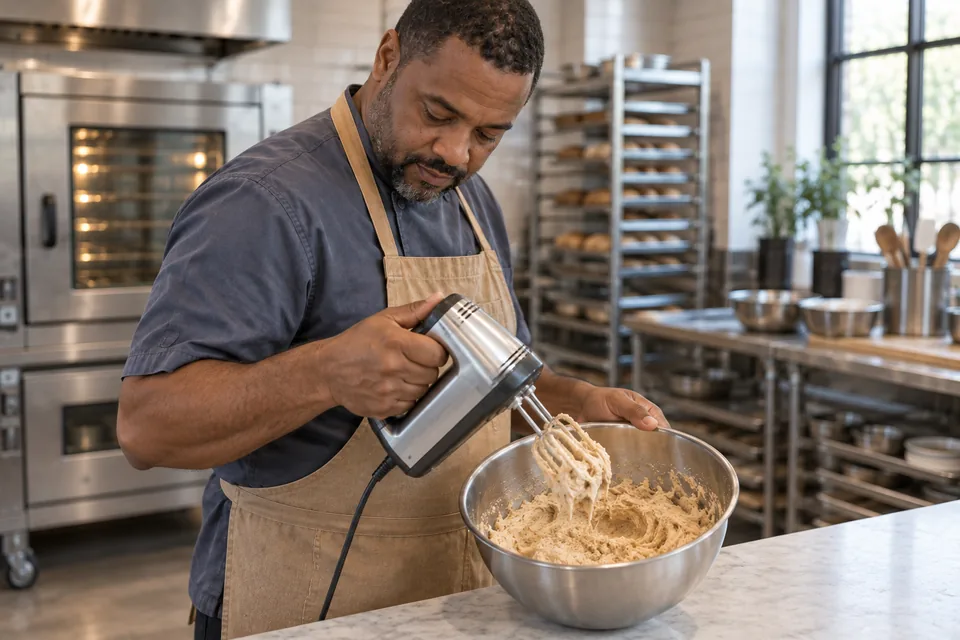
  2. Cream and add the eggs. Beat the butter and sugar until noticeably paler and fluffy. Beat in the eggs and egg whites gradually, scraping the bowl. Mix in the sour cream and vanilla flavouring. 5–7 min An even, creamy mixture without pockets of butter.
  3. Finish the batter. Add the dry mixture and milk in alternating additions on low speed. Stop once the flour disappears; scrape the bottom and fold briefly by hand. 2 min Thick, smooth batter; avoid prolonged mixing.
  4. Bake the layers. Divide the batter evenly between the pans. Bake at 175°C until the centres spring back and a skewer comes out without wet batter. Fill pans no more than two-thirds full; bake any excess separately as cupcakes. 30–35 min at the reference size Set centres and lightly golden edges; start checking early if the pan size changes.
  5. Cool completely. Rest the layers in their pans for about 10 minutes. Turn onto a rack, remove the paper and leave until completely cool. About 1–2 hours No warmth remains before filling or icing.
Chocolate cake

Pan diameter: 20 cm · Layers: 2

GroupIngredientAmountPreparation
DryAll-purpose flour265 g
DryGranulated sugar340 g
DryNatural unsweetened cocoa60 gUse natural cocoa; Dutch-process changes acidity
DryBaking soda10 ml
DryBaking powder5 ml
DryFine salt3 gWeigh; equal weight coarse salt also works
WetNeutral vegetable oil120 ml
WetLarge eggs2 Room temperature
WetAlcohol-free vanilla flavouring7.5 ml
WetFull-fat buttermilk240 ml
WetHot water240 ml
  1. Prepare and whisk. Heat the oven to 175°C conventional. Grease and line one round pan per layer selected in your plan, each at least 5 cm deep. Whisk the flour, sugar, cocoa, leaveners and salt until evenly coloured. 10 min No pale pockets or cocoa lumps.
  2. Mix the batter. Whisk in the oil, eggs, vanilla flavouring and buttermilk. Carefully mix in the hot water until the batter is smooth. About 2 min A thin, pourable chocolate batter is expected.
  3. Divide and bake. Divide between the pans. Bake at 175°C until the centres are set and a skewer has moist crumbs but no liquid batter. Fill pans no more than two-thirds full; bake any excess separately as cupcakes. 32–36 min at the reference size The centre springs back gently; check both pans.
  4. Cool the layers. Cool briefly in the pans, then turn onto a rack and remove the paper. Let the layers cool fully before handling and filling. About 1–2 hours Cool, stable layers; chill briefly if very tender.
Vanilla buttercream

Yield: 715 g

GroupIngredientAmountPreparation
MixtureUnsalted butter225 gSoftened
MixtureIcing sugar450 gSifted
MixtureWhole milk30 ml
MixtureAlcohol-free vanilla flavouring10 ml
MixtureFine salt1 g
  1. Beat the butter. Beat the softened butter until pale and smooth. Scrape the sides and bottom of the bowl. 3–5 min Creamy butter with no firm lumps.
  2. Add the sugar. Add the sifted icing sugar in several portions on low speed. Scrape the bowl, then beat until fully combined. 3 min Smooth and thick, without dry sugar pockets.
  3. Adjust and smooth. Beat in the milk, vanilla flavouring and salt. Finish on low speed to reduce bubbles. Reserve the stated portions for filling, coating or piping a dam. 2 min Spreads easily but holds a ridge; a warm, loose batch needs a short chill.
Cream-cheese icing

Yield: 850 g

GroupIngredientAmountPreparation
BaseUnsalted butter115.0 gSoftened, not greasy
BaseFull-fat block cream cheese225.0 gSoftened
SugarIcing sugar500.0 gSifted
SugarFine salt1.25 mlLevel measure
  1. Beat base. Beat butter and cream cheese until smooth, scraping the bowl. 2–3 min No cold cheese lumps.
  2. Add sugar. Add icing sugar and salt gradually on low speed, then beat briefly until creamy. 3 min Thick and spreadable.
  3. Use or chill. Spread on completely cool cake. Refrigerate if it is too soft to handle. Refrigerate the assembled cake; this icing is not suitable as a fondant undercoat. As needed Icing keeps a spatula ridge.
Dark chocolate ganache

Yield: 500 g

GroupIngredientAmountPreparation
MixtureDark chocolate300 gFinely chopped, about 60–70% cocoa
MixtureHeavy cream200 gAbout 35% fat
  1. Heat and combine. Put the chopped chocolate in a heatproof bowl. Heat the cream until steaming with small bubbles at the edge, then pour it over the chocolate. About 5 min Hot cream; no need for a prolonged boil.
  2. Emulsify. Wait briefly, then stir gently from the centre outward until smooth and glossy. 2–3 min An even emulsion without oily streaks or chocolate lumps.
  3. Let it set for its job. Cool, stirring occasionally, until spreadable for filling or coating. For a fondant undercoat, apply a thin layer and let it firm before covering. About 1–2 hours, depending on the room A spatula leaves a ridge. Warm ganache is too fluid for filling.
Raspberry filling

Yield: 350 g

GroupIngredientAmountPreparation
SlurryCornstarch12.0 g
SlurryWater25.0 mlCold
FruitRaspberries350.0 gFresh or frozen, unsweetened
FruitCaster sugar65.0 g
FruitLemon juice5.0 mlFresh
  1. Make slurry. Stir cornstarch into cold water until smooth. 1 min No dry starch lumps.
  2. Cook filling. Combine berries, sugar and lemon juice in a saucepan. Add slurry and heat, stirring and crushing berries, until bubbling. Continue stirring until thick. 8–12 min A spatula leaves a brief trail; mixture no longer tastes starchy.
  3. Cool. Transfer to a shallow heatproof container. Let steam subside, then refrigerate until completely cold. Use only when completely cold, in a thin layer inside a firm buttercream or ganache dam. Until cold Thick and spreadable, not warm or runny.
Whipped cream

Yield: 265 g

GroupIngredientAmountPreparation
WhipHeavy cream240.0 mlAt least 35% fat; cold
WhipCaster sugar25.0 gFine grains
  1. Prepare. Chill bowl and whisk if the kitchen is warm. 5 min Equipment cool to the touch.
  2. Whip. Whisk cream and sugar, starting slowly. Increase speed and check frequently as it thickens. 2–4 min Soft peaks for spooning; firmer peaks for piping.
  3. Serve. Use immediately or cover and refrigerate briefly. Stop whisking before the cream becomes grainy. For cake filling, whip to peaks that hold and keep the layer thin. Refrigerate the assembled cake and serve the same day. As needed Smooth cream that holds the intended shape.
Rolled fondant

Yield: 680 g

GroupIngredientAmountPreparation
MixturePrepared gelatin-free fondant680 gCheck the label for pork-derived ingredients and added alcohol
MixtureCornstarch10 gFor light dusting; some remains on the work surface
  1. Condition the fondant. Knead the prepared fondant until pliable. Keep unused pieces covered so they do not dry out. 5 min Smooth and flexible, without cracking.
  2. Roll a covering sheet. Dust the bench very lightly and roll an even sheet about 3–4 mm thick, wide enough to cover the top and both sides with trimming allowance. 5–10 min An even thickness that lifts without tearing.
  3. Drape over the undercoat. Start with a level cake covered in the firm, smooth undercoat from your plan. Lift the fondant on a rolling pin and centre it over the cake. A few minutes No exposed crumbs beneath the fondant.
  4. Smooth and trim. Smooth the top, then ease the sides down a little at a time, lifting folds rather than trapping them. Trim excess at the base. 5–10 min A smooth cover without stretched tears or trapped pleats.
Fresh berries

Yield: 150 g

GroupIngredientAmountPreparation
MixtureFresh berries150 gChoose sound, dry fruit
  1. Rinse and dry. Rinse the berries gently, remove damaged fruit and pat completely dry. 5 min No surface water to dissolve or stain the finish.
  2. Add before serving. Arrange the dry berries on the finished cake shortly before serving. Keep the cake refrigerated. 2 min Fresh, intact berries; keep wet fruit away from fondant.
Toasted pecans

Yield: 80 g

GroupIngredientAmountPreparation
MixturePecans80 gPlain, shelled
  1. Toast gently. Spread the pecans on a tray and toast at 160°C conventional, turning once. Watch closely near the end. 8–12 min Fragrant nuts, slightly darker inside; not scorched.
  2. Cool and chop. Let the nuts cool completely, then chop to the size you want and scatter over the finished cake. 10–15 min cooling Cool, crisp pieces that will not melt the icing.
Chocolate shavings

Yield: 60 g

GroupIngredientAmountPreparation
MixtureDark chocolate60 gA solid bar, at room temperature
  1. Shave the chocolate. Draw a vegetable peeler along the edge of the chocolate bar over a clean tray. If it crumbles, let the bar warm slightly in your hands. 5 min Thin shavings or curls; avoid melting the chocolate.
  2. Finish the cake. Scatter the shavings over the set finish. Handle lightly so they keep their shape. 2 min Dry, distinct shavings rather than smeared chocolate.
Butter cake

Pan diameter: 20 cm · Layers: 2

GroupIngredientAmountPreparation
DryCake flour270 gSifted
DryBaking powder10 ml
DryFine salt2.5 ml
CreamHeavy cream240 gCold; at least 35% fat
BatterUnsalted butter140 gSoftened
BatterGranulated sugar265 g
BatterLarge eggs5 Room temperature
BatterAlcohol-free vanilla flavouring15 ml
  1. Prepare. Heat oven to 175°C conventional. Grease and line one round pan per selected layer, at least 5 cm deep. Whisk dry ingredients. 5 min No flour lumps.
  2. Whip cream. Whisk cold cream until soft peaks form; set aside. 2–3 min Peaks bend over.
  3. Cream butter. Beat butter, sugar and vanilla until fluffy. Gradually beat in eggs. 5–7 min Even and airy.
  4. Combine. Mix in dry ingredients briefly, then fold in whipped cream. Divide between pans, no more than two-thirds full. 3 min No streaks.
  5. Bake. Bake at 175°C. Check from 20 minutes; extend as needed. 20–25 min Skewer shows crumbs, not wet batter.
  6. Cool. Rest briefly, then turn onto racks. Cool before filling. About 1–2 hours No warmth remains.
Pound cake

Pan diameter: 20 cm · Layers: 2

GroupIngredientAmountPreparation
BatterUnsalted butter300 gSoftened
BatterGranulated sugar300 g
BatterLarge eggs6 About 300 g without shells; room temperature
BatterAlcohol-free vanilla flavouring10 ml
DryAll-purpose flour300 gPlain; sifted
DryBaking powder5 mlLevel measure
DryFine salt2.5 ml
  1. Prepare pans. Heat oven to 165°C conventional. Grease and line one round pan per selected layer, each at least 5 cm deep. Whisk flour, baking powder and salt. 5 min Pans ready; dry mixture lump-free.
  2. Cream. Beat butter and sugar until visibly lighter, scraping the bowl several times. 5–7 min Fluffy, not greasy.
  3. Add eggs. Beat eggs together, then add gradually with vanilla. If the mixture separates, beat in a spoonful of the measured flour. 3–4 min Thick and evenly mixed.
  4. Fold and portion. Fold in the remaining dry mixture just until smooth. Divide evenly between pans and level gently; keep below two-thirds full. 2 min Thick batter, without flour pockets.
  5. Bake. Bake at 165°C, checking from 30 minutes. These shallow layers bake faster than a pound-cake loaf. 30–40 min Centre springs back; skewer has no wet batter.
  6. Cool. Rest for 10 minutes before turning onto racks. Cool fully before assembling; use a thin filling layer with this rich cake. About 1–2 hours Layers cool and firm enough to lift.
Carrot cake

Pan diameter: 20 cm · Layers: 2

GroupIngredientAmountPreparation
WetBrown sugar255 g
WetNeutral oil230 ml
WetPlain Greek yogurt75 g
WetLarge eggs4 Room temperature
DryAll-purpose flour320 gPlain
DryBaking soda6.5 mlLevel measure
DryGround cinnamon12.5 ml
DryGround nutmeg1.5 ml
DryFine salt3 ml
Fold inCarrots335 gFreshly finely grated; do not squeeze
Fold inPecans130 gChopped; walnuts also work
  1. Prepare. Heat oven to 175°C conventional. Grease and line one round pan per selected layer, each at least 5 cm deep. 5 min Pans ready.
  2. Mix wet ingredients. Whisk sugar, oil and yogurt until even, then whisk in eggs. 3 min Smooth, thick mixture.
  3. Combine. Whisk the dry ingredients separately. Fold into the wet mixture, followed by carrots and pecans. Divide evenly between pans, no more than two-thirds full. 3 min No flour pockets; carrots distributed throughout.
  4. Bake. Bake at 175°C. Begin checking the centres at 30 minutes and extend if needed. 30–40 min Centres spring back; a skewer has no raw batter.
  5. Cool. Rest in pans for 15 minutes, then gently turn onto racks. Cool completely before filling. About 1–2 hours Layers hold together and are no longer warm.
Chiffon cake

Pan diameter: 23 cm · Layers: 2

GroupIngredientAmountPreparation
BatterLarge eggs7 Separated
BatterCream of tartar2.5 ml
BatterCaster sugar300 gOne-third for whites; two-thirds for dry mixture
BatterAll-purpose flour240 g
BatterBaking powder12.5 ml
BatterFine salt3.75 ml
BatterNeutral oil100 g
BatterWhole milk170 g
BatterAlcohol-free vanilla flavouring10 ml
  1. Prepare. Heat oven to 160°C conventional. Use two ungreased 23 cm round pans. Keep the whisk and bowl grease-free. 5 min Dry pan walls help the cake climb.
  2. Make the foam. Whisk whites with cream of tartar; gradually add one-third of the sugar. 5 min Firm, glossy peaks.
  3. Mix and fold. Whisk remaining sugar with dry ingredients. Beat oil, yolks and vanilla; add dry mixture alternately with milk. Fold in whites gently. 5 min Airy, evenly coloured batter.
  4. Bake. Divide between pans. Bake at 160°C for 40 minutes, then 175°C for about 10 minutes. About 50 min Centre springs back without an indentation.
  5. Cool. Invert pans on a rack for 30 minutes, then loosen and unmould. Finish cooling before decorating. 1–2 hours Cool and stable.
Genoise sponge

Pan diameter: 23 cm · Layers: 2

GroupIngredientAmountPreparation
BatterLarge eggs6
BatterLarge egg yolk1
BatterCaster sugar150 gTwo-thirds for eggs; one-third for flour
BatterFine salt1.25 ml
BatterAll-purpose flour90 g
BatterCornstarch15 ml
BatterUnsalted butter55 gMelted; still fluid
BatterAlcohol-free vanilla flavouring10 ml
  1. Prepare. Heat oven to 175°C conventional. Line two 23 cm round pan bases with parchment; leave sides ungreased. 5 min Pans ready before whipping.
  2. Warm and whip. Whisk eggs, yolk, salt and two-thirds of the sugar over simmering water until gently warm and sugar dissolves. Remove and beat until thick ribbons linger on the surface. 5–8 min Pale, voluminous foam.
  3. Fold. Combine flour, cornstarch and remaining sugar. Fold into eggs in thirds. Blend a scoop of batter with butter and vanilla; gently fold this back in. 3 min No flour or butter pockets.
  4. Bake. Divide evenly between pans and bake at 175°C. 20–25 min Lightly golden; centre springs back.
  5. Cool. Rest in pans 15 minutes, then loosen edges and unmould onto a rack. Fill when cool; cover promptly. About 1 hour No warmth remains.
Angel food cake

Pan diameter: 25 cm · Layers: 1

GroupIngredientAmountPreparation
SiftCake flour135 gLow-protein flour, not self-raising; substitute 115 g all-purpose flour plus 20 g cornstarch
SiftCaster sugar150 g
SiftFine salt1.25 ml
FoamLarge egg whites12 Freshly separated; about 360 g total
FoamCream of tartar7.5 ml
SweetenCaster sugar200 g
  1. Prepare. Heat oven to 165°C conventional. Use an ungreased 25 cm angel-food tube pan with a removable base. Keep the whisk and bowl free of fat. 5 min No grease or yolk in the mixing equipment.
  2. Sift. Sift the ingredients in the Sift group together twice. 3 min Fine, lump-free mixture.
  3. Whip. Whisk whites and cream of tartar until foamy. Gradually add the sugar in the Sweeten group while whisking to soft peaks. 5–7 min Glossy peaks bend at the tips.
  4. Fold. Sift the dry mixture over the foam in three additions, folding gently. Spoon into the pan. 3 min Airy batter with no flour pockets.
  5. Bake. Bake at 165°C without opening the oven early. 40–45 min Top is golden and springs back lightly.
  6. Cool inverted. Invert the pan on its feet or a secure heatproof support that leaves space under the cake. Cool fully before loosening with a thin knife. About 3 hours Cake is cool and retains its height.
Sponge cake

Pan diameter: 20 cm · Layers: 2

GroupIngredientAmountPreparation
BatterLarge eggs6 Separated
BatterCaster sugar200 gThree-quarters for yolks; one-quarter for whites
BatterAlcohol-free vanilla flavouring10 ml
BatterFine salt1.25 ml
BatterCake flour120 gNot self-raising
  1. Prepare. Heat oven to 175°C conventional. Grease two 20 cm round pans at least 5 cm deep, line bases with parchment, then grease and flour the paper. 5 min Clean, grease-free whisk for whites.
  2. Whip yolks. Beat yolks with three-quarters of the sugar until pale and thick. Add vanilla and salt. 3–5 min Mixture leaves a ribbon.
  3. Whip whites. Whisk whites to soft peaks. Gradually add remaining sugar; continue to firm, glossy peaks. 3 min Foam is smooth, not dry.
  4. Fold. Fold yolk mixture into whites in thirds. Sift flour over and fold gently. Divide between pans. 3 min Airy batter without flour streaks.
  5. Bake and cool. Bake at 175°C until springy. Cool in pans 5 minutes, then turn out, remove paper and cool upright on a rack. 20–25 min bake; about 1 hour cooling Edges begin to release; centre springs back.
Choose your crust, filling and finish

Pie builder

Build a sweet or savoury pie with one ingredient list and a baking plan matched to your choices.

Choose your pie

One 23 cm pie · about 4 cm deep · 8 slices

Utensil checklist

Recommended Tools Regular BakerCasual Baker Workarounds Hacks
Read the pie component recipes

These are the reference batches before resizing or assembly. Use the builder above for the quantities and baking sequence for your chosen combination.

Butter pastry

GroupIngredientAmountPreparation
All-purpose flour175 gPlain; plus a little for rolling
Unsalted butter115 gCold and cubed
Fine salt2 g
Water60 mlCold; start with 45 mL, add only as needed
  1. Rub in butter. Mix flour and salt, then rub in cold butter, leaving some small flakes. Crumbly with visible butter.
  2. Bring together. Stir in cold water gradually until a squeezed handful holds. Flatten into a disc; wrap and chill for 45 minutes. Cohesive, not sticky.
  3. Line the dish. Roll to a circle about 30 cm across. Ease into a 23 cm pie dish, 3.5–4 cm deep, without stretching. Trim and crimp; chill for 30 minutes. Follow the assembly plan for any pre-baking. Dough fits the corners; no stretched edges.
Sweet shortcrust

GroupIngredientAmountPreparation
All-purpose flour200 g
Unsalted butter125 gSoftened
Granulated sugar55 g
Large egg yolk1
Water10 ml
Fine salt1 g
  1. Mix. Beat butter, sugar and salt smooth. Mix in yolk and water, then flour just until clumps form. Soft dough without dry flour.
  2. Shape and chill. Press evenly over the base and sides of the 23 cm dish, about 3 mm thick. Chill for 45 minutes. Follow the assembly plan for pre-baking. Even shell, with no thick corners.
Biscuit crumb crust

GroupIngredientAmountPreparation
Graham crackers or plain digestive biscuits180 gFinely crushed
Granulated sugar40 g
Unsalted butter85 gMelted
  1. Combine. Stir crumbs and sugar together, then mix in butter. Resembles damp sand.
  2. Shape. Press over the base and up the sides of the 23 cm dish with a flat-bottomed glass. Do not pack rock-hard. Follow the assembly plan for baking and cooling. Evenly covered, no loose patches.
Apple filling

GroupIngredientAmountPreparation
Apples800 gPrepared weight; peeled, cored and thinly sliced; firm baking apples
Granulated sugar120 g
All-purpose flour30 g
Lemon juice15 ml
Ground cinnamon5 ml
Unsalted butter20 g
  1. Soften fruit. Cook apples, sugar, lemon and butter in a wide pan for 8–10 minutes, stirring, until slightly softened. Stir in flour and cinnamon and cook for another minute. Spread out to cool. Slices bend but still hold together.
  2. Fill and cover. Spoon cooled fruit into the chilled shell, keeping below the rim. Add the chosen fruit-pie topping; vent a pastry lid. Bake any excess fruit separately. Filling distributed evenly.
  3. Bake. Bake on a tray at 190°C conventional for 45–60 minutes. Shield browned edges with foil. Juices bubble in the centre and pastry or crumble is golden.
  4. Set. Cool for at least 3 hours before cutting. Juices have thickened.
Mixed berry filling

GroupIngredientAmountPreparation
Mixed berries750 gFresh or thawed; include any thawed juices; halve large strawberries
Granulated sugar100 g
All-purpose flour40 g
Lemon juice20 ml
  1. Mix fruit. Mix sugar and flour, then gently toss with berries and lemon juice. Every berry lightly coated.
  2. Fill. Transfer to the chilled shell, below the rim. Add the selected fruit-pie topping; vent any pastry lid. Keep excess filling for a separate small bake. No overflowing juices.
  3. Bake. Bake on a tray at 190°C conventional for 50–65 minutes; shield edges once browned. Thick bubbles rise through the centre, not only around the edge.
  4. Cool. Leave for at least 4 hours before slicing. Filling settled and cool.
Pumpkin custard

GroupIngredientAmountPreparation
Pumpkin purée425 gPlain thick purée; not prepared pie filling
Brown sugar150 g
Large eggs3
Evaporated milk250 mlUnsweetened
All-purpose flour10 g
Ground cinnamon5 ml
Ground ginger5 ml
Ground nutmeg1 ml
Fine salt2 g
  1. Mix. Whisk sugar, flour, spices and salt. Whisk in eggs, pumpkin and milk without beating in lots of air. Smooth and pourable.
  2. Fill and bake. Pour into the pre-baked shell on a tray, stopping 1 cm below the rim. Bake at 175°C conventional for 45–55 minutes. Shield the crust edge if needed. Bake excess custard separately. Edges set; the middle has a small gentle wobble, not a liquid wave.
  3. Cool and chill. Cool for about an hour, then refrigerate for at least 4 hours. Keep refrigerated and use within 3 days. Cold and sliceable.
Chocolate pudding

GroupIngredientAmountPreparation
Whole milk360 ml
Heavy cream180 ml
Granulated sugar100 g
Cornstarch20 g
Unsweetened cocoa powder10 g
Large egg yolks2
Dark chocolate180 gFinely chopped
Unsalted butter20 g
Fine salt1 g
  1. Make pudding. In a saucepan whisk sugar, starch, cocoa and salt. Add yolks and a little milk to make a smooth paste, then whisk in remaining milk and cream. Cook over medium heat, stirring continuously; once thick bubbles break the surface, cook for 1 minute. Thick, smooth pudding.
  2. Finish. Off the heat, stir in chocolate and butter until melted. Strain if lumpy. Glossy and even.
  3. Fill and chill. Spread into a fully baked, cooled shell, stopping below the rim. Cover the surface and refrigerate for at least 6 hours, preferably overnight. Add cold toppings just before serving; refrigerate leftovers up to 3 days. Cold and firm enough to slice.
Lemon curd

GroupIngredientAmountPreparation
Large eggs3
Large egg yolks3
Granulated sugar200 g
Lemon juice160 mlFreshly squeezed
Lemon zest10 gFinely grated; yellow part only
Unsalted butter125 gCubed
Fine salt1 g
  1. Cook curd. Whisk eggs, yolks, sugar, juice, zest and salt in a heatproof bowl over gently simmering water; keep the bowl above the water. Stir constantly for 10–15 minutes until thick enough to coat a spoon and leave a clear trail when a finger is drawn through the coating. Do not let the curd boil. Thick and steaming, with no watery layer.
  2. Finish. Remove from heat and stir in butter gradually. Strain into a clean bowl. Smooth, glossy curd.
  3. Fill and chill. Spoon into a fully baked, cooled shell. This is a shallow, rich filling; keep below the rim. Cover and refrigerate for at least 6 hours. Keep cold; use within 3 days. Firm when chilled, with a soft creamy slice.
Spinach and feta custard

GroupIngredientAmountPreparation
Frozen chopped spinach300 gThawed, then squeezed very dry
Feta cheese125 gCrumbled
Large eggs4
Whole milk240 ml
Spring onions40 gFinely sliced
Ground black pepper1 ml
  1. Prepare. Squeeze spinach in a clean cloth until it stops dripping. Separate the clumps and mix with feta and spring onions. Loose greens without free water.
  2. Mix and fill. Whisk eggs, milk and pepper. Scatter greens and cheese into a pre-baked butter pastry shell; pour over custard, stopping 1 cm below the rim. Bake any excess in a separate small dish. Filling evenly spread; no sweet topping.
  3. Bake. Bake at 175°C conventional for 35–45 minutes, shielding the rim if necessary. Centre is just set with a slight wobble; no liquid sloshing.
  4. Rest. Rest 20 minutes before slicing. Refrigerate leftovers within 2 hours and use within 3 days. Custard holds a slice.
Crumble

GroupIngredientAmountPreparation
All-purpose flour100 g
Brown sugar65 g
Unsalted butter65 gCold and cubed
  1. Mix. Rub butter into flour and sugar until uneven small clumps form. Chill until needed. Crumbs and pea-sized clumps.
  2. Bake with fruit. Scatter over apple or berry filling before baking. Follow the fruit filling’s baking schedule; cover loosely with foil if browned before the fruit bubbles. Golden topping over bubbling fruit.
Whipped cream

GroupIngredientAmountPreparation
Heavy cream240 mlCold; at least 35% fat
Caster sugar25 g
  1. Whip. Whisk cream and sugar until it forms peaks that hold gently. Smooth and billowy, not grainy.
  2. Finish. Spoon onto a fully cooled or chilled sweet pie shortly before serving. Keep refrigerated. Cream stays in soft mounds.
Chocolate shavings

GroupIngredientAmountPreparation
Dark chocolate30 gPlain bar
  1. Shave. Draw a vegetable peeler along the side of the chocolate bar over a plate. Fine curls or flakes.
  2. Finish. Scatter over a fully cooled sweet pie just before serving. Chocolate remains distinct, not melted.
Pastry lid

GroupIngredientAmountPreparation
All-purpose flour175 gPlain; plus a little for rolling
Unsalted butter115 gCold and cubed
Fine salt2 g
Water60 mlCold; start with 45 mL, add only as needed
  1. Make lid dough. Rub butter into flour and salt; add cold water gradually until cohesive. Flatten, wrap and chill for 45 minutes. This is extra dough in addition to the bottom shell. Dough holds when squeezed.
  2. Cover fruit. Roll to about 28 cm across. Lay over cool apple or berry filling in a butter pastry shell. Seal edges, trim and cut several steam vents. Lid sealed without stretching.
  3. Bake. Follow the selected fruit filling’s oven temperature and timing. Shield browned edges if needed. Golden pastry with fruit bubbling through the vents.

What can you make with the baking builders?

Start with a complete recipe, then use the matching builder to choose compatible components or a different batch size. The tools keep ingredient weights and instructions together.

Cake builder
Choose a cake base, filling, icing and topping. Foam cakes and soft fillings have different support needs; compatibility messages explain the limits.
Pie builder
Combine a crust, filling and topping for a 23 cm pie. The selected combination determines whether the crust needs baking before filling.
Cookie builder
Choose a cookie base and texture. Each texture uses its own complete ingredient proportions and matching method; the chart shows when ingredients come together.
Recipe tools
Enter weights or load a supported dough to calculate flour ratios and resize the batch. Starter and preferment composition must be included when calculating hydration.
Recipe builder · start with the weights

Recipe builder

Enter ingredient weights to check the proportions and build a recipe from a supported method. Start with an example or load a dough from the collection.

Generated recipes are trial formulas. Some ingredient combinations have no suitable method; flour, temperature and starter activity affect the results.

Use a bread or pizza dough

Imports the final dough ratios, including the weighed portion of prepared levain or preferment. Build it using the linked recipe first. Add-ins and toppings stay in that recipe.

Starting formula: half of Same-day white bread.

1 · Ingredients by weight

Ingredientg

Resize the whole recipe

g

Every ingredient changes in the same proportion, including prepared starter. Weights are rounded for the kitchen after scaling. Keep individual loaf sizes or pan depth similar; bake extra batches if needed.

Choose a name from the suggestions. Weigh eggs without shells. Enter a prepared starter or preferment as one ingredient; its internal flour and water are calculated below.

2 · Choose the bake

Starter & preferment composition

The default levain is nominally 80% hydration with 20% whole wheat in its flour. Poolish is usually 100%; the default biga is 68%. Poolish/biga defaults to white flour; enter its grain shares if different. Each pair of whole-wheat and rye shares must total no more than 100%. These are composition inputs, not feeding instructions.

Saved drafts

Stored in this browser on this device. Download a recipe as HTML for a portable copy.

    Understand before you adjust

    Baking science, made practical

    Learn what flour, water, time and heat do—and what to look for as you bake.

    Start with the dough’s feel and appearance. Use the explanations below to decide when to rest, fold, proof or bake.

    Count the flour and water in a starter

    450 g fresh flour + 300 g water + 100 g starter at 100% hydration.

    The starter contributes 50 g flour and 50 g water. Total flour = 500 g; total water = 350 g. Hydration = 70%; prefermented flour = 10%. Add 10 g salt for 2% salt. Do not add the starter’s flour and water a second time.

    Read a recipe in proportions

    Baker’s percentages compare every ingredient with the total flour weight. All flours together are 100%; the ingredients’ percentages do not need to add up to 100%. This makes recipes easier to compare and scale.

    Use it: Ingredient % = ingredient weight ÷ total flour weight × 100. With 500 g flour, 350 g water is 70% hydration and 10 g salt is 2%. To change batch size, multiply every ingredient by the same factor.

    Watch for: Include the flour in any starter or preferment you add. Use total flour, rather than total dough weight, as the denominator. A larger loaf or deeper pan may need a different baking time.

    Count the flour and water in a starter

    A starter or levain contributes flour and water to the final dough. Prefermented flour percentage measures its flour as a share of all the flour in the dough; starter weight percentage measures the whole starter. These are different quantities.

    Use it: For S grams of flour-and-water starter at H% hydration, let h = H ÷ 100. Starter flour = S ÷ (1 + h); starter water = S × h ÷ (1 + h). For example, 180 g of starter at 80% hydration contains 100 g flour and 80 g water. Subtract these amounts from the desired totals before weighing the fresh additions.

    Watch for: Calculate from the portion actually used, which may be smaller than the full starter build. For poolish and biga, use the listed flour, water and yeast quantities.

    Judge hydration by ratio and feel

    Water hydrates flour and allows the gluten network to move. With the same flour, more water usually makes a softer dough that is harder to handle. Whole-wheat content, milling, protein characteristics and flour condition all affect absorption, so two doughs at 75% hydration can feel different.

    Use it: Start with a recipe using a similar flour blend. Keep the flour weight fixed and adjust water in small, weighed amounts when the consistency calls for it. With 500 g flour, 5 g water changes hydration by one percentage point.

    Watch for: A wet wheat dough should still gain support through mixing and folding. Whole wheat often needs more water. Rye behaves differently from wheat and has no universal water correction.

    Build strength and protect the bubbles

    Hydrated wheat proteins form a gluten network that holds expanding gas cells. Mixing brings the ingredients together; folds strengthen and organize the dough. As the dough becomes aerated, gentle handling helps preserve its structure.

    Use it: Stretch an edge only until it resists, fold it across and repeat around the dough. Fold early in the rise, with time to relax between sets. When shaping, create enough surface tension to hold the loaf without tearing it or squeezing out all the gas.

    Watch for: After a useful fold, the dough sits taller and spreads more slowly. Tearing means the stretch has gone too far. Use wet hands for folds and modest bench flour for shaping; repeated handfuls of flour change the recipe.

    Let a flour-and-water rest do some work

    An autolyse is a rest after mixing flour and water. It gives the flour time to hydrate while enzymes begin acting on starch and proteins. The dough can become easier to stretch and need less mixing.

    Use it: When the recipe calls for an autolyse, mix flour and water until no dry patches remain, cover and rest for 20–30 minutes before adding salt and leavening. Follow the recipe’s sequence: some poolish doughs have too little fresh water for a separate rest.

    Watch for: A longer warm rest is not always helpful. Adding yeast or levain starts fermentation, so that rest behaves differently from flour and water alone.

    Use temperature to guide fermentation

    Within the working range of these doughs, warmer dough usually ferments faster, and more active leavening usually shortens the rise. Time also changes flavor and dough strength. Ingredient weights alone cannot predict when a dough will be ready.

    Use it: Measure the finished dough as well as the room. Many lean-dough recipes here aim for about 24–27°C; use the target on the recipe card and adjust mixing-water temperature toward it. Record dough temperature and the time it takes to reach the expansion cue.

    Watch for: A dough’s center cools gradually in the refrigerator. Treat recipe times as check-in windows, then decide from its expansion, feel and appearance.

    Use a preferment when it is ready

    Poolish, biga and levain develop leavening activity, acidity and aroma before the final mix. Their flour, water, temperature and feeding schedules create different starting conditions, so equal weights are not interchangeable.

    Use it: Look for an aerated poolish with surface bubbles that break, or an expanded, gas-pocked biga with a slightly domed surface. Follow the feeding and maturity cues for the levain in your recipe; a young levain will look different from an overnight ripe build.

    Watch for: A collapsed preferment has passed peak expansion. Aroma alone does not show leavening strength. Changing starter hydration also requires accounting for the final flour and water totals and reassessing the rise.

    Weigh salt for reliable results

    Salt adds flavor, supports dough strength and moderates fermentation. Fine grains and large flakes pack differently, so the same spoonful can contain very different weights.

    Use it: Use the recipe’s salt weight. A common bread range is about 1.8–2.2% of total flour; at 500 g flour, 2% is 10 g. Include salt carried in any salted preferment.

    Watch for: Reducing salt changes handling and fermentation as well as taste. Adjusting salt solely to speed up or slow down a standard recipe can produce unintended results.

    Separate the first rise from the final proof

    Bulk fermentation is the rise of the mixed dough before division. Final proof is the last rise after shaping. Shaping gives the fermented dough support; proof allows gas and relaxation to develop before baking.

    Use it: Mark the starting level in a straight-sided container and follow the recipe’s expansion target. For a loaf proving at room temperature, a gentle floured-finger dent that returns slowly and incompletely is one useful cue. For cold dough, combine touch with visible expansion and the recipe’s schedule.

    Watch for: Some recipes call for 2½–3 times the initial bulk volume; this is not a target for every dough. A dent that rebounds immediately can indicate underproofing. A slack loaf that does not recover can be overproofed.

    Match heat and steam to the bake

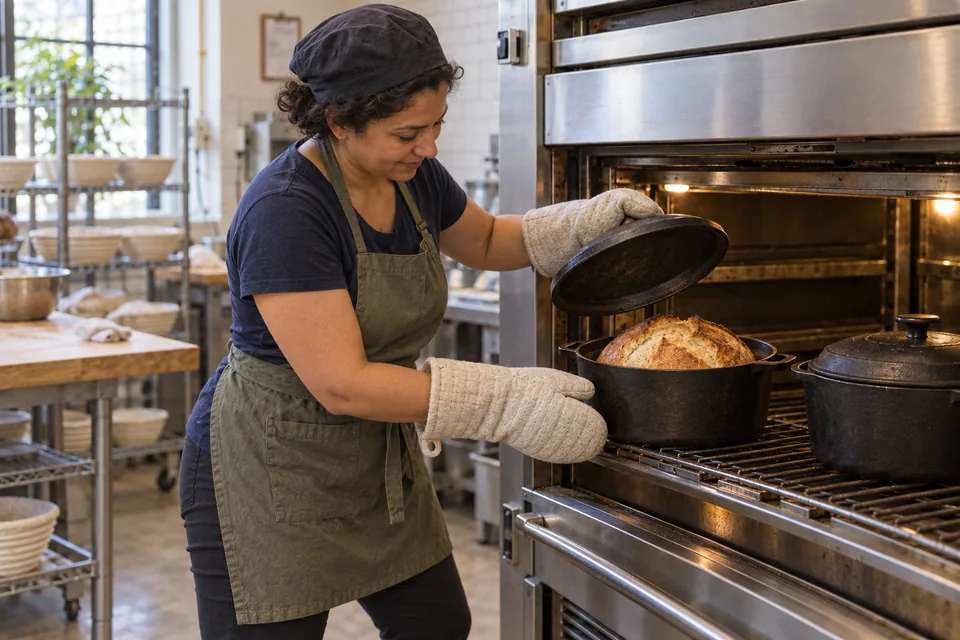
    A covered, preheated pot traps a loaf’s moisture and keeps its surface flexible during early expansion. Uncovering lets the crust dry and brown. The center also needs enough heat, so loaf thickness and equipment matter alongside oven temperature.

    Use it: For a loaf using a Dutch oven, preheat and follow the recipe’s covered and uncovered stages. Use the pan, baking surface and top-heat method specified for pizza or focaccia.

    Watch for: Check the oven’s actual temperature. A pale crust, a scorched base and a dark exterior with a wet center each suggest a different heat problem. Use the doneness cues for the particular bake.

    Give the crumb time to set

    Heat and moisture continue to move through a loaf after it leaves the oven. Cutting immediately exposes a fragile, steamy crumb. Enclosing a hot loaf traps that moisture and softens the crust.

    Use it: Cool bread on a rack so air can reach the base. Wait to slice while the center remains very hot, and let the loaf cool before enclosing it for storage.

    Watch for: A sticky cut surface may come from slicing too soon. A center that stays gummy can also point to underbaking or a fermentation problem; cooling cannot repair an underbaked loaf.

    Develop a recipe through a small trial

    Ratios describe ingredients. A working recipe also needs a mixing method, a leavening system, a shape and a heat schedule. The builder’s dough methods focus on wheat breads, pizza and focaccia; other baking families need their own methods.

    Use it: Choose a close reference recipe, hold the total flour steady and change one main variable at a time. Treat a generated method as the starting point for a small trial. Record the dough’s handling and the finished crust and crumb before adjusting the next batch.

    Watch for: Generated formulas have not been kitchen-tested. Large changes to sugar, fat, eggs, non-wheat flour, chemical leavening or pan size may need a different recipe family and method.
    From ingredients to a recipe

    1. Choose the result you want—loaf, pizza or focaccia—and a close reference recipe in that family.
    2. Enter all ingredient weights, flour types and leavening. Record starter hydration and the amount of preferment you will actually add.
    3. Count the flour and water in that preferment once, then add the fresh ingredients to calculate total hydration, salt percentage and prefermented flour percentage.
    4. Compare your proportions with the reference recipe. Large amounts of sugar, fat, eggs or non-wheat flour may call for a different method.
    5. Choose the mixing and rest sequence, folds, bulk expansion target, shaping and final-proof cues. Set a schedule using the recipe’s room and dough temperatures.
    6. Set the portion sizes, pan dimensions and bake method. Ingredient weights scale proportionally; baking time does not.
    7. Bake a small trial. Record flour, water, temperatures, rise, handling, crust and crumb, then change one main variable for the next bake.

    Ingredient and calculation notes

    Flour names are not universal specifications
    Bread flour and all-purpose flour vary between countries and mills. Protein percentage helps with comparison but does not by itself predict absorption, stretch or baking performance.
    A changed feeding ratio does not instantly change the whole starter
    Retained starter carries flour and water from its previous feed. When changing hydration, include that carryover if you need an exact calculation; the new feed ratio alone describes only the fresh additions.
    No added alcohol describes the ingredients
    These dough recipes add no alcoholic ingredients. Yeast fermentation naturally produces ethanol as well as carbon dioxide, so the collection does not claim zero residual alcohol.
    Baking words, explained

    Terms & techniques

    You do not need to know the jargon before you begin. Choose a term to learn what it means, how to use it and what to look for. Underlined terms in recipes bring you here; use Back to return to your recipe.

    Which preparation does what?

    PreparationWhat you prepareMain purpose
    LevainFed sourdough cultureFermentation and flavour
    PoolishLoose flour, water and yeast mixtureFermentation and flavour
    BigaOften firm flour, water and yeast mixtureFermentation and flavour
    Pâte fermentéeReserved dough, including saltFermentation and flavour
    AutolyseUnheated flour-and-water restMoisten flour and ease dough development
    TangzhongFlour and liquid cooked into a loose pasteRetain moisture and soften the crumb
    YudaneFlour mixed with boiling waterRetain moisture and soften the crumb

    These are different tools, not interchangeable ingredients. Some recipes combine a preferment with a flour rest or a cooked paste.

    Levain

    A portion of sourdough starter prepared for a particular batch of dough. Think of it as the starter you build for today’s bread.

    Weigh out the mature, bubbly levain needed for the dough.
    Weigh out the mature, bubbly levain needed for the dough.
    What to do
    Feed some of your established starter with the flour and water specified in the recipe. Let it become active, then weigh the required amount into the dough. Keep a separate portion of your main starter for future bakes.
    What to look for
    Look for bubbles and a clear increase in volume; use the recipe’s ripeness cues. Temperature and feeding proportions change the timing.
    Easy to mix up
    Levain and starter are sometimes used interchangeably. A levain build is usually a one-bake portion; your maintained starter is the culture you keep. It is not a different packet of yeast you need to buy.
    All baking terms ↑

    Sourdough starter

    A living mixture of flour, water, yeasts and bacteria used to raise and flavour dough.

    Keep a portion of starter to feed for future bakes.
    Keep a portion of starter to feed for future bakes.
    What to do
    Maintain it by keeping a portion and adding fresh flour and water at the feeding ratio your recipe specifies.
    What to look for
    A healthy, ready starter rises predictably after feeding and has visible bubbles.
    Easy to mix up
    A newly mixed jar of flour and water is not immediately ready to raise bread. “Active” means it is fermenting well, not simply that it exists.
    All baking terms ↑

    Preferment

    Flour, water and a leavening culture mixed ahead of the final dough.

    Poolish is one example of a preferment; other types can be much firmer.
    Poolish is one example of a preferment; other types can be much firmer.
    What to do
    Prepare the portion specified in the recipe, let it mature, and then add it with the remaining dough ingredients.
    What to look for
    Its expected texture depends on the type: a poolish is loose, while many bigas are firm.
    Easy to mix up
    This is an umbrella term. Poolish, biga and a sourdough levain are different kinds; they are not interchangeable without adjusting the formula.
    All baking terms ↑

    Poolish

    A loose preferment usually made with equal weights of flour and water, plus a small quantity of baker’s yeast.

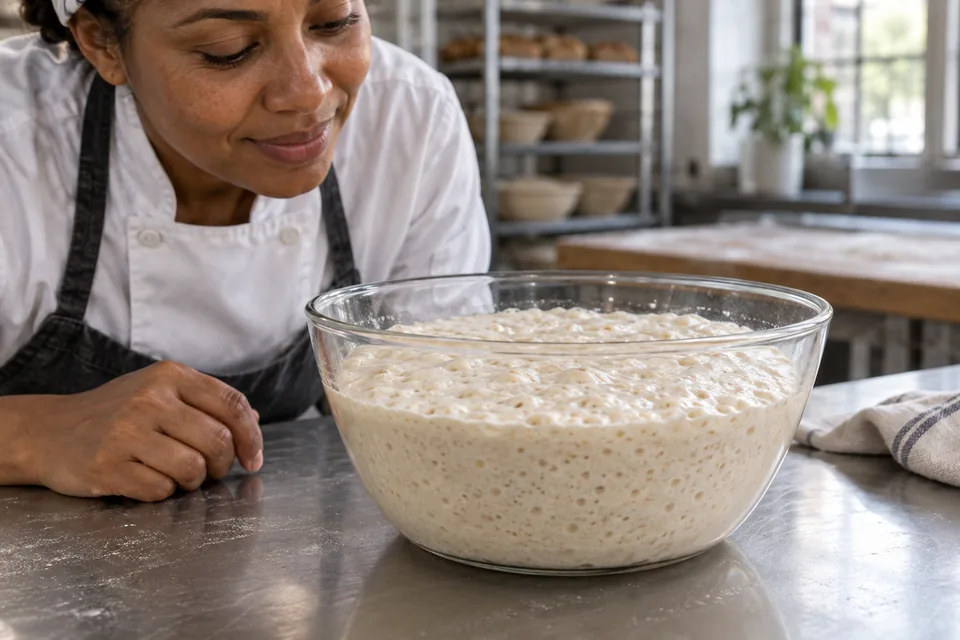
    A ripe poolish has a loose texture and a surface full of bubbles.
    A ripe poolish has a loose texture and a surface full of bubbles.
    What to do
    Mix its ingredients before making the final dough and follow the recipe’s maturation schedule.
    What to look for
    Look for abundant bubbles and a surface near its maximum rise, often just beginning to flatten.
    Easy to mix up
    Equal weights do not mean equal cup measures. Include its flour and water when calculating the final dough.
    All baking terms ↑

    Biga

    A yeast preferment that is commonly firmer than a poolish.

    Tearing open mature biga reveals its aerated interior.
    Tearing open mature biga reveals its aerated interior.
    What to do
    Mix the specified flour, water and yeast; let it mature before incorporating it thoroughly into the final dough.
    What to look for
    A mature biga is expanded and aerated inside. Its firmness depends on the recipe.
    Easy to mix up
    There is no single hydration for every biga. Do not substitute the same weight of poolish without adjusting water and flour.
    All baking terms ↑

    Autolyse

    A rest after mixing flour and water, usually before adding salt and the leavening.

    Cover the rough flour-and-water mixture and allow it to rest.
    Cover the rough flour-and-water mixture and allow it to rest.
    What to do
    Mix just until no dry flour remains, cover, and rest for the time in the recipe. Then add the remaining ingredients.
    What to look for
    The rested mixture often stretches more easily and feels less rough.
    Easy to mix up
    A rest that already includes starter is sometimes called a fermentolyse. Do not extend a recipe’s rest indefinitely: flour type and temperature matter.
    All baking terms ↑

    Bulk fermentation

    The first fermentation of the mixed dough, before dividing or final shaping.

    During the first rise, watch the dough become more aerated; follow the recipe’s rise target.
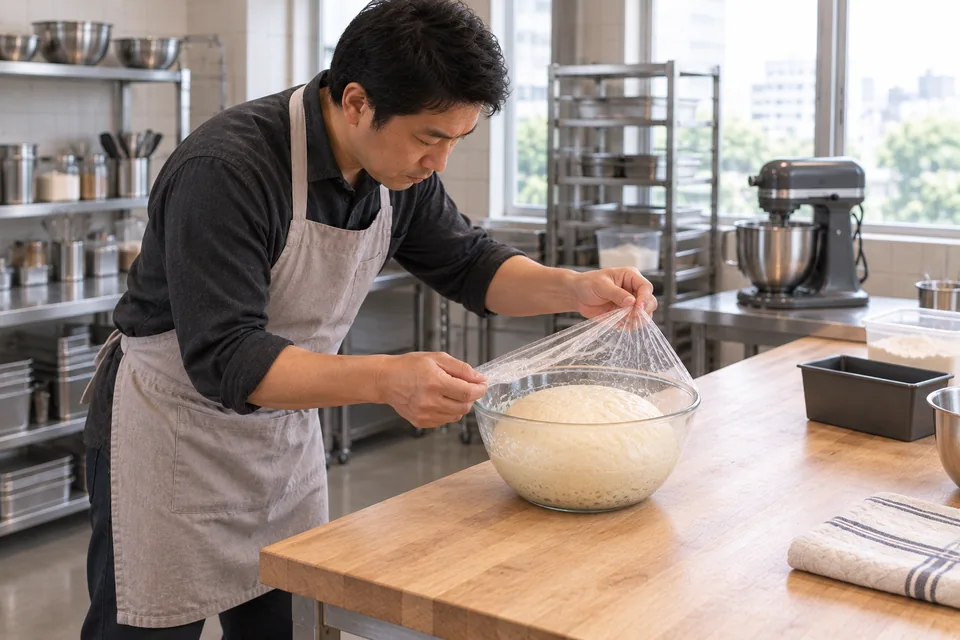
    During the first rise, watch the dough become more aerated; follow the recipe’s rise target.
    What to do
    Keep the dough covered and perform any scheduled folds during this stage.
    What to look for
    Watch for the recipe’s increase in volume, bubbles and a lighter feel.
    Easy to mix up
    “Bulk” means the dough is still together as one mass; it does not mean a large batch. Doubling is not a universal target.
    All baking terms ↑

    Proofing

    The rise after shaping and before baking.

    Consider the loaf’s puffiness alongside its response to a gentle finger press.
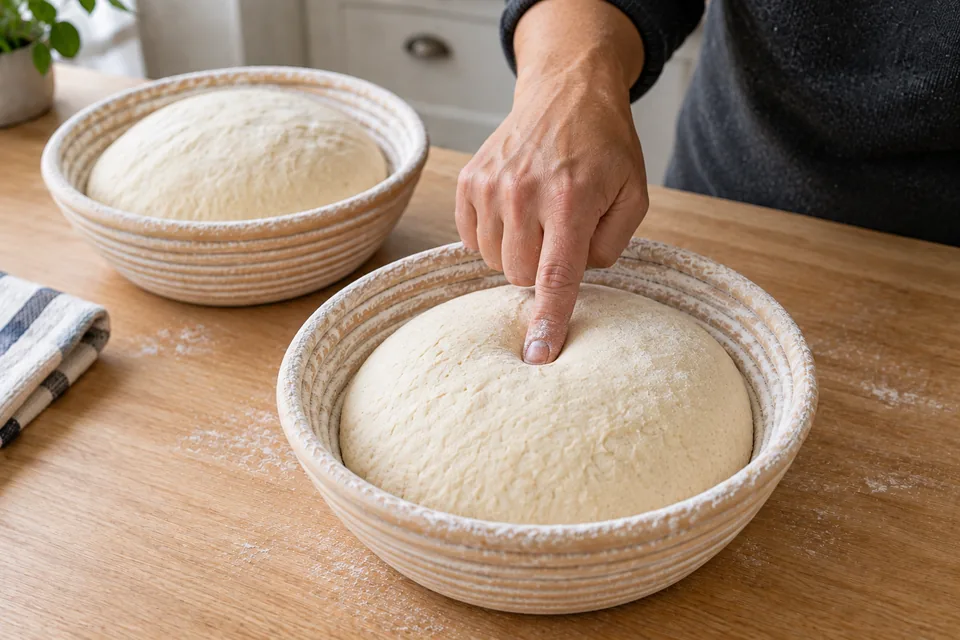
    Consider the loaf’s puffiness alongside its response to a gentle finger press.
    What to do
    Protect the shaped dough from drying and allow it to expand according to the recipe.
    What to look for
    Look for a puffier loaf. In suitable wheat doughs, a gentle finger dent returning slowly can help judge readiness.
    Easy to mix up
    The finger test is only one clue, especially with cold or very wet dough. Follow the recipe’s appearance and timing together.
    All baking terms ↑

    Cold fermentation

    Slowing fermentation by chilling the dough.

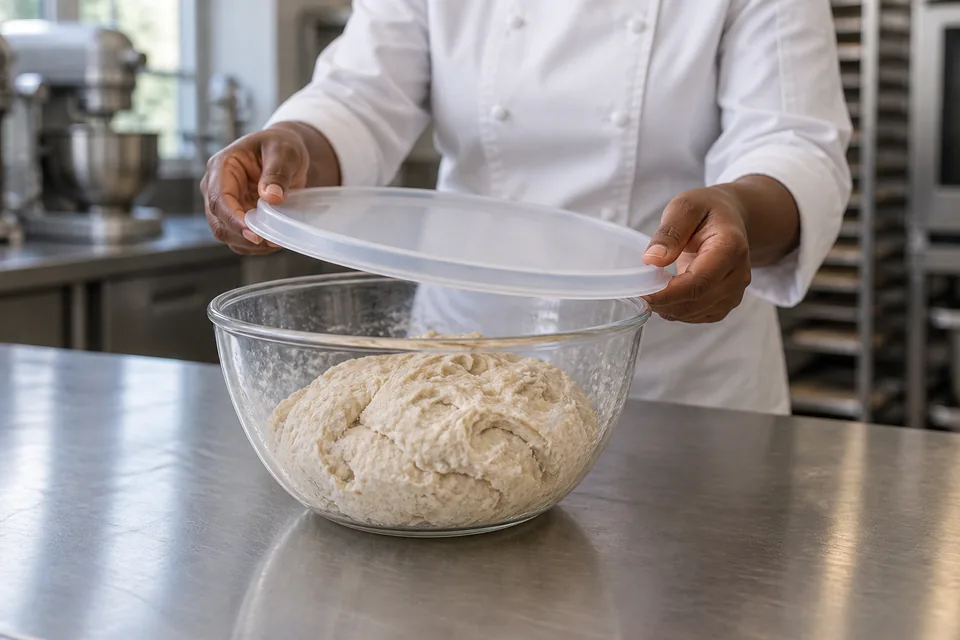
    Keep dough covered during its scheduled refrigerator rest.
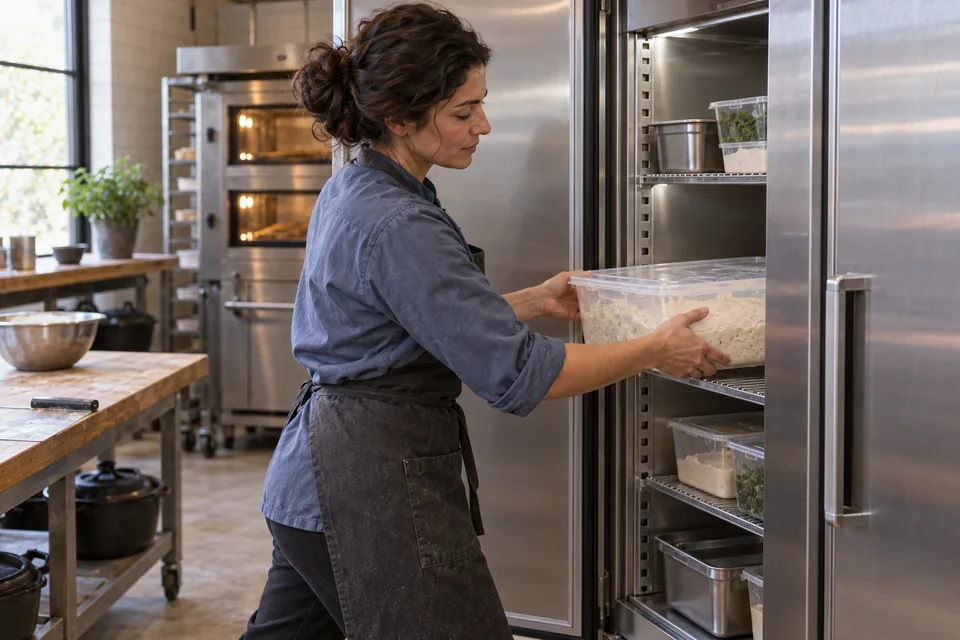
    Keep dough covered during its scheduled refrigerator rest.
    What to do
    Cover the dough and refrigerate it at the stage specified: some recipes chill before shaping, others afterwards.
    What to look for
    Expect slower expansion, not an instant stop in activity; a large warm dough takes time to cool.
    Easy to mix up
    An overnight refrigerator rest is not interchangeable with an overnight rest on the counter.
    All baking terms ↑

    Hydration

    The amount of water compared with flour, expressed as a percentage by weight.

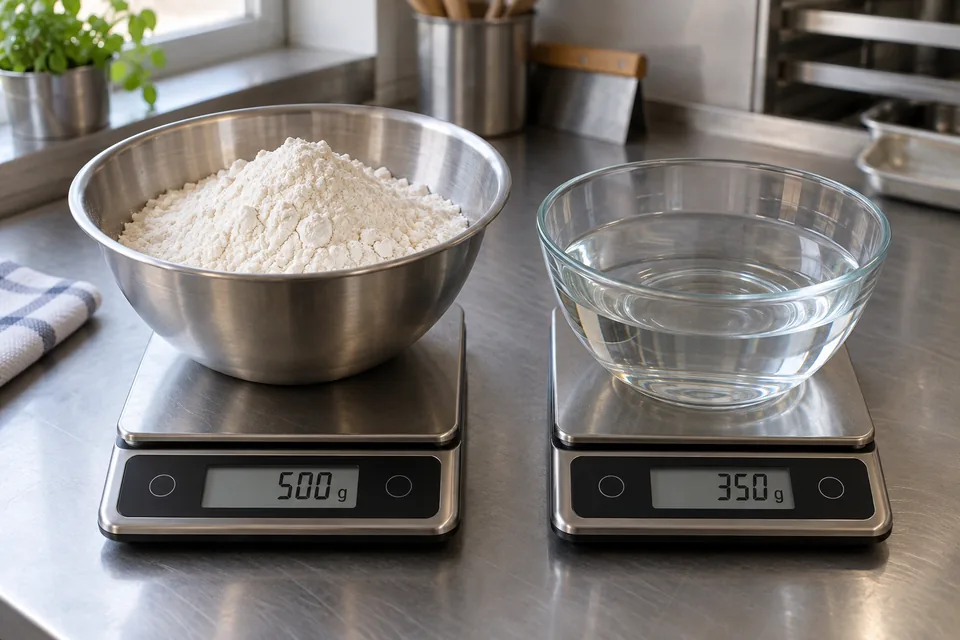
    For a flour-and-water dough, 350 g water with 500 g flour gives 70% hydration.
    For a flour-and-water dough, 350 g water with 500 g flour gives 70% hydration.
    What to do
    For a simple dough, divide water weight by flour weight and multiply by 100. For example, 350 g water with 500 g flour is 70%. Include flour and water inside any starter.
    What to look for
    Higher hydration often feels stickier, but flour type and mixing also affect the feel.
    Easy to mix up
    Milk, eggs and butter contain other substances as well as water. Their full weight is not pure water.
    All baking terms ↑

    Baker’s percentage

    A way to compare ingredients against the total flour weight, which is always 100%.

    Flour is the 100% reference: 350 ÷ 500 × 100 makes the water 70%.
    Flour is the 100% reference: 350 ÷ 500 × 100 makes the water 70%.
    What to do
    With 500 g total flour, 10 g salt is 2%. Multiply the flour weight by a desired percentage to resize an ingredient.
    What to look for
    Ratios stay the same when a batch is scaled correctly.
    Easy to mix up
    The percentages need not add up to 100. Include preferment flour in the total before calculating.
    All baking terms ↑

    Stretch and fold

    A way to strengthen dough by lifting part of it and folding it over itself.

    Lift a section of dough, then fold it back over the rest.
    Lift a section of dough, then fold it back over the rest.
    What to do
    With damp hands, lift an edge gently, fold it over the middle and repeat around the bowl as instructed. Rest between sets.
    What to look for
    The dough gradually holds its shape better and stretches without tearing so easily.
    Easy to mix up
    Stop pulling when the dough resists. Tearing it harder does not build more strength.
    All baking terms ↑

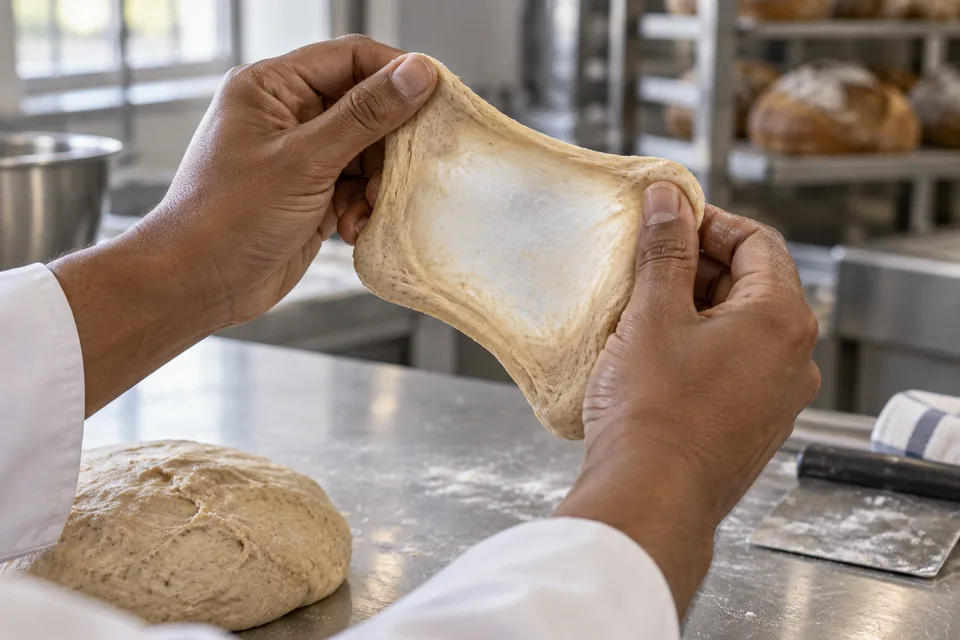
    Windowpane test

    Checking whether wheat dough can stretch into a thin film without immediately tearing.

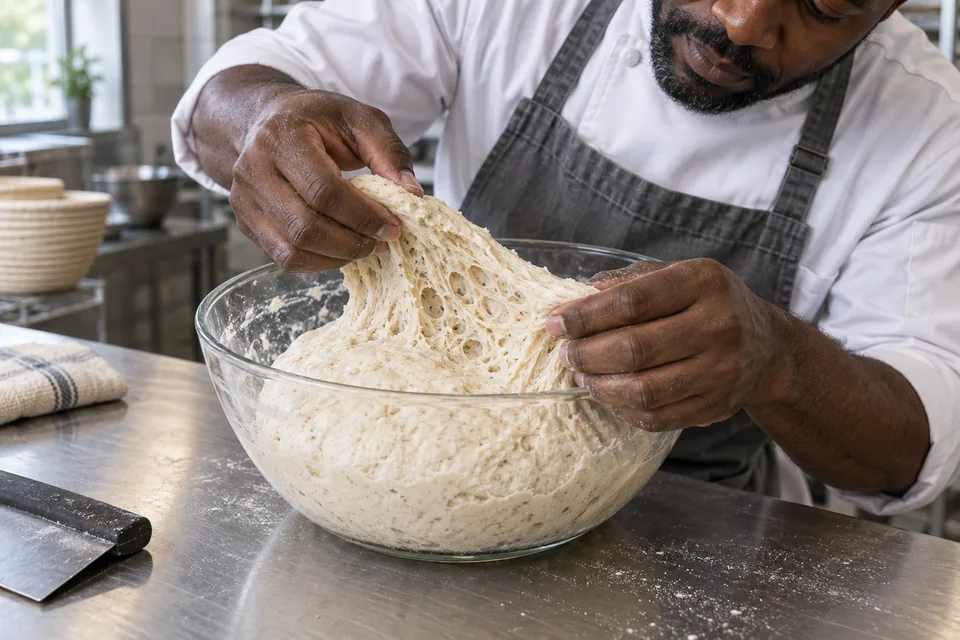
    Developed dough can stretch into a thin, translucent membrane before tearing.
    Developed dough can stretch into a thin, translucent membrane before tearing.
    What to do
    Let a small piece relax, then stretch it gently between your fingers.
    What to look for
    A translucent patch suggests a developed gluten network.
    Easy to mix up
    Wholegrain particles can interrupt the film. Not every dough needs a perfect windowpane; do not keep kneading an unsuitable dough just to achieve one.
    All baking terms ↑

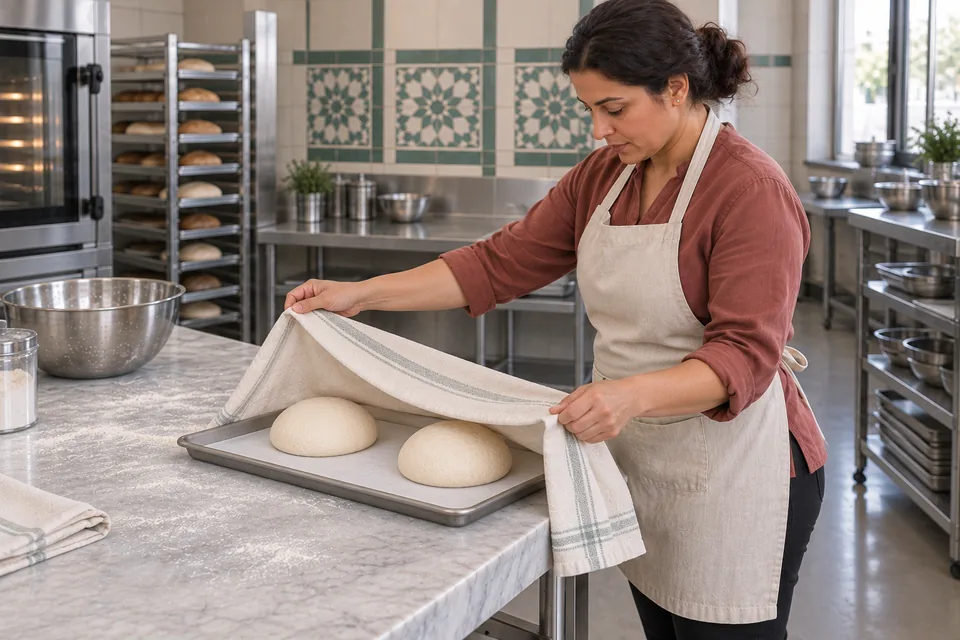
    Bench rest

    A short pause between dividing or rough shaping and final shaping.

    Cover divided portions while they relax before final shaping.
    Cover divided portions while they relax before final shaping.
    What to do
    Cover the portions so their surfaces stay supple. Wait for the rest in the recipe.
    What to look for
    Dough that was springing back should be easier to shape.
    Easy to mix up
    This is a relaxation stage, not a substitute for the final rise.
    All baking terms ↑

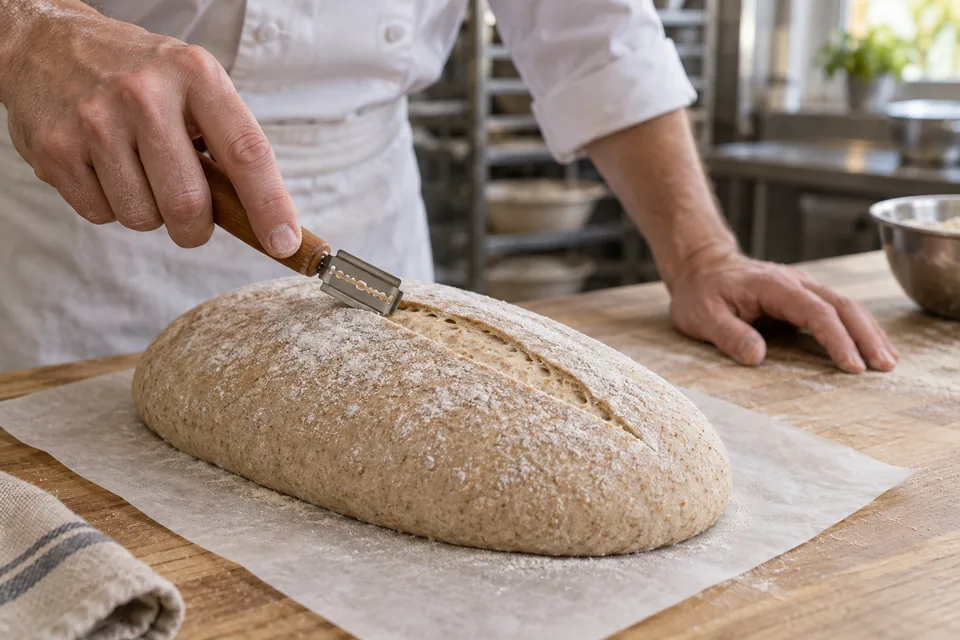
    Scoring

    Making deliberate cuts in the surface of a shaped loaf before baking.

    A shallow cut gives the loaf a controlled place to open in the oven.
    A shallow cut gives the loaf a controlled place to open in the oven.
    What to do
    Use a suitable sharp blade and follow the recipe’s pattern just before the loaf goes into the oven.
    What to look for
    A clean cut gives expanding dough a place to open.
    Easy to mix up
    Cut direction and depth depend on the bread. Decorative lines and a main expansion cut need not be equally deep.
    All baking terms ↑

    Oven spring

    The rapid expansion of dough early in baking.

    The expanded loaf and opened score show the result of its early growth in the oven.
    The expanded loaf and opened score show the result of its early growth in the oven.
    What to do
    Preheat properly and use the recipe’s specified steam or covered-baking method.
    What to look for
    The loaf rises and its cuts open before the crust becomes firm.
    Easy to mix up
    Extra heat cannot reliably rescue dough that has lost its structure through overproofing.
    All baking terms ↑

    Crumb

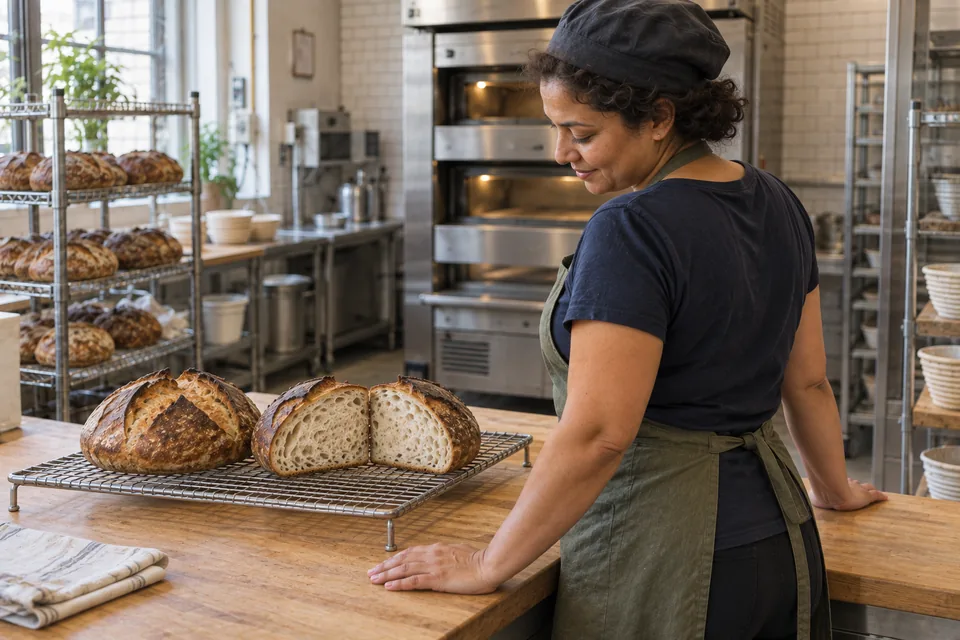
    The inside texture of bread or cake, including its air pockets.

    A cut loaf reveals the crumb: the texture and air pockets inside.
    A cut loaf reveals the crumb: the texture and air pockets inside.
    What to do
    Let the bake cool as directed before slicing and judging its interior.
    What to look for
    Look for the texture intended by the recipe: a sandwich loaf can be evenly fine, while a rustic loaf may have larger holes.
    Easy to mix up
    Larger holes are not automatically better. A gummy centre can also reflect slicing too early or insufficient baking.
    All baking terms ↑

    Creaming

    Beating softened butter and sugar together to introduce tiny air pockets.

    Beat butter and sugar until lighter and aerated; brown sugar gives this mixture its colour.
    Beat butter and sugar until lighter and aerated; brown sugar gives this mixture its colour.
    What to do
    Use butter that yields to a finger but is not melted. Beat with the sugar, scraping the bowl so the mixture combines evenly.
    What to look for
    It becomes lighter in colour and visibly fluffy rather than oily.
    Easy to mix up
    This does not mean adding cream. Melted butter cannot trap air in the same way as softened butter.
    All baking terms ↑

    Fold in

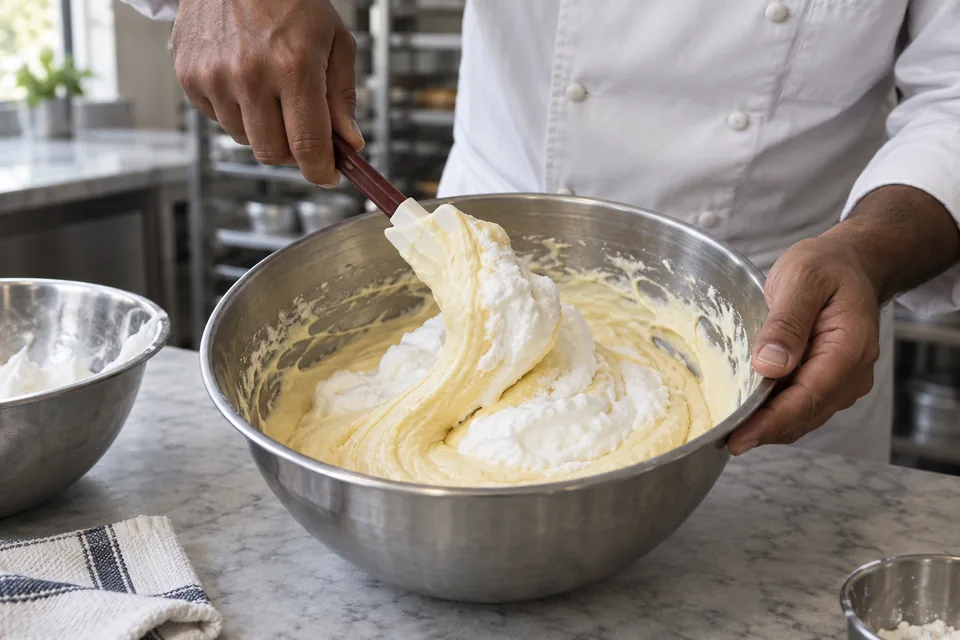
    Combining a delicate mixture gently so it keeps more of its trapped air.

    Lift batter over the egg whites with a spatula, turning gently to preserve air.
    Lift batter over the egg whites with a spatula, turning gently to preserve air.
    What to do
    Slide a spatula down the bowl, scoop underneath and lift the mixture over itself. Turn the bowl and repeat.
    What to look for
    Stop when no streaks or pockets remain.
    Easy to mix up
    This cake technique is different from strengthening bread dough with stretch-and-fold sets. Gentle does not mean leaving dry flour unmixed.
    All baking terms ↑

    Soft and stiff peaks

    Descriptions of the shape whipped cream or egg whites hold when the whisk is lifted.

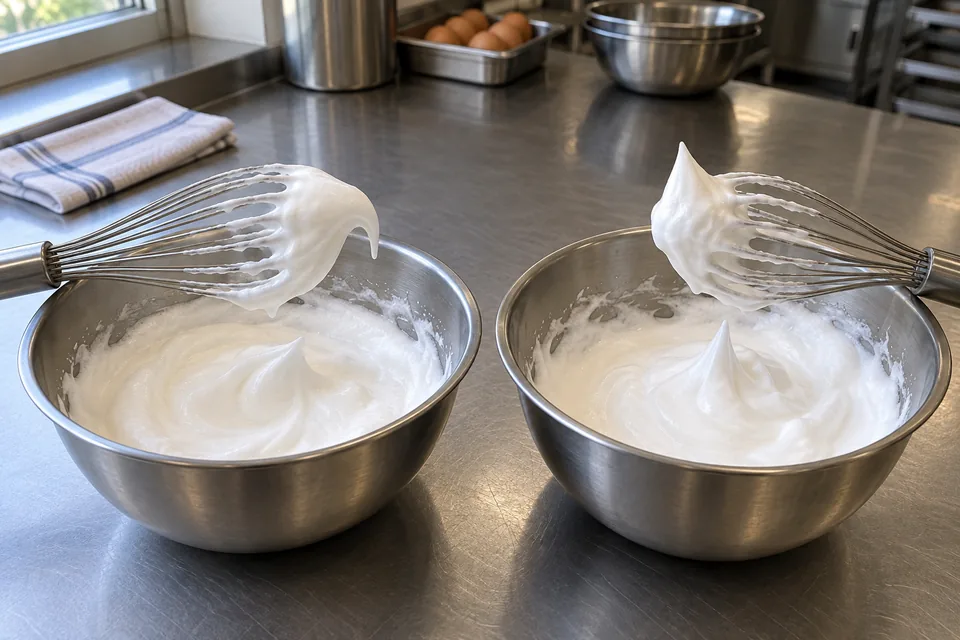
    Left: a soft peak bends over. Right: a stiff peak holds its shape.
    Left: a soft peak bends over. Right: a stiff peak holds its shape.
    What to do
    Lift the whisk to check regularly. Soft peaks droop; stiff peaks hold a more upright point.
    What to look for
    Stop at the stage the recipe calls for while the mixture is still smooth.
    Easy to mix up
    Stiff does not mean dry or grainy. Overwhipped cream begins separating; overbeaten whites become harder to fold in evenly.
    All baking terms ↑

    Pâte fermentée (old dough)

    A portion of already mixed bread dough saved to help flavour and ferment a later batch. It normally contains flour, water, yeast and salt.

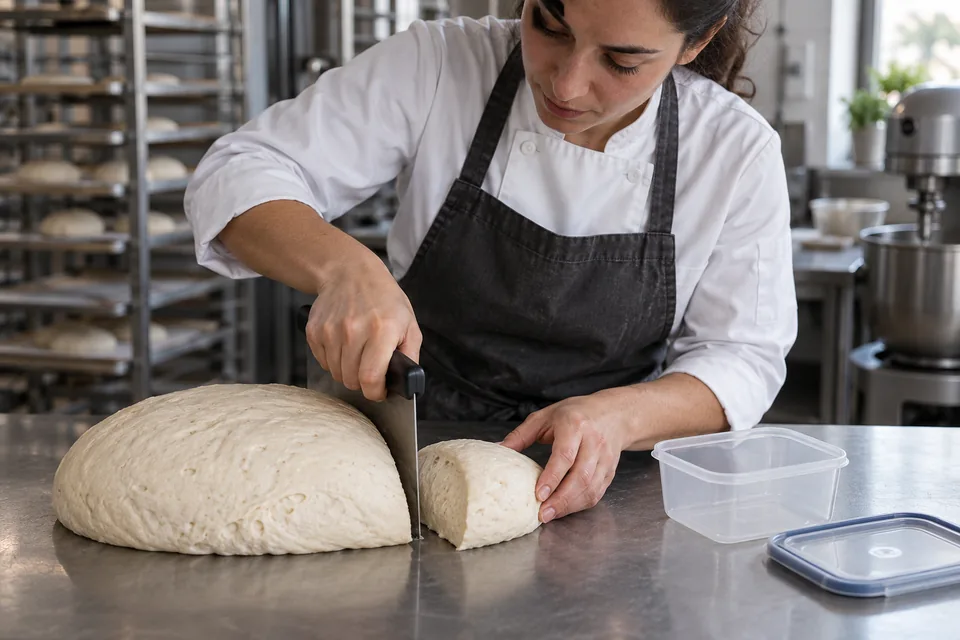
    Reserve a piece of dough for a later batch, following the recipe’s storage instructions.
    Reserve a piece of dough for a later batch, following the recipe’s storage instructions.
    What to do
    Reserve the portion at the stage the recipe specifies, cover it and follow its storage schedule. Incorporate the measured amount into the new dough; smaller pieces are easier to mix in evenly.
    What to look for
    It should show fermentation and an aerated interior. Use the recipe’s maturity and storage cues rather than treating any forgotten dough as usable old dough.
    Easy to mix up
    Unlike a typical poolish or biga, it already includes salt. Count that salt, flour and water in the new batch. “Old” means deliberately fermented, not stale bread or spoiled dough.
    All baking terms ↑

    Tangzhong

    A cooked flour-and-liquid paste that helps bread retain moisture and stay soft. It is a preparation technique, not a sourdough starter.

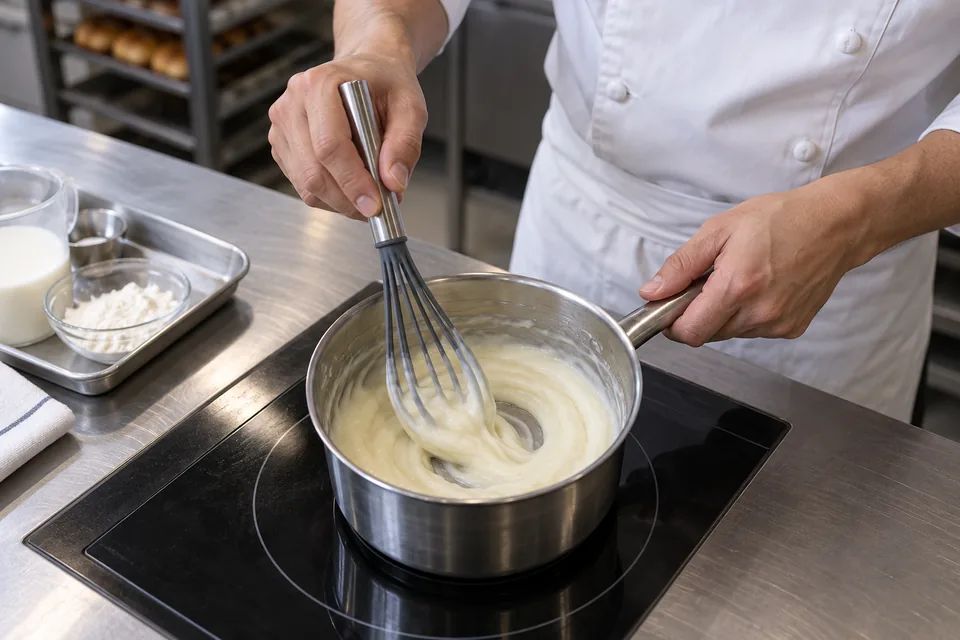
    Cook the flour-and-liquid mixture until smooth and thick enough to leave whisk trails.
    Cook the flour-and-liquid mixture until smooth and thick enough to leave whisk trails.
    What to do
    Take the flour and liquid from the recipe’s measured ingredients, whisk them together and heat gently while stirring until thickened. Cool as directed before adding to the dough. A common paste uses about 1 part flour to 5 parts liquid by weight, but follow the particular formula.
    What to look for
    Look for a smooth, thick paste with whisk trails and no dry lumps. Avoid scorching it or boiling away a lot of liquid.
    Easy to mix up
    Do not add an extra paste on top of an unchanged dough formula. Its flour and liquid count toward the totals. Tangzhong and yudane both use heat to help starch hold water, but their methods and proportions differ.
    All baking terms ↑

    Yudane

    Flour scalded with boiling water to make a firm paste for soft, moisture-retaining bread.

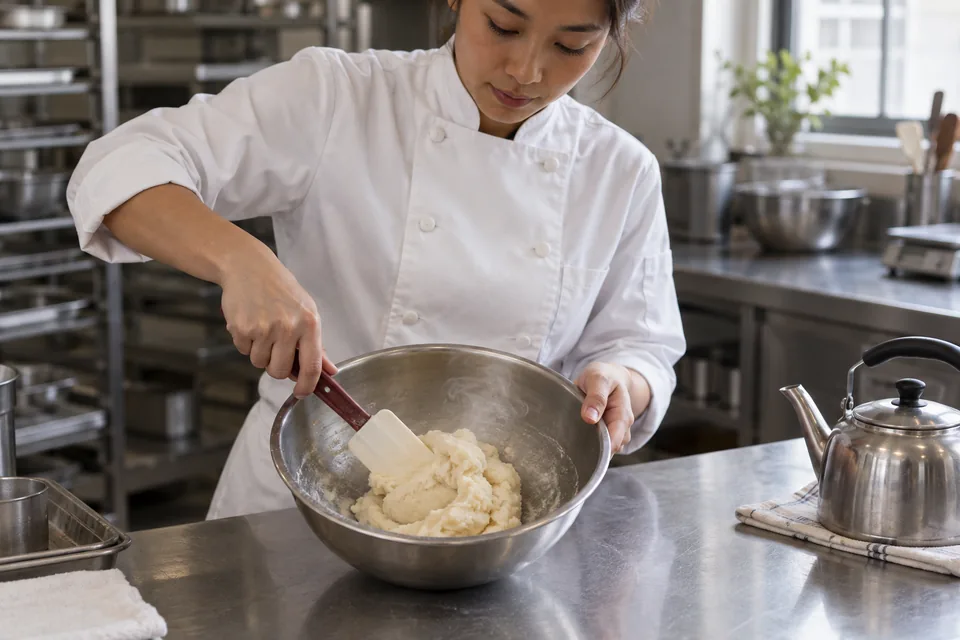
    Scalded flour forms a firm paste; let it cool before adding it to dough.
    Scalded flour forms a firm paste; let it cool before adding it to dough.
    What to do
    Pour the recipe’s boiling water onto the reserved flour and mix immediately and thoroughly. Many formulas use roughly equal weights of flour and water. Cover, cool and rest it as directed; some recipes call for a refrigerated overnight rest.
    What to look for
    The flour should be evenly moistened, forming a cohesive paste with no dry pockets. Cool it before adding yeast or starter.
    Easy to mix up
    Tangzhong is usually a looser mixture heated in a pan; yudane is commonly made by pouring boiling water onto flour. Do not swap them gram for gram without recalculating the flour and liquid. Neither is a preferment unless separately fermented.
    All baking terms ↑

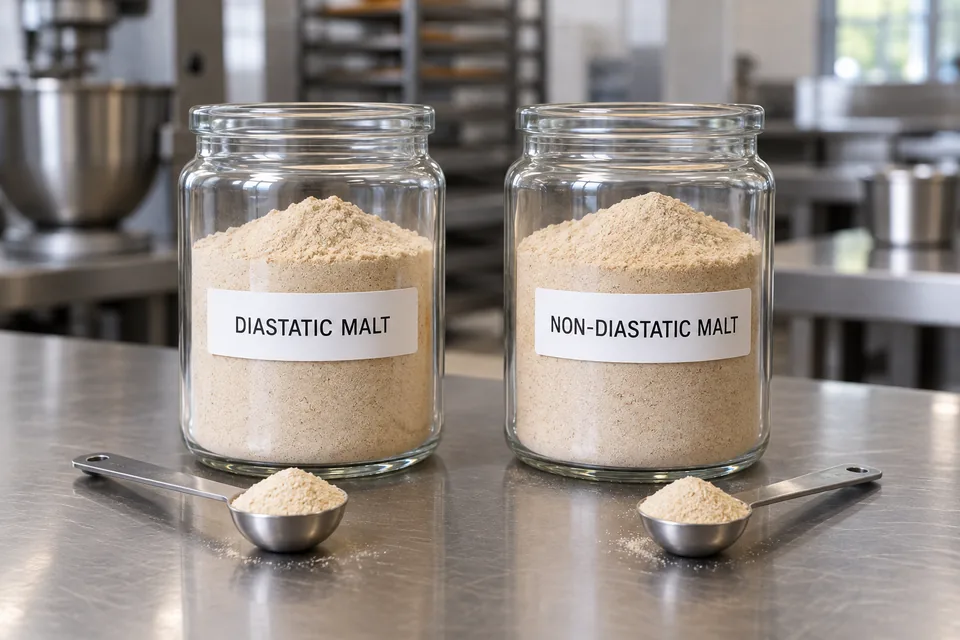
    Diastatic vs. non-diastatic malt

    Diastatic malt has active enzymes that break down starch into sugars. Non-diastatic malt mainly supplies malty flavour, sweetness and colour, without that enzyme activity.

    Read the label: similar-looking powders can have different enzyme activity and are not interchangeable.
    Read the label: similar-looking powders can have different enzyme activity and are not interchangeable.
    What to do
    Read the label and use the type and amount the recipe requests. Check whether the flour is already malted before adding diastatic malt. Non-diastatic malt or malt syrup may appear in bagel dough or its water bath.
    What to look for
    Diastatic malt can aid browning and fermentation when the flour needs it; too much can leave the bread sticky or gummy inside.
    Easy to mix up
    They are not interchangeable. Honey or sugar may replace a sweetening role with adjustments, but cannot replace active enzymes. Malted milk powder is a different product. If a recipe just says “malt,” identify the intended type before choosing a substitute.
    All baking terms ↑
    Ingredient choices · function before brand

    When the specified ingredient is unavailable

    A named brand may be the tested product, a sponsor or a preference. The recipe’s ingredient-options panel distinguishes those cases. Match flour type and protein, yeast type and salt weight before changing the method.

    Bread flour → all-purpose flour

    In recipes that permit it, begin with equal weight. Weaker flour may make a slacker dough and a less chewy loaf. Reserve some water and add it only if the consistency calls for it.

    More kneading is not a universal correction. Handle the Heat’s dinner rolls allow longer kneading; King Arthur’s high-hydration comparison recommends gentler mixing and less water. Follow the selected recipe’s guidance.

    AP flour + vital wheat gluten

    A blend can approximate a target protein percentage. Replace some AP with gluten so total flour-blend weight stays constant. This calculation does not reproduce every property of bread flour, and added gluten may increase water demand.

    Use the label values for your products. A nutrition label gives an approximate protein content, not an exact flour-strength measurement.

    Instant ↔ active dry yeast

    Several compared recipes permit an equal-weight swap. Active dry may start more slowly; judge expansion and dough condition. A rise-time percentage from one recipe is not a universal timer. Follow product instructions for dissolving or adding directly.

    Coarse salt, table salt and flakes

    Keep the gram weight when changing salt brands. Equal spoon volumes can differ greatly: Diamond Crystal and Morton coarse salt have different densities. Where a recipe specifies volume but no brand, its salt percentage is left unknown.

    Finishing flakes affect surface texture as well as salinity; they are separate from the dough’s salt.

    Cocoa, vanilla and flour treatments

    Keep natural versus Dutch-process cocoa as specified unless the recipe explicitly permits both; acidity and chemical leavening interact. Use alcohol-free vanilla with comparable flavour strength.

    Self-rising flour, gluten-free blends and very soft cake flour are not interchangeable with plain bread flour. Choose a method developed for them.

    Calculate a protein blend

    Example values: 11.7% AP, 12.7% target, 76.7% vital gluten. Change these to your labels. The calculation is an editorial mass balance, not a tested bread-flour replacement.

    Formula: gluten mass = total blend mass × (target protein − AP protein) ÷ (gluten protein − AP protein). The remaining mass is AP flour.

    Ways to read a recipe

    Choose how you read a recipe

    Recipe gives you ingredients, plain steps and signs of readiness. Technical keeps the same recipe and adds detailed tables, ratios and charts. Choose either version at the top of a recipe; your choice carries into printing.

    In Technical, use the layout menu to switch between detailed tables and an ingredient chart. The examples below show how ingredient flows and timing diagrams help you follow or plan a bake.

    Choose a recipe

    FormatBest forWhat it makes clear
    Ingredient → operation flowFollowing the methodWhat joins the mixture at each stage and what to look for.
    Dependency / critical-path chartUnderstanding order and overlapWhich stages must finish first and which chain controls the planned finish.
    Resource lanesPlanning your hands and ovenActive work, unattended dough and oven use on one clock.

    Example: 1,000 g flour, 720 g water, 21 g salt and 4 g instant yeast. Two loaves. Times below are estimates, with folds included inside the five-hour bulk rise.

    1. Ingredient → operation flow

    Same-day white bread · ingredient flowRead each row from the ingredients into the action.
    1. A
      • White all-purpose flour 1,000 g
      • Water 720 g32–35°C / 90–95°F

      1 Autolyse

      Mix flour and water until no dry flour remains; cover.

      25 min in this example

      Look for: Fully hydrated, rough dough.

    2. Continue from step 1

      B
      • Fine sea salt 21 g
      • Instant dried yeast 4 g

      2 Mix

      Incorporate salt and yeast by pinching through the dough and folding it over itself.

      About 5 min

      Look for: Uniform dough with some tension; target 25–26°C / 77–78°F.

    3. Continue from step 2

      Mixed dough

      3 Bulk rise and folds

      Cover and let rise. Give two folds early in the rise, when the dough has relaxed.

      About 5 h; fold checkpoints at 10 and 50 min after mixing

      Look for: About three times the starting volume; folds build support.

    4. Continue from step 3

      Finish
      • Flour As neededFor bench and proofing baskets

      4 Divide and shape

      Divide into two rounds; build moderate surface tension. Put seam down in floured baskets and cover.

      About 10 min

      Look for: Smooth rounds with intact surfaces.

    5. Continue from step 4

      Shaped loaves

      5 Proof; preheat in parallel

      Proof covered. Start preheating lidded Dutch ovens 30 minutes into this illustrative 75-minute proof.

      Proof about 75 min; preheat at least 45 min at 245°C / 475°F

      Look for: Loaf expands; a finger dent returns slowly and incompletely.

    6. Continue from step 5

      Proofed loaves + heated pots

      6 Bake

      Invert and load seam up. Bake covered for 30 minutes, then uncovered for about 20 minutes.

      About 50 min at 245°C / 475°F

      Look for: Crust medium-dark brown all around.

    7. Continue from step 6

      Baked loaves

      7 Cool

      Turn out onto a rack and allow the crumb to settle before slicing.

      At least 20 min

      Look for: Air reaches the base; the loaf is no longer freshly steaming.

    This view shows method order. Use the dependency and resource views to see work that can overlap.

    2. Dependency and critical-path chart

    Preheating runs during proof. Baking waits for both. The two fold checkpoints do not add two more minutes to the end of the five-hour bulk rise.

    Same-day white bread · dependenciesEarliest modeled finish: 8 h 5 min
    Same-day white bread · dependenciesOperations share one elapsed-time axis. Arrows show prerequisites, and outlined bars lie on a longest dependency path. Earliest modeled finish: 8 h 5 min. An equivalent timing table follows.0:001:303:004:306:007:308:05Elapsed time · hours:minutes1. AutolyseDough · 25 min2. Mix salt and yeastHands · 5 min3. Bulk riseDough · 5 h4. First foldHands · 1 min+10 min5. Second foldHands · 1 min+50 min6. Divide and shapeHands · 10 min7. Final proofDough · 1 h 15 min8. Preheat covered potsOven · 45 min+30 min9. Bake covered, thenopenOven · 50 min10. Cool on a rackDough · 20 min
    Exact planned timings and dependencies; elapsed time from starting the recipe
    OperationResourceStart → finishAfterDuration / path
    1. AutolyseDough0 min → 25 minStart25 min; critical
    2. Mix salt and yeastHands25 min → 30 minAutolyse5 min; critical
    3. Bulk riseDough30 min → 5 h 30 minMix salt and yeast5 h; critical
    4. First foldHands40 min → 41 minMix salt and yeast; wait 10 min1 min; checkpoint within the rise
    5. Second foldHands1 h 20 min → 1 h 21 minMix salt and yeast; wait 50 min1 min; checkpoint within the rise
    6. Divide and shapeHands5 h 30 min → 5 h 40 minBulk rise; First fold; Second fold10 min; critical
    7. Final proofDough5 h 40 min → 6 h 55 minDivide and shape1 h 15 min; critical
    8. Preheat covered potsOven6 h 10 min → 6 h 55 minDivide and shape; wait 30 min45 min; critical
    9. Bake covered, then openOven6 h 55 min → 7 h 45 minFinal proof; Preheat covered pots50 min; critical
    10. Cool on a rackDough7 h 45 min → 8 h 5 minBake covered, then open20 min; critical

    Outlined bars are on a longest dependency path. Waits and overlapping operations are counted once.

    Planning estimates: fermentation readiness overrides the clock. Fold checkpoints belong within the bulk rise; they do not extend it by default.

    3. Hands, dough and oven lanes

    The long dough rests leave your hands free. A delayed preheat would delay baking even if the loaf were ready.

    Same-day white bread · resource planEarliest modeled finish: 8 h 5 min
    Same-day white bread · resource planAll lanes use the same elapsed-time axis. Numbers identify the operations in the key. Overlapping work is drawn on additional tracks rather than hidden. Earliest modeled finish: 8 h 5 min. An equivalent timing table follows.0:001:303:004:306:007:308:05Elapsed time · hours:minutesHandsDoughOven123. Bulk rise45678910
    1. Autolyse0 min–25 min
    2. Mix salt and yeast25 min–30 min
    3. Bulk rise30 min–5 h 30 min
    4. First fold40 min–41 min · during bulk
    5. Second fold1 h 20 min–1 h 21 min · during bulk
    6. Divide and shape5 h 30 min–5 h 40 min
    7. Final proof5 h 40 min–6 h 55 min
    8. Preheat covered pots6 h 10 min–6 h 55 min
    9. Bake covered, then open6 h 55 min–7 h 45 min
    10. Cool on a rack7 h 45 min–8 h 5 min
    Exact planned timings and dependencies; elapsed time from starting the recipe
    OperationResourceStart → finishAfterDuration / path
    1. AutolyseDough0 min → 25 minStart25 min; critical
    2. Mix salt and yeastHands25 min → 30 minAutolyse5 min; critical
    3. Bulk riseDough30 min → 5 h 30 minMix salt and yeast5 h; critical
    4. First foldHands40 min → 41 minMix salt and yeast; wait 10 min1 min; checkpoint within the rise
    5. Second foldHands1 h 20 min → 1 h 21 minMix salt and yeast; wait 50 min1 min; checkpoint within the rise
    6. Divide and shapeHands5 h 30 min → 5 h 40 minBulk rise; First fold; Second fold10 min; critical
    7. Final proofDough5 h 40 min → 6 h 55 minDivide and shape1 h 15 min; critical
    8. Preheat covered potsOven6 h 10 min → 6 h 55 minDivide and shape; wait 30 min45 min; critical
    9. Bake covered, then openOven6 h 55 min → 7 h 45 minFinal proof; Preheat covered pots50 min; critical
    10. Cool on a rackDough7 h 45 min → 8 h 5 minBake covered, then open20 min; critical

    Outlined bars are on a longest dependency path. Waits and overlapping operations are counted once.

    Planning estimates: fermentation readiness overrides the clock. Fold checkpoints belong within the bulk rise; they do not extend it by default.

    Format inspiration: tabular recipe notation; Breezipe dependency diagrams; Kochbahn recipe timelines. This example uses the Same-day white bread formula. The visual arrangement and scheduling model are prepared for this collection.

    Nepedia · Recipes

    A guide for the kitchen

    Recipes, useful proportions and the signs that tell you when to move on.

    Choose a recipe

    Browse by style or region. Related methods and ingredient variations sit under one recipe.

    Explore the collection

    Choose your level of detail

    Recipe gives you plain steps and clear signs of readiness. Technical adds ratios, detailed tables and ingredient charts. Both use the same quantities.

    See the layouts

    Adjust the batch

    Use the builder to work from ingredient weights, halve or double a formula, or scale to a flour weight. Keep loaf size or pan depth similar when making more.

    Open the recipe builder

    Print what you need

    Print the current view or select one recipe. Your chosen units, reading level and technical layout carry into printing. Open extra notes before printing if you want them included.

    Measurements and ingredient choices

    Metric is the default. Switch to US customary or UK imperial above. Weights convert to weights; volumes convert to volumes. Main quantities use practical rounding, with more detail for small yeast or salt doses. Scaling keeps the original proportions before display rounding.

    Ingredient specifications and alternatives describe useful substitutions and likely changes in texture. A protein blend can approximate a flour’s protein content, but cannot reproduce all of its properties.

    Ingredient alternatives and flour-blend calculator

    Dietary scope

    Recipes contain no pork ingredients or added alcohol. Check prepared ingredients and flavourings against the recipe specification. Fermentation can naturally produce ethanol; this collection does not claim analytically zero alcohol.

    Saved recipes and privacy

    The builder calculates on your device. Saved drafts stay in this browser; they do not sync between devices. Download a draft to keep a separate copy. Recipe calculations and saved drafts stay on your device. The recipe collection uses no analytics or third-party scripts.