Sourdough bread

A country loaf made with sourdough starter, a little yeast and an overnight proof.

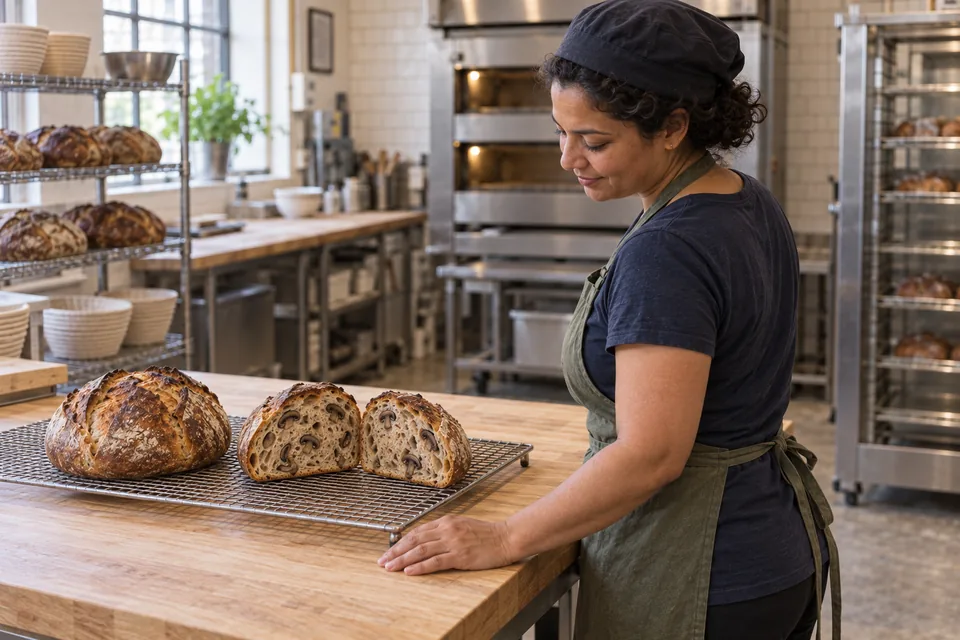
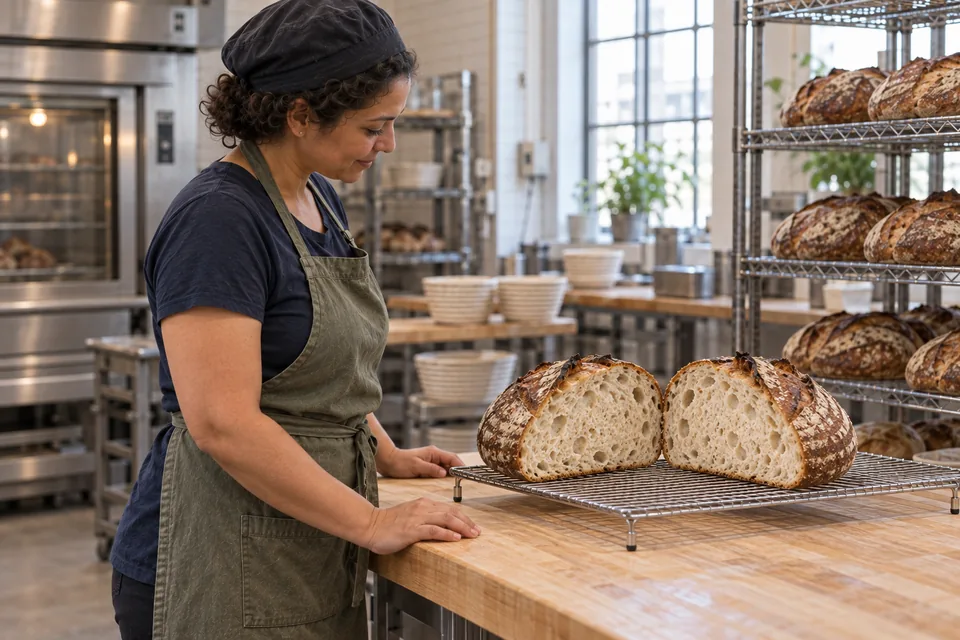
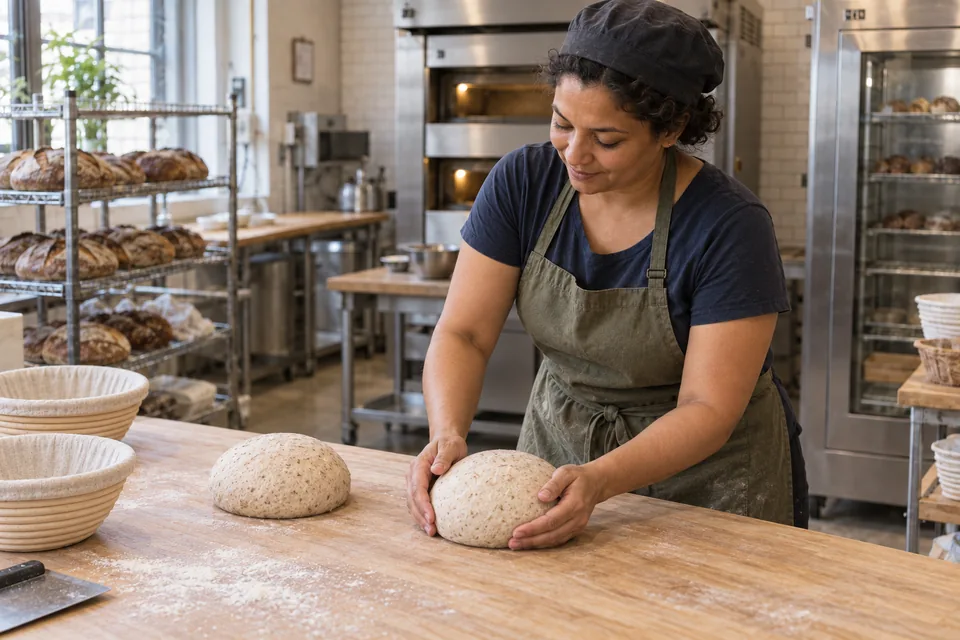
One whole pale wheat loaf and both halves of a second cool on a raised rack beside the baker.
Makes
2 loaves
Heat
245°C
Baking time
30 min covered + about 20 min uncovered

Preheat covered pots for at least 45 min. Check the crust after 15 min uncovered.

View

Country sourdough with added yeast

Makes
2 loaves
Heat
245°C
Baking time
30 min covered + about 20 min uncovered

Preheat covered pots for at least 45 min. Check the crust after 15 min uncovered.

Hybrid levain bread

Country sourdough with added yeast

A mostly white country loaf with a small whole-wheat contribution and an overnight cold proof.

Method

  1. 01 · Feed

    6–8 hours

    Use: A

    Keep only 100 g mature levain. Mix in the feed flour and water; cover at room temperature.

    Ready when: Bubbly, expanded and webbed inside; pleasantly fermented.
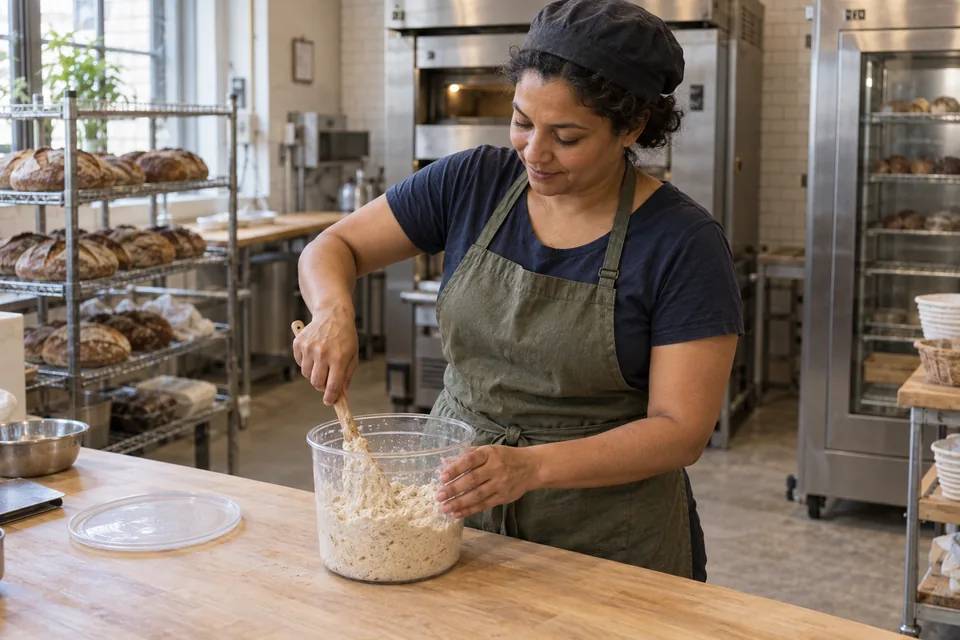
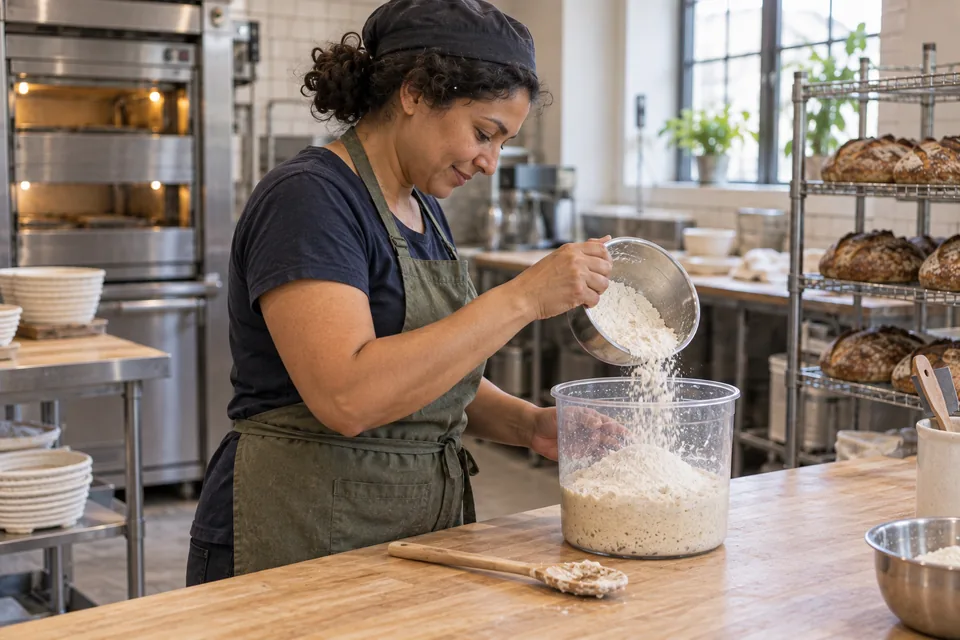
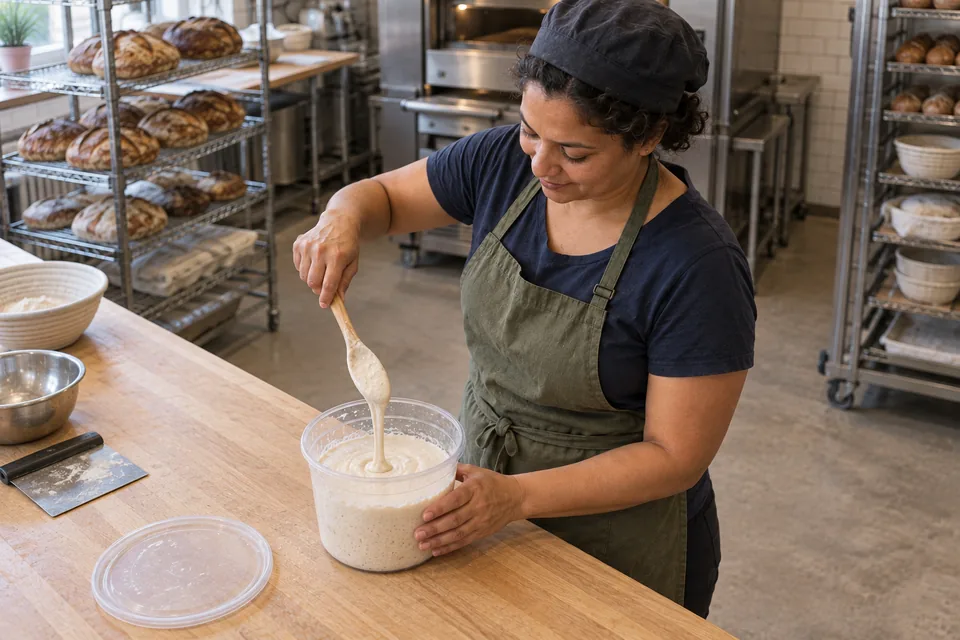
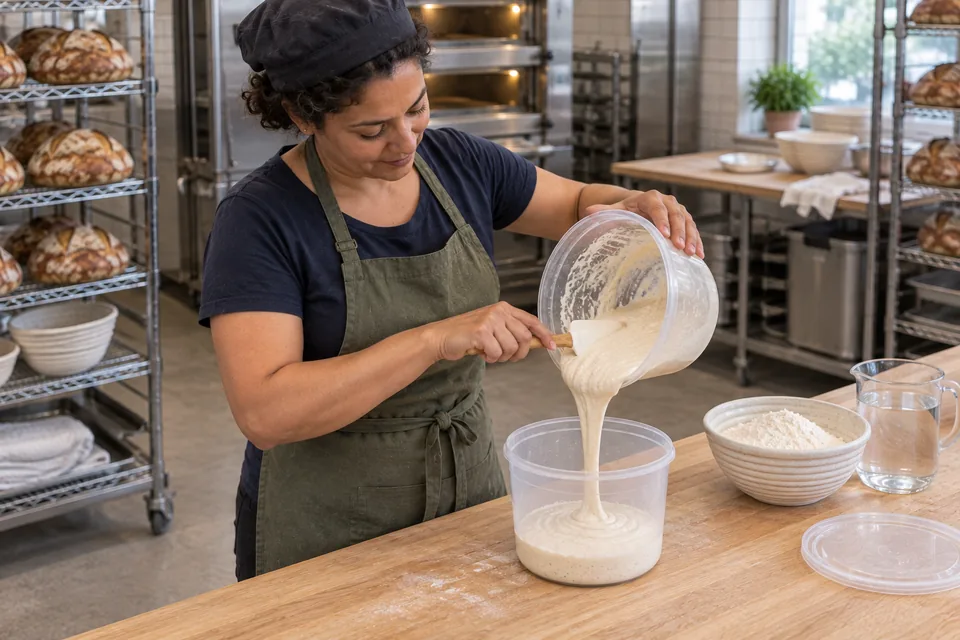
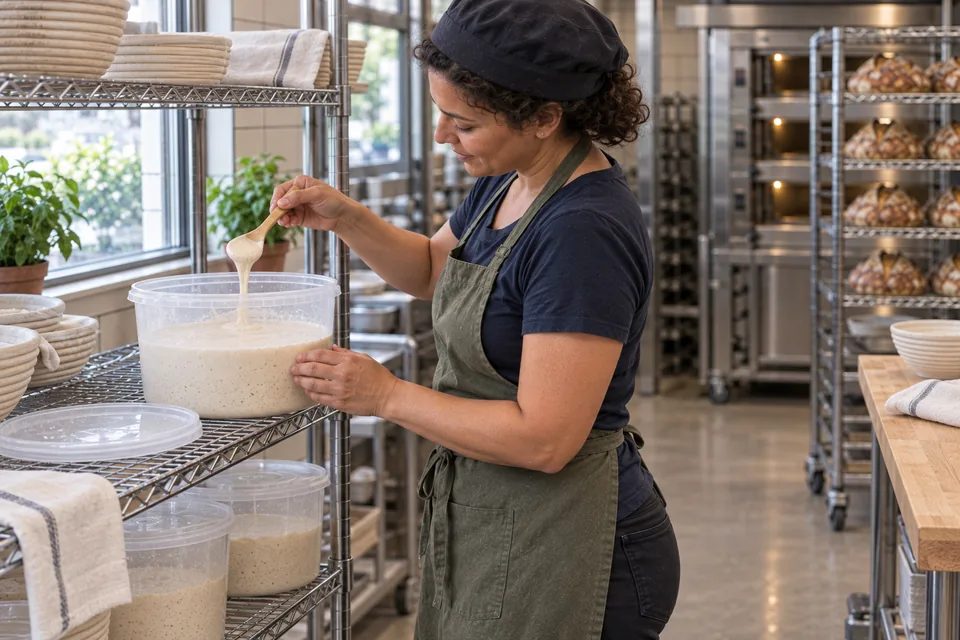
    Baker stirs a thick, softly flecked levain in a clear container.
    01 FeedMix the retained starter with its feed flour and water, then cover and let it expand.
  2. 02 · Autolyse

    20–30 minutes

    Use: B flour + B water

    Near the end of the feed, mix the final-dough flours and water only. Cover. Keep salt, yeast and levain aside.

    Ready when: All flour moistened; no dry pockets.
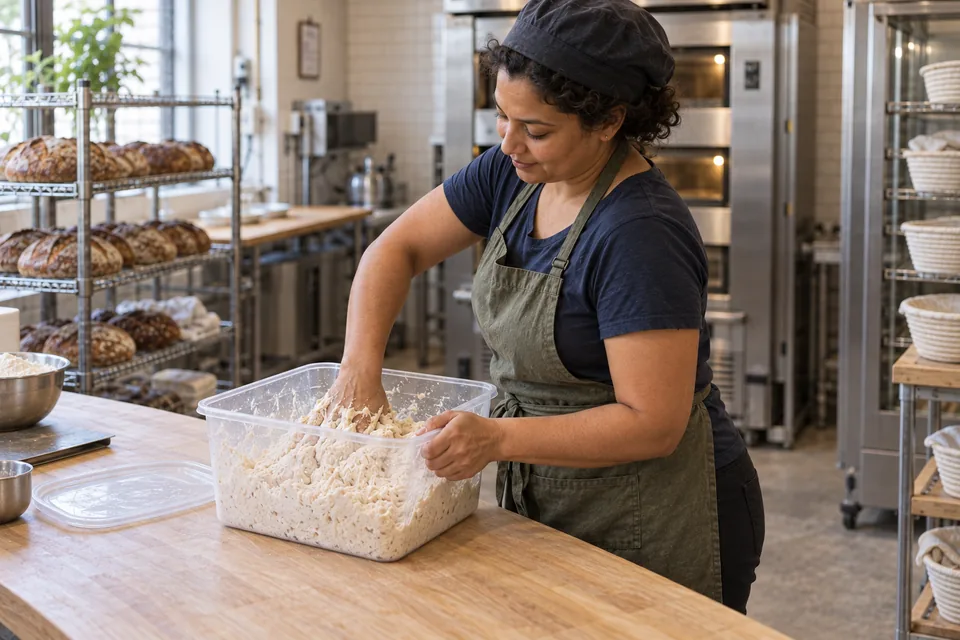
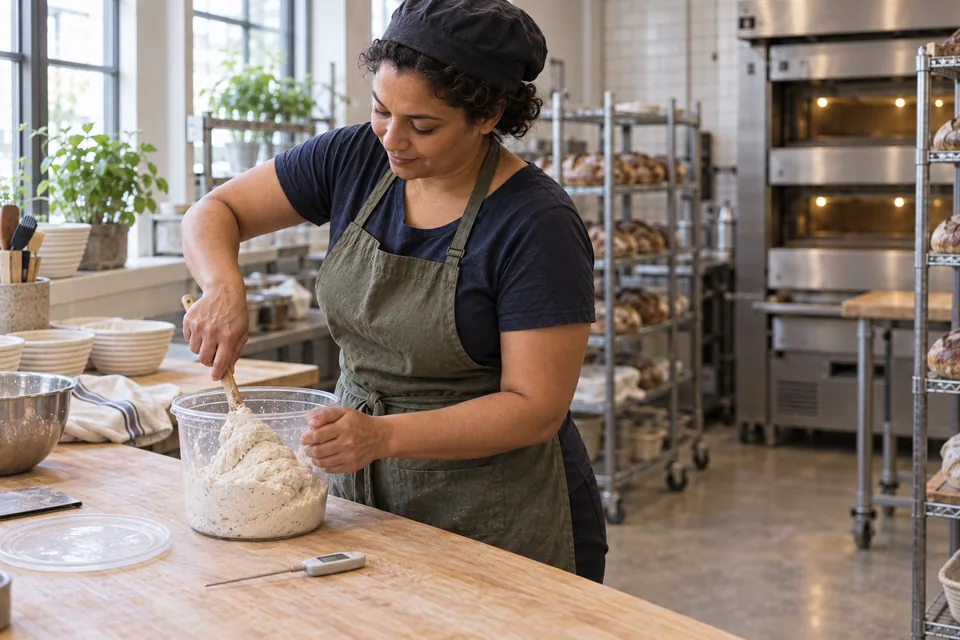
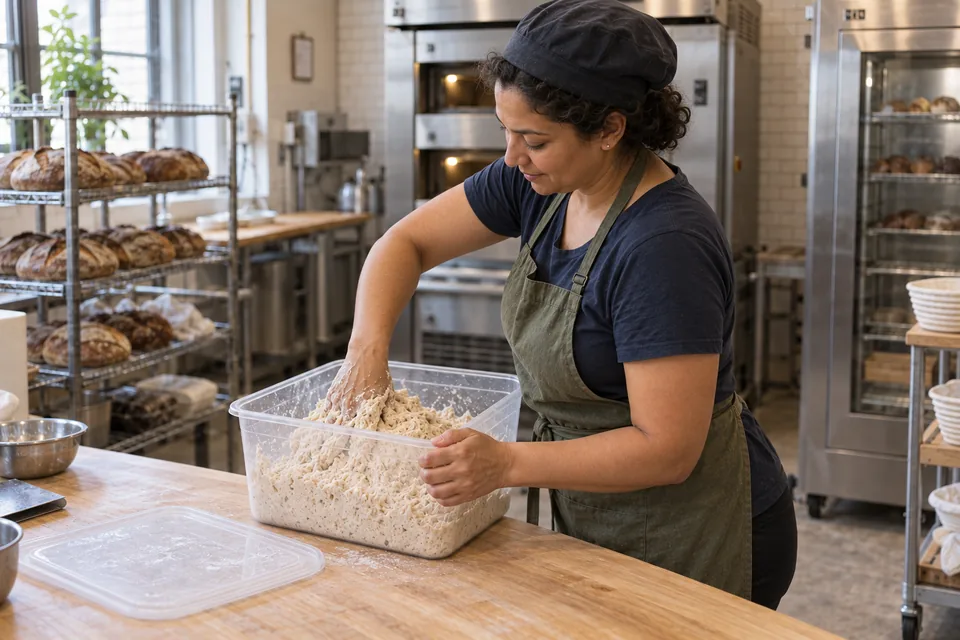
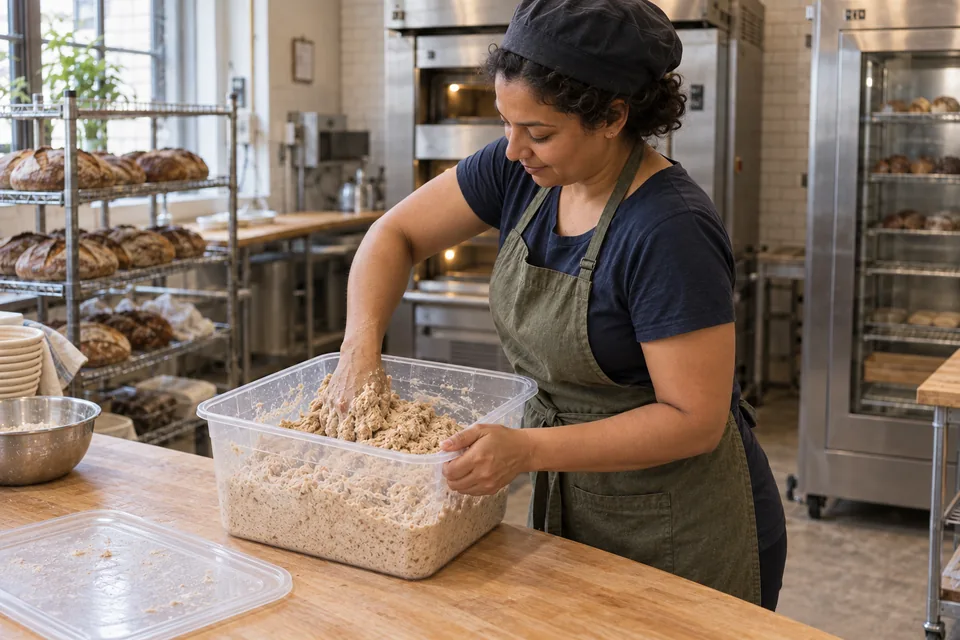
    Seen from the side, the baker mixes rough pale wheat dough by hand in a clear rectangular tub.
    02 AutolyseMoisten all the final-dough flour with the final water, then cover and rest.
  3. 03 · Mix

    3–6 minutes

    Use: Autolysed dough + remaining B

    With a damp hand, fold edges over the additions; pinch through the mass with thumb and forefinger 5–6 times. Alternate pinching and folding until uniformly mixed, about 3–6 minutes. Rest briefly, then fold again.

    Ready when: Uniform dough, no streaks of levain or salt.
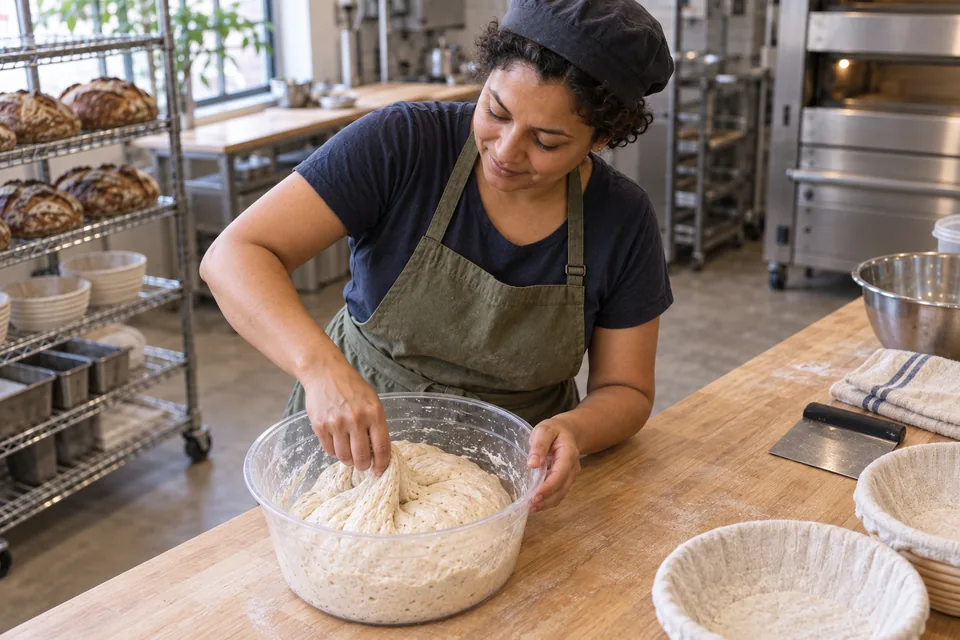
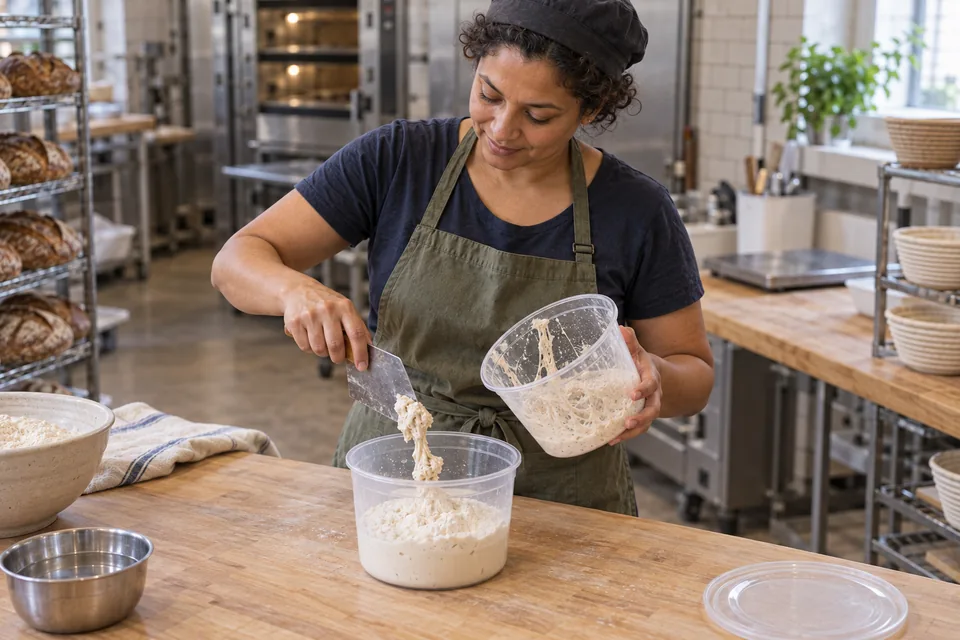
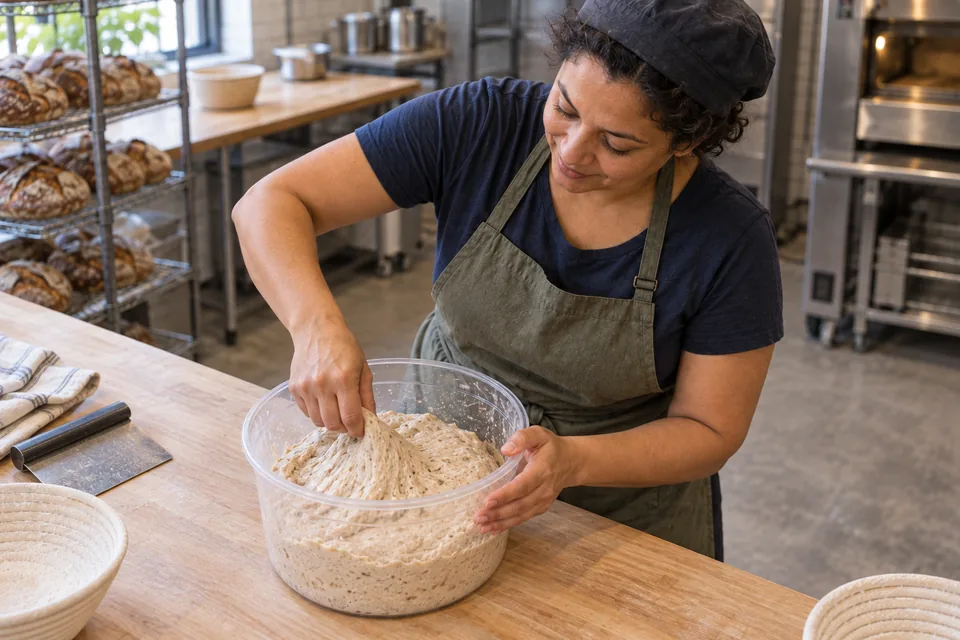
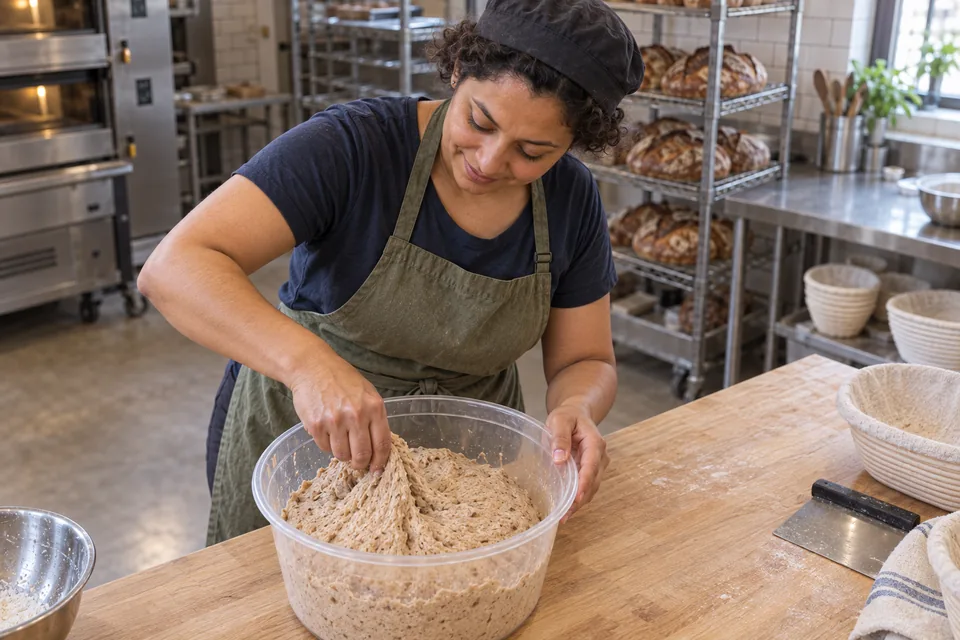
    From an elevated angle, the baker pinches and folds cohesive pale wheat dough in a clear tub.
    03 MixUse a damp hand to pinch and fold the levain, salt and any listed yeast evenly into the dough.
  4. 04 · Fold & bulk

    3–4 sets in first 1½–2 h; total bulk about 5 hours

    Use: Mixed dough

    With a damp hand, stretch one edge until resistance, then fold across the dough. Repeat around 4–5 sides; turn the bundle seam down. Cover between sets; let it relax before the next set. Do not tear it or fold during the last bulk hour.

    Ready when: About 2½× starting volume, aerated and elastic.
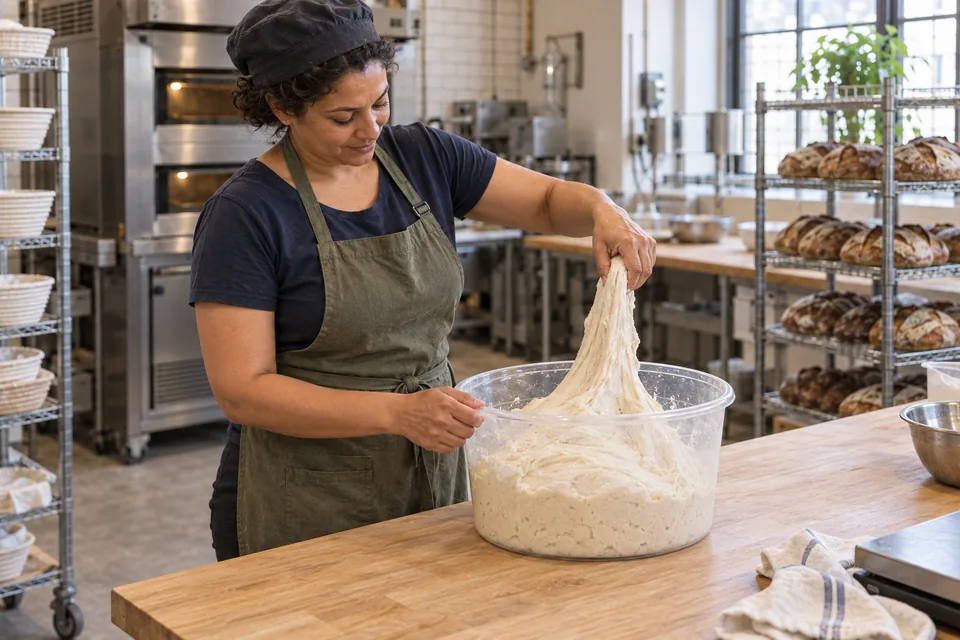
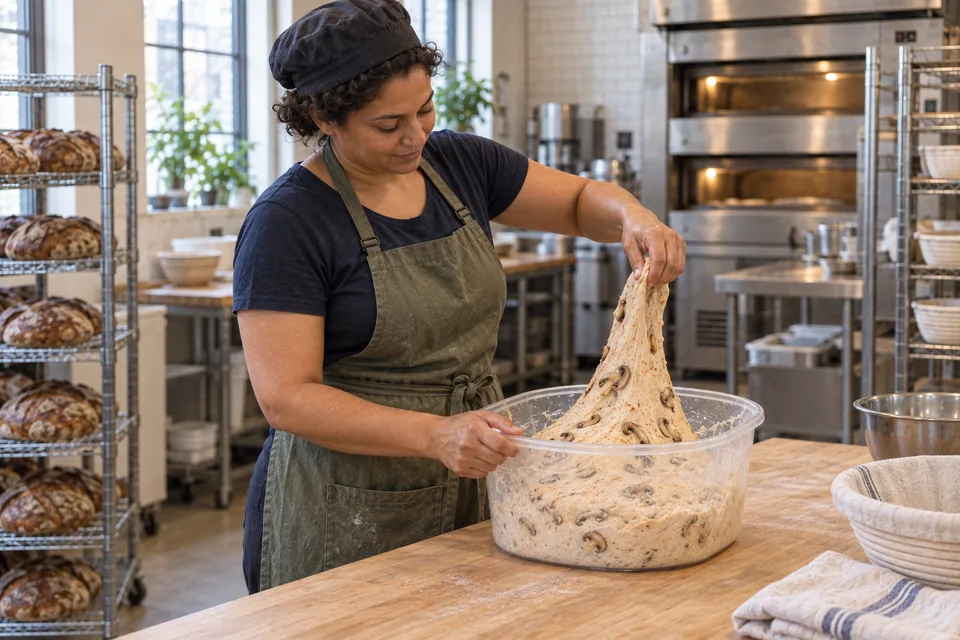
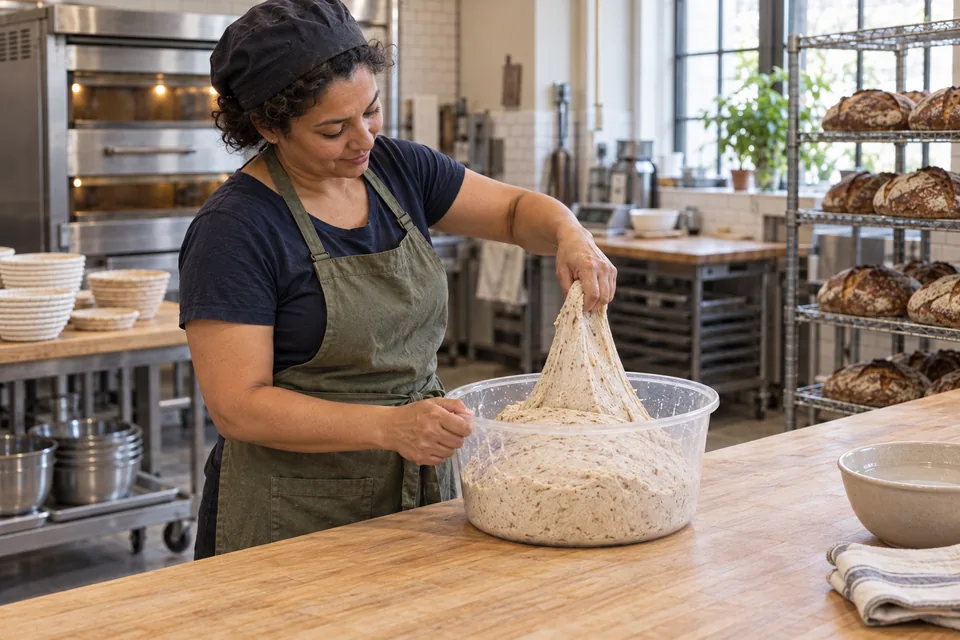
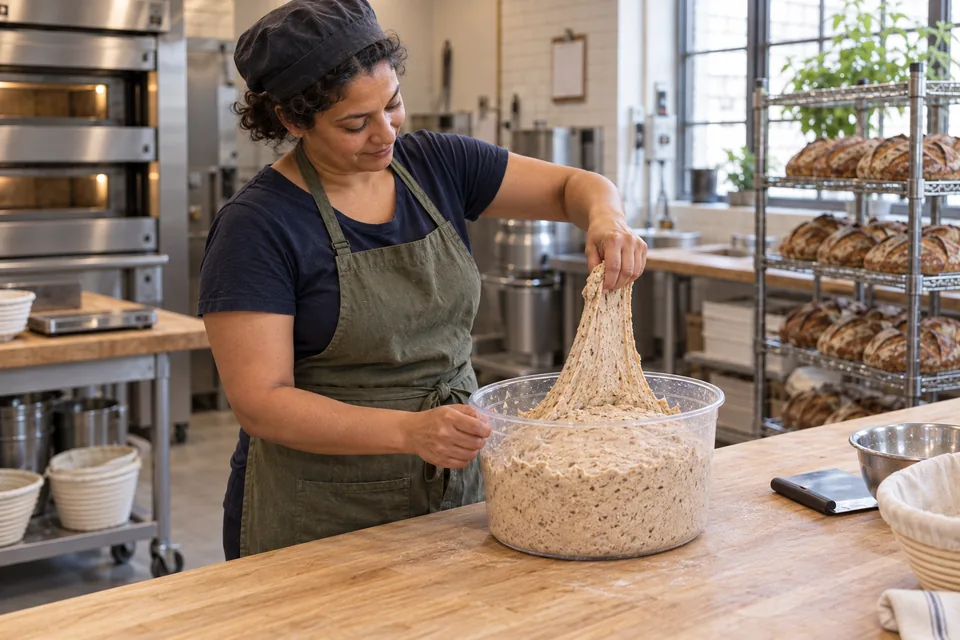
    The baker lifts a short elastic flap of pale wheat dough, ready to fold it back across the mass.
    04 Fold & bulkLift an edge gently, fold it across, then let the dough relax before the next set.
  5. 05 · Divide & shape

    After bulk

    Use: Fermented dough

    Gently tip onto a lightly floured counter and divide equally. Fold each perimeter inward; turn seam down. Cup and drag on an unfloured patch, rotating, until the surface holds tension without tearing. Place seam DOWN in floured baskets; cover.

    Ready when: Medium-tight rounds; preserve visible gas.
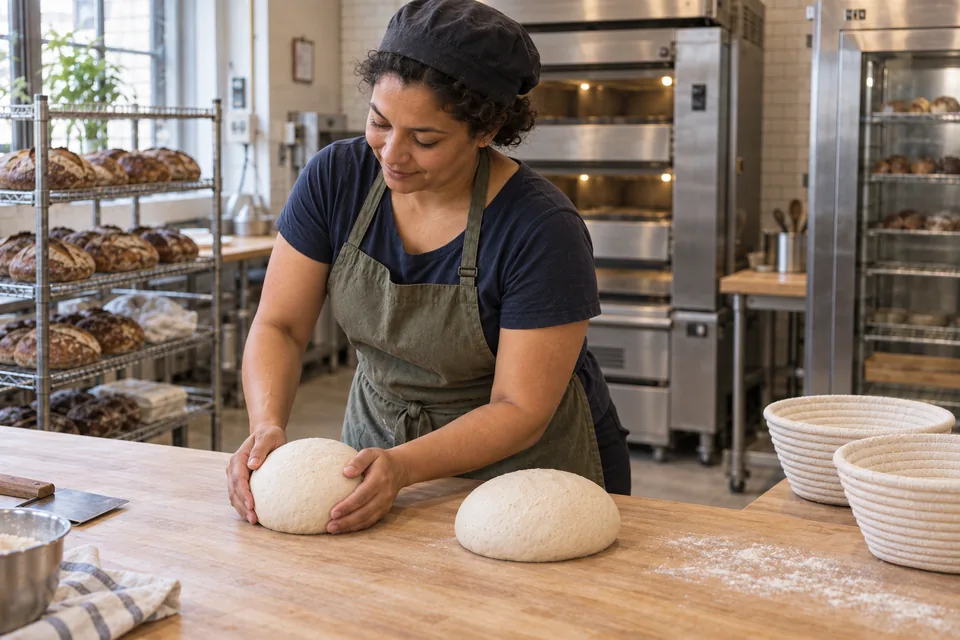
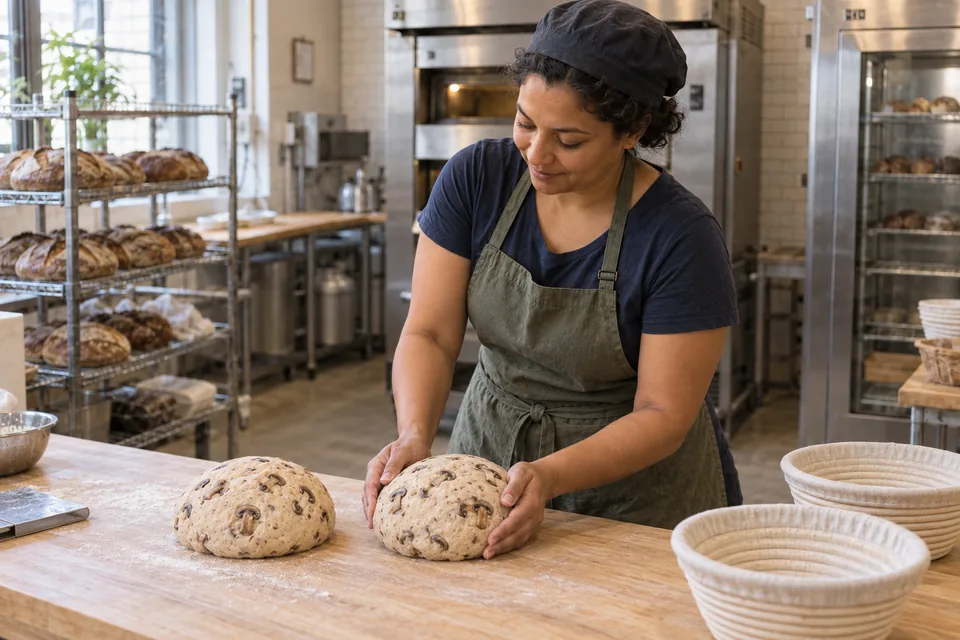
    The baker cups one pale wheat dough round with a second equally sized round beside it.
    05 Divide & shapeDivide equally and cup each piece into a smooth round, then place seam down in floured baskets.
  6. 06 · Proof

    12–14 hours

    Use: Covered baskets

    Refrigerate in closed bags overnight. Bake directly from the fridge; no warm-up is needed.

    Ready when: Expanded, aerated loaves; firm enough to lift while cold.
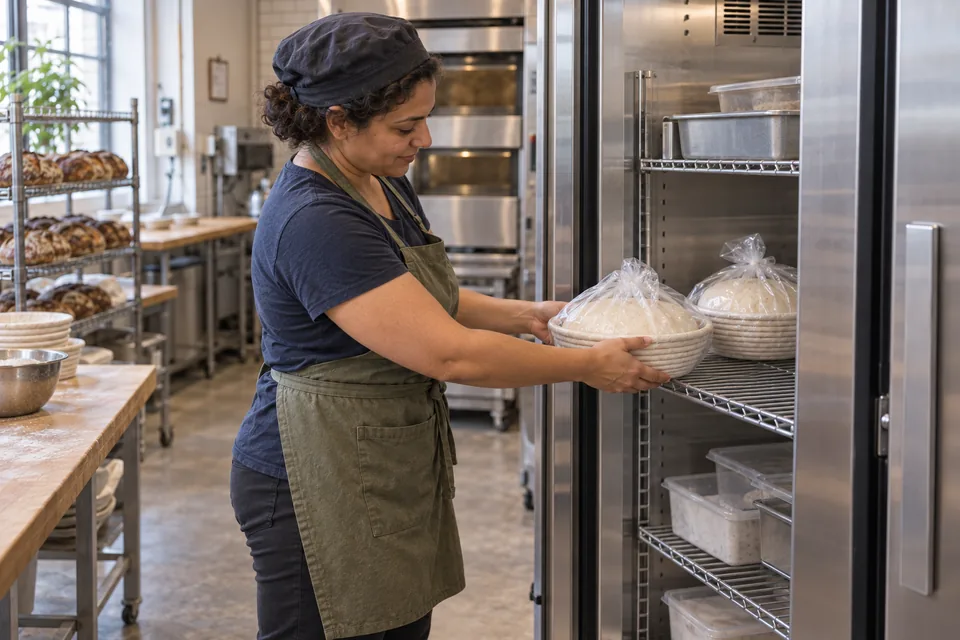
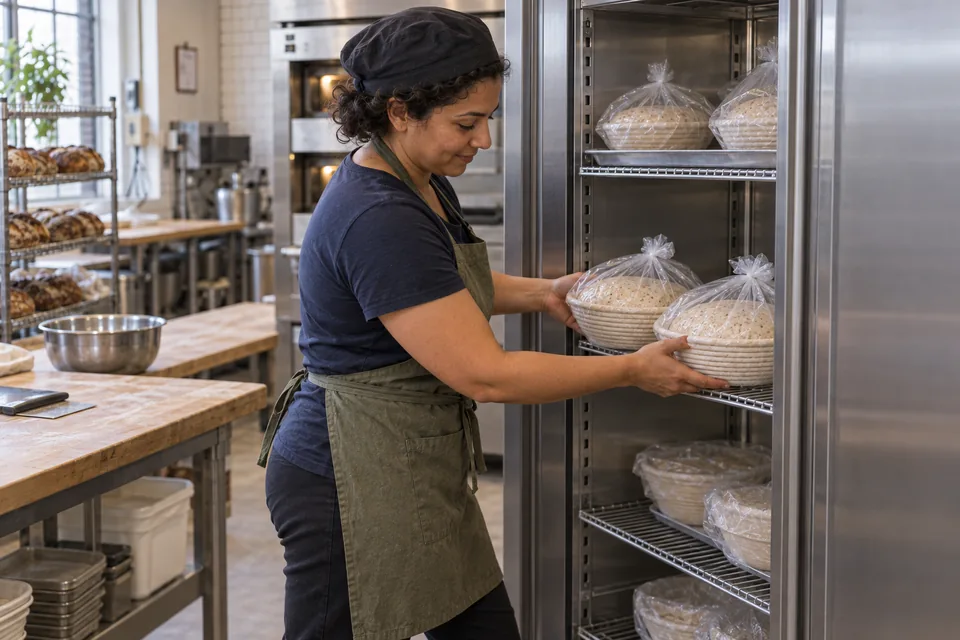
    The baker places a pair of bag-covered pale wheat dough rounds in proofing baskets into the refrigerator.
    06 ProofEnclose the baskets in closed bags and refrigerate overnight. Bake the loaves directly from the fridge.
  7. 07 · Preheat

    At least 45 minutes, overlapping final proof

    Use: Oven + covered Dutch ovens

    Put covered pots on a middle rack. Preheat thoroughly to 245°C.

    Ready when: Oven and pot fully heated.

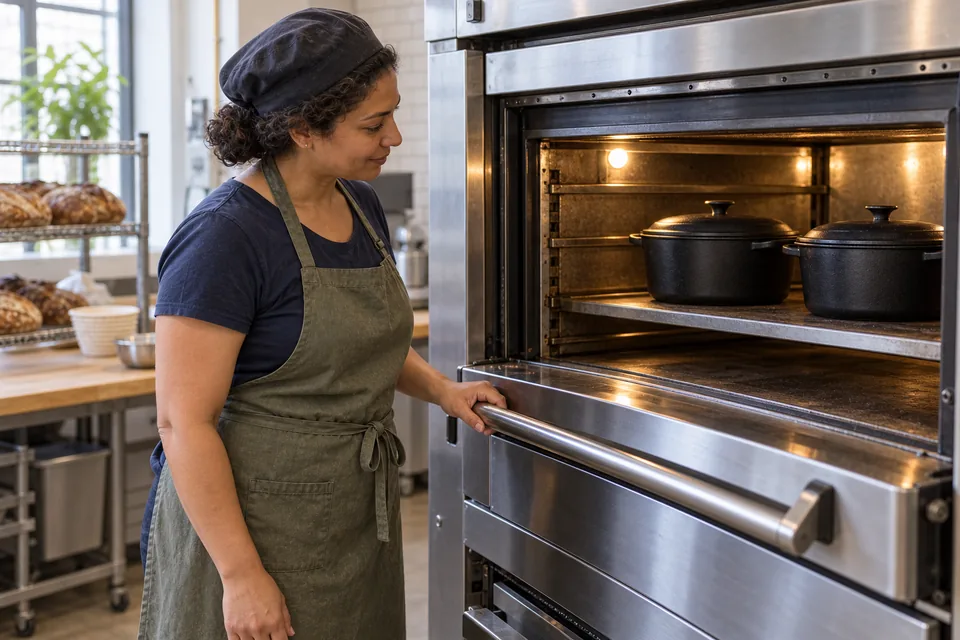
    Two covered cast-iron pots heat on the middle oven rack.
    07 PreheatHeat the covered Dutch ovens thoroughly while the loaves finish proofing.
  8. 08 · Bake

    30 min covered + about 20 min uncovered

    Use: Proofed loaves

    Invert onto a lightly floured counter and carefully lower into hot pot seam UP. Cover for 30 minutes, then uncover to finish. Use dry oven mitts; keep skin clear of hot iron.

    Ready when: Deep brown crust; check 15 min after uncovering.
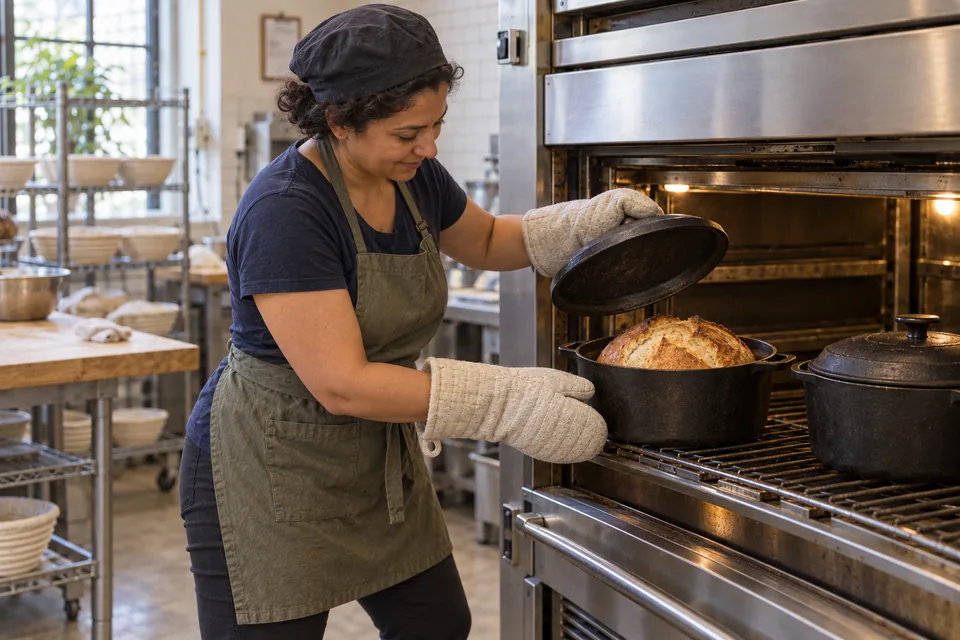
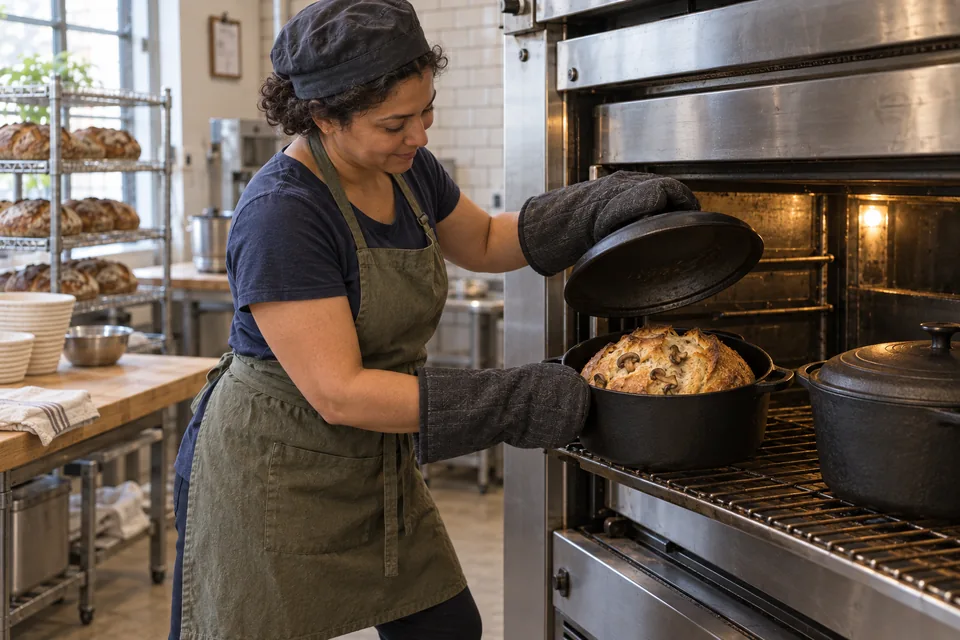
    Using dry oven mitts, the baker lifts a lid to reveal a naturally split pale wheat loaf, with a second covered pot nearby.
    08 BakeUse dry mitts to remove the lid after the covered bake, then finish uncovered until the crust is deep brown.
  9. 09 · Cool

    At least 20 minutes; longer for cleaner slices

    Use: Baked loaves

    Lift out of pots and cool on a rack before cutting.

    Ready when: Steam has subsided; crumb no longer tears when cut.
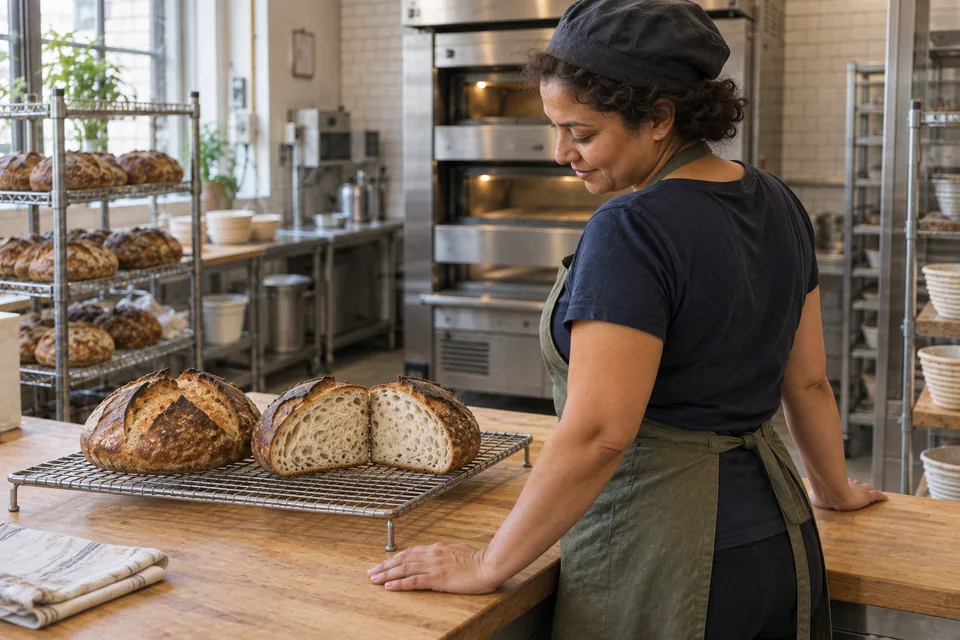
    One whole pale wheat loaf and both halves of a second cool on a raised rack beside the baker.
    09 CoolCool the loaves on a rack before cutting so the crumb can set without tearing.

What to look for

StageLook and feelNeeds attention
Mix & foldsSticky but cohesive dough gains height and elasticity after each fold.A puddle that never gains strength, or a dry dough tearing under a gentle stretch.
ProofUse volume and dough feel alongside the schedule. At room temperature, a poke returns slowly and partly.Immediate rebound suggests more proof; collapse or a lasting deep dent suggests excess proof.

Troubleshooting

If you seeLikely causeWhat to do nowNext time
Dough is slow to expandCool dough or weak levain.Keep covered in a mildly warmer spot; wait for the volume cue.Confirm the starter is vigorous; log dough and room temperatures.
Loaf spreads or collapsesFermentation went too far or shaping left little tension.Handle gently and bake promptly; expect a lower loaf.Use the volume cue; shape with surface tension and shorten the next warm hold.
Sticky crumb when slicedThe loaf was cut warm or insufficiently baked.Let it cool fully before judging.Bake to an even deep crust colour and allow a longer cooling rest.

Recipe notes

  • Formula totals describe the final dough, not all flour used for feeding. Use only the stated levain portion. An established culture at 80% hydration with an 80:20 white-to-whole-wheat flour blend maintains that composition. After a change of feed, traces of the previous flour blend and hydration remain.
  • Keep unused levain separately for the next feeding; do not return salted dough to the starter. For one Dutch oven, chill the waiting loaf and reheat the empty pot for 5 minutes before the second bake.
Show ingredient flow

Recipe

Country sourdough with added yeast

A mostly white country loaf with a small whole-wheat contribution and an overnight cold proof.

How do I make it?

  1. Prepare the starter

    6–8 hours

    Prepare the starter: keep only 100 g of ripe, active starter and mix in the flour and water listed for this feed. Aim for 26–27°C just after mixing, then cover and leave at room temperature. This prepared starter is the levain used later in the dough.

    Baker stirs a thick, softly flecked levain in a clear container.
    Mix the retained starter with its feed flour and water, then cover and let it expand.

    Ready when: The starter has grown, is bubbly and shows fine stretchy strands inside, with a pleasant fermented smell.

  2. Rest the flour and water

    20–30 minutes

    As the prepared starter nears readiness, mix only the flour and water listed for the final dough. Cover and let it rest, keeping the salt, yeast and prepared starter separate for now.

    Seen from the side, the baker mixes rough pale wheat dough by hand in a clear rectangular tub.
    Moisten all the final-dough flour with the final water, then cover and rest.

    Ready when: All the flour is wet, with no dry patches.

  3. Mix the dough

    3–6 minutes

    Add the remaining group B ingredients to the rested dough, then wet your hand and fold the outer edges over them. Pinch through the dough with your thumb and forefinger 5–6 times, alternating with folds until evenly mixed, about 3–6 minutes. Rest briefly, fold again and aim for a dough temperature of 25–26°C.

    From an elevated angle, the baker pinches and folds cohesive pale wheat dough in a clear tub.
    Use a damp hand to pinch and fold the levain, salt and any listed yeast evenly into the dough.

    Ready when: The dough looks even, with no streaks of starter or salt.

  4. Fold and let rise

    3–4 folding rounds in first 1½–2 h; total first rise about 5 hours

    Wet your hand, lift one edge of the dough just until it resists, then fold it across; work around 4–5 sides and turn the dough folded-side down. Keep it covered and let it relax between rounds of folding. Avoid tearing the dough, and leave it untouched for the last hour of this first rise.

    The baker lifts a short elastic flap of pale wheat dough, ready to fold it back across the mass.
    Lift an edge gently, fold it across, then let the dough relax before the next set.

    Ready when: About 2½× its starting size, airy and stretchy.

  5. Shape the loaves

    After the first rise

    Gently tip the dough onto a lightly floured counter and divide it equally. Fold each piece’s edges into the middle, turn the folded side down onto a patch without flour, then cup and gently pull it toward you while turning until the surface is firm without tearing. Put the rounds folded-side DOWN in floured rising baskets and cover, keeping as much air in the dough as possible.

    The baker cups one pale wheat dough round with a second equally sized round beside it.
    Divide equally and cup each piece into a smooth round, then place seam down in floured baskets.

    Ready when: Moderately firm rounds that still have air bubbles inside.

  6. Let the loaves rise

    12–14 hours

    Put the covered rising baskets in closed bags and refrigerate overnight. Bake the loaves straight from the fridge; they do not need to warm up first.

    The baker places a pair of bag-covered pale wheat dough rounds in proofing baskets into the refrigerator.
    Enclose the baskets in closed bags and refrigerate overnight. Bake the loaves directly from the fridge.

    Ready when: The loaves have grown and feel airy, but are firm enough to lift while cold.

  7. Heat the oven

    At least 45 minutes, overlapping the last rise

    Put the heavy lidded pots on the middle rack. Heat the oven and pots thoroughly to 245°C.

    Two covered cast-iron pots heat on the middle oven rack.
    Heat the covered Dutch ovens thoroughly while the loaves finish proofing.

    Ready when: The oven and pot are fully hot.

  8. Bake

    30 min covered + about 20 min uncovered

    Turn each loaf out onto a lightly floured counter and carefully lower it folded-side UP into a hot pot. Bake with the lid on for 30 minutes, then remove the lid to finish baking. Use dry oven mitts and keep your hands clear of the hot metal.

    Using dry oven mitts, the baker lifts a lid to reveal a naturally split pale wheat loaf, with a second covered pot nearby.
    Use dry mitts to remove the lid after the covered bake, then finish uncovered until the crust is deep brown.

    Ready when: A deep brown crust; start checking 15 min after removing the lid.

  9. Let it cool

    At least 20 minutes; longer for cleaner slices

    Take the loaves out of the pots and leave them on a rack to cool before slicing.

    One whole pale wheat loaf and both halves of a second cool on a raised rack beside the baker.
    Cool the loaves on a rack before cutting so the crumb can set without tearing.

    Ready when: Most steam has escaped and the inside no longer tears when sliced.

What can go wrong, and how can I fix it?

What you noticeLikely causeWhat to do
Dough is slow to expandCool dough or weak levain.Keep covered in a mildly warmer spot; wait for the volume cue. Confirm the starter is vigorous; log dough and room temperatures.
Loaf spreads or collapsesFermentation went too far or shaping left little tension.Handle gently and bake promptly; expect a lower loaf. Use the volume cue; shape with surface tension and shorten the next warm hold.
Sticky crumb when slicedThe loaf was cut warm or insufficiently baked.Let it cool fully before judging. Bake to an even deep crust colour and allow a longer cooling rest.
Useful recipe notes

Formula totals describe the final dough, not all flour used for feeding. Use only the stated levain portion. An established culture at 80% hydration with an 80:20 white-to-whole-wheat flour blend maintains that composition. After a change of feed, traces of the previous flour blend and hydration remain.

Keep unused levain separately for the next feeding; do not return salted dough to the starter. For one Dutch oven, chill the waiting loaf and reheat the empty pot for 5 minutes before the second bake.

See the detailed method and ratios in , or follow ingredients through the .

Ingredient proportions & recipe details

Country sourdough with added yeast at a glance

Makes
2 loaves
Heat
245°C
Baking time
30 min covered + about 20 min uncovered
Dough hydration
78%
Prefermented flour
20% of total flour
Leavening
Starter + yeast
Bulk fermentation
3–4 sets in first 1½–2 h; total bulk about 5 hours · About 2½× starting volume, aerated and elastic.
How do the ingredient proportions compare?

Core dough totals include the flour and water in the portion of starter or preferment used. Do not add them again. Toppings, fillings and dusting flour are separate.

Formula componentGramsFlour = 100%
Total flour1000 g100%
Total water780 g78%
Salt21 g2.1%
Instant yeast2 g0.2%

Overnight wheat and rye sourdough

Makes
2 loaves
Heat
245°C
Baking time
30 min covered + 20–25 min uncovered

Preheat covered pots for at least 45 min. Check the crust after 15 min uncovered.

Pure levain bread

Overnight wheat and rye sourdough

A small amount of levain drives a long overnight fermentation in this wheat-and-rye loaf.

Method

  1. 01 · Feed

    7–9 hours

    Use: A

    Keep only 100 g mature levain. Mix in the feed flour and water; cover at room temperature.

    Ready when: Bubbly, expanded and webbed inside; pleasantly fermented.

    Baker stirs a thick, softly flecked levain in a clear container.
    01 FeedMix the retained starter with its feed flour and water, then cover and let it expand.
  2. 02 · Autolyse

    20–30 minutes

    Use: B flour + B water

    Near the end of the feed, mix the final-dough flours and water only. Cover. Keep salt, yeast and levain aside.

    Ready when: All flour moistened; no dry pockets.

    Seen from the side, the baker mixes rough pale wheat dough by hand in a clear rectangular tub.
    02 AutolyseMoisten all the final-dough flour with the final water, then cover and rest.
  3. 03 · Mix

    3–6 minutes

    Use: Autolysed dough + remaining B

    With a damp hand, fold edges over the additions; pinch through the mass with thumb and forefinger 5–6 times. Alternate pinching and folding until uniformly mixed, about 3–6 minutes. Rest briefly, then fold again.

    Ready when: Uniform dough, no streaks of levain or salt.

    From an elevated angle, the baker pinches and folds cohesive pale wheat dough in a clear tub.
    03 MixUse a damp hand to pinch and fold the levain, salt and any listed yeast evenly into the dough.
  4. 04 · Fold & bulk

    3–4 sets before bed; total bulk 12–15 h

    Use: Mixed dough

    With a damp hand, stretch one edge until resistance, then fold across the dough. Repeat around 4–5 sides; turn the bundle seam down. Cover between sets; let it relax before the next set. Do not tear it or fold during the last bulk hour. The slow dough can take its last fold later in the evening.

    Ready when: Nearly 3× starting volume; possibly less in a cool kitchen.

    The baker lifts a short elastic flap of pale wheat dough, ready to fold it back across the mass.
    04 Fold & bulkLift an edge gently, fold it across, then let the dough relax before the next set.
  5. 05 · Divide & shape

    After bulk

    Use: Fermented dough

    Gently tip onto a lightly floured counter and divide equally. Fold each perimeter inward; turn seam down. Cup and drag on an unfloured patch, rotating, until the surface holds tension without tearing. Place seam DOWN in floured baskets; cover.

    Ready when: Medium-tight rounds; preserve visible gas.

    The baker cups one pale wheat dough round with a second equally sized round beside it.
    05 Divide & shapeDivide equally and cup each piece into a smooth round, then place seam down in floured baskets.
  6. 06 · Proof

    about 4 hours

    Use: Covered baskets

    Leave at about 21°C. Gently press the loaf with a floured fingertip to make a small dent. The dent should slowly rise partway back.

    Ready when: Slow, partial rebound; loaf feels aerated.

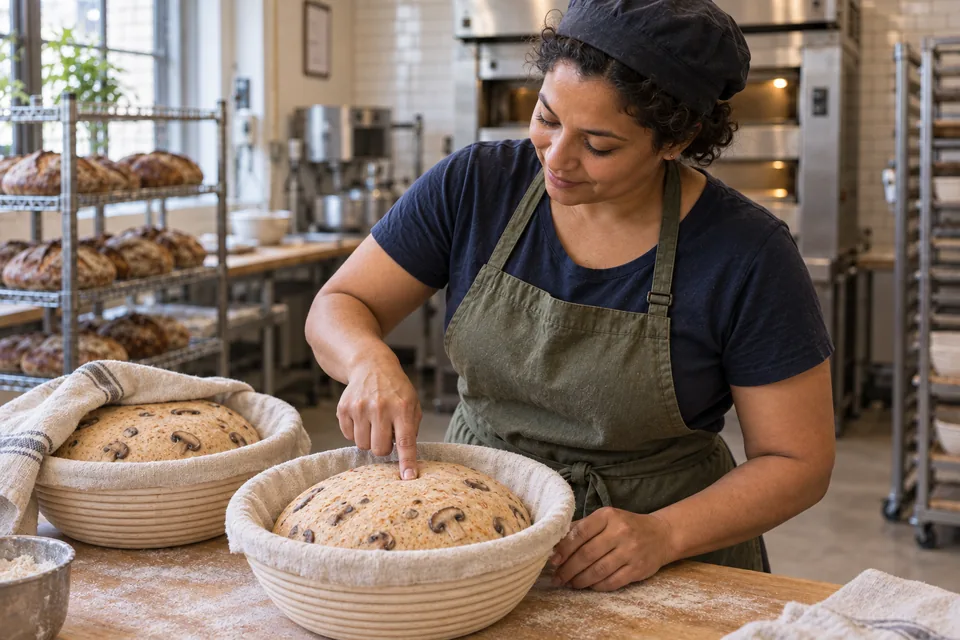
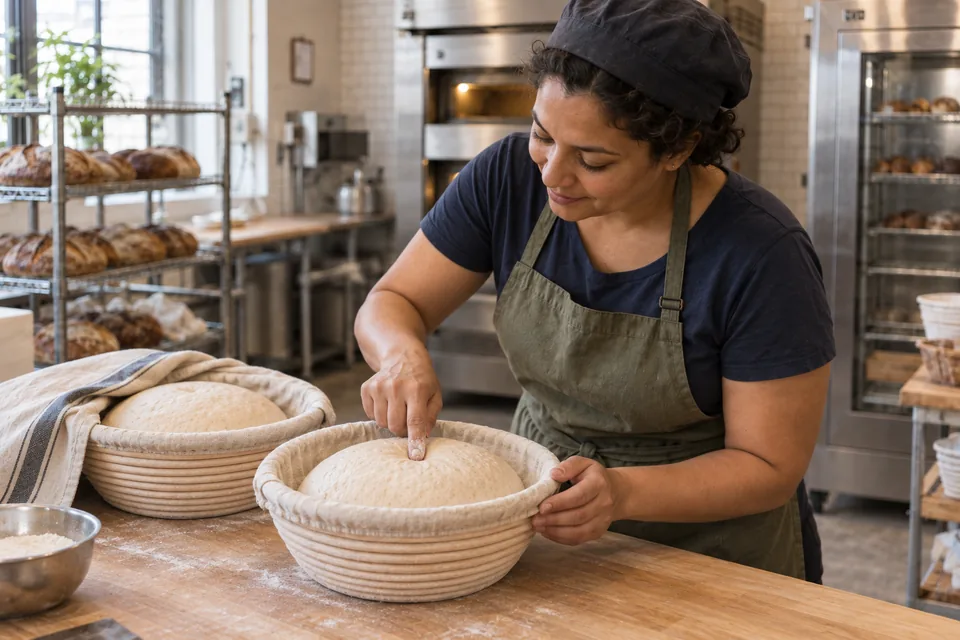
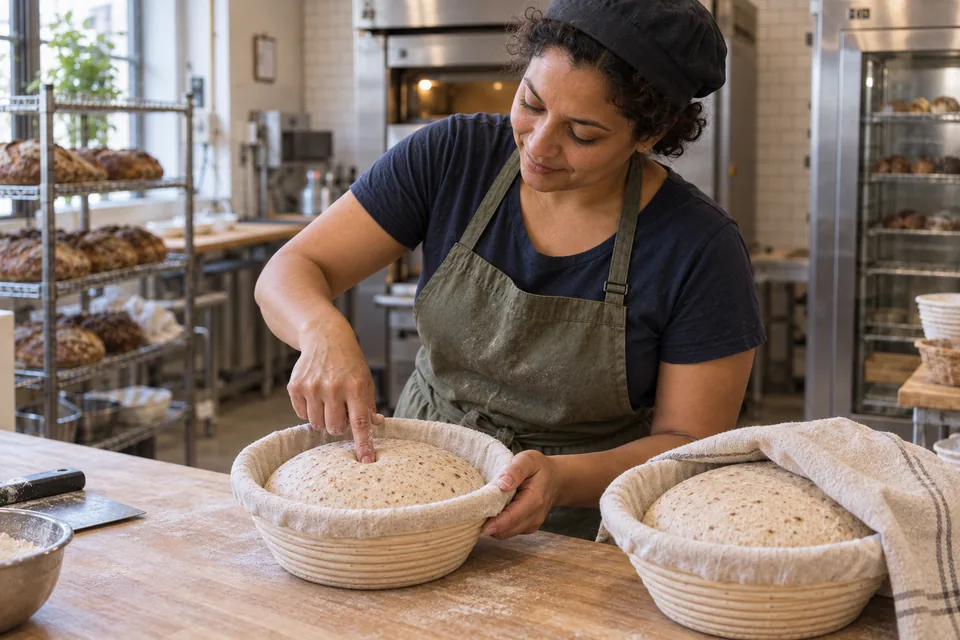
    A floured fingertip gently checks one of two puffy pale wheat dough rounds in cloth-lined baskets.
    06 ProofLook for a puffy loaf and a small fingertip dent that slowly rises partway back.
  7. 07 · Preheat

    At least 45 minutes, overlapping final proof

    Use: Oven + covered Dutch ovens

    Put covered pots on a middle rack. Preheat thoroughly to 245°C.

    Ready when: Oven and pot fully heated.

    Two covered cast-iron pots heat on the middle oven rack.
    07 PreheatHeat the covered Dutch ovens thoroughly while the loaves finish proofing.
  8. 08 · Bake

    30 min covered + 20–25 min uncovered

    Use: Proofed loaves

    Invert onto a lightly floured counter and carefully lower into hot pot seam UP. Cover for 30 minutes, then uncover to finish. Use dry oven mitts; keep skin clear of hot iron.

    Ready when: Deep brown crust; check 15 min after uncovering.

    Using dry oven mitts, the baker lifts a lid to reveal a naturally split pale wheat loaf, with a second covered pot nearby.
    08 BakeUse dry mitts to remove the lid after the covered bake, then finish uncovered until the crust is deep brown.
  9. 09 · Cool

    At least 20 minutes; longer for cleaner slices

    Use: Baked loaves

    Lift out of pots and cool on a rack before cutting.

    Ready when: Steam has subsided; crumb no longer tears when cut.

    One whole pale wheat loaf and both halves of a second cool on a raised rack beside the baker.
    09 CoolCool the loaves on a rack before cutting so the crumb can set without tearing.

What to look for

StageLook and feelNeeds attention
Mix & foldsSticky but cohesive dough gains height and elasticity after each fold.A puddle that never gains strength, or a dry dough tearing under a gentle stretch.
ProofUse volume and dough feel alongside the schedule. At room temperature, a poke returns slowly and partly.Immediate rebound suggests more proof; collapse or a lasting deep dent suggests excess proof.

Troubleshooting

If you seeLikely causeWhat to do nowNext time
Dough is slow to expandCool dough or weak levain.Keep covered in a mildly warmer spot; wait for the volume cue.Confirm the starter is vigorous; log dough and room temperatures.
Loaf spreads or collapsesFermentation went too far or shaping left little tension.Handle gently and bake promptly; expect a lower loaf.Use the volume cue; shape with surface tension and shorten the next warm hold.
Sticky crumb when slicedThe loaf was cut warm or insufficiently baked.Let it cool fully before judging.Bake to an even deep crust colour and allow a longer cooling rest.

Recipe notes

  • Formula totals describe the final dough, not all flour used for feeding. Use only the stated levain portion. An established culture at 80% hydration with an 80:20 white-to-whole-wheat flour blend maintains that composition. After a change of feed, traces of the previous flour blend and hydration remain.
  • Keep unused levain separately for the next feeding; do not return salted dough to the starter. For one Dutch oven, chill the waiting loaf and reheat the empty pot for 5 minutes before the second bake.
  • Below 21°C, allow extra time. Keep the 216 g levain portion: adding more changes the flour and water totals.
Show ingredient flow

Recipe

Overnight wheat and rye sourdough

A small amount of levain drives a long overnight fermentation in this wheat-and-rye loaf.

How do I make it?

  1. Prepare the starter

    7–9 hours

    Prepare the starter: keep only 100 g of ripe, active starter and mix in the flour and water listed for this feed. Aim for 26–27°C just after mixing, then cover and leave at room temperature. This prepared starter is the levain used later in the dough.

    Baker stirs a thick, softly flecked levain in a clear container.
    Mix the retained starter with its feed flour and water, then cover and let it expand.

    Ready when: The starter has grown, is bubbly and shows fine stretchy strands inside, with a pleasant fermented smell.

  2. Rest the flour and water

    20–30 minutes

    As the prepared starter nears readiness, mix only the flour and water listed for the final dough. Cover and let it rest, keeping the salt, yeast and prepared starter separate for now.

    Seen from the side, the baker mixes rough pale wheat dough by hand in a clear rectangular tub.
    Moisten all the final-dough flour with the final water, then cover and rest.

    Ready when: All the flour is wet, with no dry patches.

  3. Mix the dough

    3–6 minutes

    Add the remaining group B ingredients to the rested dough, then wet your hand and fold the outer edges over them. Pinch through the dough with your thumb and forefinger 5–6 times, alternating with folds until evenly mixed, about 3–6 minutes. Rest briefly, fold again and aim for a dough temperature of 25–26°C.

    From an elevated angle, the baker pinches and folds cohesive pale wheat dough in a clear tub.
    Use a damp hand to pinch and fold the levain, salt and any listed yeast evenly into the dough.

    Ready when: The dough looks even, with no streaks of starter or salt.

  4. Fold and let rise

    3–4 folding rounds before bed; total first rise 12–15 h

    Wet your hand, lift one edge just until it resists and fold it across; repeat around 4–5 sides, then turn the dough folded-side down without tearing it. Cover and let it relax between folding rounds, leaving it untouched for the last hour of this first rise. This slowly rising dough can have its last fold later in the evening.

    The baker lifts a short elastic flap of pale wheat dough, ready to fold it back across the mass.
    Lift an edge gently, fold it across, then let the dough relax before the next set.

    Ready when: Nearly 3× its starting size, though it may rise less in a cool kitchen.

  5. Shape the loaves

    After the first rise

    Gently tip the dough onto a lightly floured counter and divide it equally. Fold each piece’s edges into the middle, turn the folded side down onto a patch without flour, then cup and gently pull it toward you while turning until the surface is firm without tearing. Put the rounds folded-side DOWN in floured rising baskets and cover, keeping as much air in the dough as possible.

    The baker cups one pale wheat dough round with a second equally sized round beside it.
    Divide equally and cup each piece into a smooth round, then place seam down in floured baskets.

    Ready when: Moderately firm rounds that still have air bubbles inside.

  6. Let the loaves rise

    about 4 hours

    Let the covered loaves rise at about 21°C. Gently press a loaf with a floured fingertip to make a small dent: it is ready when the dent slowly rises partway back and leaves a slight mark.

    A floured fingertip gently checks one of two puffy pale wheat dough rounds in cloth-lined baskets.
    Look for a puffy loaf and a small fingertip dent that slowly rises partway back.

    Ready when: A finger dent slowly rises partway back, and the loaf feels airy.

  7. Heat the oven

    At least 45 minutes, overlapping the last rise

    Put the heavy lidded pots on the middle rack. Heat the oven and pots thoroughly to 245°C.

    Two covered cast-iron pots heat on the middle oven rack.
    Heat the covered Dutch ovens thoroughly while the loaves finish proofing.

    Ready when: The oven and pot are fully hot.

  8. Bake

    30 min covered + 20–25 min uncovered

    Turn each loaf out onto a lightly floured counter and carefully lower it folded-side UP into a hot pot. Bake with the lid on for 30 minutes, then remove the lid to finish baking. Use dry oven mitts and keep your hands clear of the hot metal.

    Using dry oven mitts, the baker lifts a lid to reveal a naturally split pale wheat loaf, with a second covered pot nearby.
    Use dry mitts to remove the lid after the covered bake, then finish uncovered until the crust is deep brown.

    Ready when: A deep brown crust; start checking 15 min after removing the lid.

  9. Let it cool

    At least 20 minutes; longer for cleaner slices

    Take the loaves out of the pots and leave them on a rack to cool before slicing.

    One whole pale wheat loaf and both halves of a second cool on a raised rack beside the baker.
    Cool the loaves on a rack before cutting so the crumb can set without tearing.

    Ready when: Most steam has escaped and the inside no longer tears when sliced.

What can go wrong, and how can I fix it?

What you noticeLikely causeWhat to do
Dough is slow to expandCool dough or weak levain.Keep covered in a mildly warmer spot; wait for the volume cue. Confirm the starter is vigorous; log dough and room temperatures.
Loaf spreads or collapsesFermentation went too far or shaping left little tension.Handle gently and bake promptly; expect a lower loaf. Use the volume cue; shape with surface tension and shorten the next warm hold.
Sticky crumb when slicedThe loaf was cut warm or insufficiently baked.Let it cool fully before judging. Bake to an even deep crust colour and allow a longer cooling rest.
Useful recipe notes

Formula totals describe the final dough, not all flour used for feeding. Use only the stated levain portion. An established culture at 80% hydration with an 80:20 white-to-whole-wheat flour blend maintains that composition. After a change of feed, traces of the previous flour blend and hydration remain.

Keep unused levain separately for the next feeding; do not return salted dough to the starter. For one Dutch oven, chill the waiting loaf and reheat the empty pot for 5 minutes before the second bake.
Below 21°C, allow extra time. Keep the 216 g levain portion: adding more changes the flour and water totals.

See the detailed method and ratios in , or follow ingredients through the .

Ingredient proportions & recipe details

Overnight wheat and rye sourdough at a glance

Makes
2 loaves
Heat
245°C
Baking time
30 min covered + 20–25 min uncovered
Dough hydration
78%
Prefermented flour
12% of total flour
Bulk fermentation
3–4 sets before bed; total bulk 12–15 h · Nearly 3× starting volume; possibly less in a cool kitchen.
How do the ingredient proportions compare?

Core dough totals include the flour and water in the portion of starter or preferment used. Do not add them again. Toppings, fillings and dusting flour are separate.

Formula componentGramsFlour = 100%
Total flour1000 g100%
Total water780 g78%
Salt22 g2.2%
Instant yeast0 g0%

Overnight white and whole-wheat sourdough

Makes
2 loaves
Heat
245°C
Baking time
30 min covered + 20–25 min uncovered

Preheat covered pots for at least 45 min. Check the crust after 15 min uncovered.

Pure levain bread

Overnight white and whole-wheat sourdough

The overnight pure-levain method with 30% total whole wheat.

Method

  1. 01 · Feed

    7–9 hours

    Use: A

    Keep only 100 g mature levain. Mix in the feed flour and water; cover at room temperature.

    Ready when: Bubbly, expanded and webbed inside; pleasantly fermented.

    Baker stirs a thick, softly flecked levain in a clear container.
    01 FeedMix the retained starter with its feed flour and water, then cover and let it expand.
  2. 02 · Autolyse

    20–30 minutes

    Use: B flour + B water

    Near the end of the feed, mix the final-dough flours and water only. Cover. Keep salt, yeast and levain aside.

    Ready when: All flour moistened; no dry pockets.

    Seen from the side, the baker mixes rough finely flecked wheat and wholegrain dough by hand in a clear rectangular tub.
    02 AutolyseMoisten all the final-dough flour with the final water, then cover and rest.
  3. 03 · Mix

    3–6 minutes

    Use: Autolysed dough + remaining B

    With a damp hand, fold edges over the additions; pinch through the mass with thumb and forefinger 5–6 times. Alternate pinching and folding until uniformly mixed, about 3–6 minutes. Rest briefly, then fold again.

    Ready when: Uniform dough, no streaks of levain or salt.

    From an elevated angle, the baker pinches and folds cohesive finely flecked wheat and wholegrain dough in a clear tub.
    03 MixUse a damp hand to pinch and fold the levain, salt and any listed yeast evenly into the dough.
  4. 04 · Fold & bulk

    3–4 sets before bed; total bulk 12–15 h

    Use: Mixed dough

    With a damp hand, stretch one edge until resistance, then fold across the dough. Repeat around 4–5 sides; turn the bundle seam down. Cover between sets; let it relax before the next set. Do not tear it or fold during the last bulk hour. The slow dough can take its last fold later in the evening.

    Ready when: Nearly 3× starting volume; possibly less in a cool kitchen.

    The baker lifts a short elastic flap of finely flecked wheat and wholegrain dough, ready to fold it back across the mass.
    04 Fold & bulkLift an edge gently, fold it across, then let the dough relax before the next set.
  5. 05 · Divide & shape

    After bulk

    Use: Fermented dough

    Gently tip onto a lightly floured counter and divide equally. Fold each perimeter inward; turn seam down. Cup and drag on an unfloured patch, rotating, until the surface holds tension without tearing. Place seam DOWN in floured baskets; cover.

    Ready when: Medium-tight rounds; preserve visible gas.

    The baker cups one finely flecked wheat and wholegrain dough round with a second equally sized round beside it.
    05 Divide & shapeDivide equally and cup each piece into a smooth round, then place seam down in floured baskets.
  6. 06 · Proof

    about 4 hours

    Use: Covered baskets

    Leave at about 21°C. Gently press the loaf with a floured fingertip to make a small dent. The dent should slowly rise partway back.

    Ready when: Slow, partial rebound; loaf feels aerated.

    A floured fingertip gently checks one of two puffy finely flecked wheat and wholegrain dough rounds in cloth-lined baskets.
    06 ProofLook for a puffy loaf and a small fingertip dent that slowly rises partway back.
  7. 07 · Preheat

    At least 45 minutes, overlapping final proof

    Use: Oven + covered Dutch ovens

    Put covered pots on a middle rack. Preheat thoroughly to 245°C.

    Ready when: Oven and pot fully heated.

    Two covered cast-iron pots heat on the middle oven rack.
    07 PreheatHeat the covered Dutch ovens thoroughly while the loaves finish proofing.
  8. 08 · Bake

    30 min covered + 20–25 min uncovered

    Use: Proofed loaves

    Invert onto a lightly floured counter and carefully lower into hot pot seam UP. Cover for 30 minutes, then uncover to finish. Use dry oven mitts; keep skin clear of hot iron.

    Ready when: Deep brown crust; check 15 min after uncovering.

    Using dry oven mitts, the baker lifts a lid to reveal a naturally split finely flecked wheat and wholegrain loaf, with a second covered pot nearby.
    08 BakeUse dry mitts to remove the lid after the covered bake, then finish uncovered until the crust is deep brown.
  9. 09 · Cool

    At least 20 minutes; longer for cleaner slices

    Use: Baked loaves

    Lift out of pots and cool on a rack before cutting.

    Ready when: Steam has subsided; crumb no longer tears when cut.

    One whole finely flecked wheat and wholegrain loaf and both halves of a second cool on a raised rack beside the baker.
    09 CoolCool the loaves on a rack before cutting so the crumb can set without tearing.

What to look for

StageLook and feelNeeds attention
Mix & foldsSticky but cohesive dough gains height and elasticity after each fold.A puddle that never gains strength, or a dry dough tearing under a gentle stretch.
ProofUse volume and dough feel alongside the schedule. At room temperature, a poke returns slowly and partly.Immediate rebound suggests more proof; collapse or a lasting deep dent suggests excess proof.

Troubleshooting

If you seeLikely causeWhat to do nowNext time
Dough is slow to expandCool dough or weak levain.Keep covered in a mildly warmer spot; wait for the volume cue.Confirm the starter is vigorous; log dough and room temperatures.
Loaf spreads or collapsesFermentation went too far or shaping left little tension.Handle gently and bake promptly; expect a lower loaf.Use the volume cue; shape with surface tension and shorten the next warm hold.
Sticky crumb when slicedThe loaf was cut warm or insufficiently baked.Let it cool fully before judging.Bake to an even deep crust colour and allow a longer cooling rest.

Recipe notes

  • Formula totals describe the final dough, not all flour used for feeding. Use only the stated levain portion. An established culture at 80% hydration with an 80:20 white-to-whole-wheat flour blend maintains that composition. After a change of feed, traces of the previous flour blend and hydration remain.
  • Keep unused levain separately for the next feeding; do not return salted dough to the starter. For one Dutch oven, chill the waiting loaf and reheat the empty pot for 5 minutes before the second bake.
  • Below 21°C, allow extra time. Keep the 216 g levain portion: adding more changes the flour and water totals.
Show ingredient flow

Recipe

Overnight white and whole-wheat sourdough

The overnight pure-levain method with 30% total whole wheat.

How do I make it?

  1. Prepare the starter

    7–9 hours

    Prepare the starter: keep only 100 g of ripe, active starter and mix in the flour and water listed for this feed. Aim for 26–27°C just after mixing, then cover and leave at room temperature. This prepared starter is the levain used later in the dough.

    Baker stirs a thick, softly flecked levain in a clear container.
    Mix the retained starter with its feed flour and water, then cover and let it expand.

    Ready when: The starter has grown, is bubbly and shows fine stretchy strands inside, with a pleasant fermented smell.

  2. Rest the flour and water

    20–30 minutes

    As the prepared starter nears readiness, mix only the flour and water listed for the final dough. Cover and let it rest, keeping the salt, yeast and prepared starter separate for now.

    Seen from the side, the baker mixes rough finely flecked wheat and wholegrain dough by hand in a clear rectangular tub.
    Moisten all the final-dough flour with the final water, then cover and rest.

    Ready when: All the flour is wet, with no dry patches.

  3. Mix the dough

    3–6 minutes

    Add the remaining group B ingredients to the rested dough, then wet your hand and fold the outer edges over them. Pinch through the dough with your thumb and forefinger 5–6 times, alternating with folds until evenly mixed, about 3–6 minutes. Rest briefly, fold again and aim for a dough temperature of 25–26°C.

    From an elevated angle, the baker pinches and folds cohesive finely flecked wheat and wholegrain dough in a clear tub.
    Use a damp hand to pinch and fold the levain, salt and any listed yeast evenly into the dough.

    Ready when: The dough looks even, with no streaks of starter or salt.

  4. Fold and let rise

    3–4 folding rounds before bed; total first rise 12–15 h

    Wet your hand, lift one edge just until it resists and fold it across; repeat around 4–5 sides, then turn the dough folded-side down without tearing it. Cover and let it relax between folding rounds, leaving it untouched for the last hour of this first rise. This slowly rising dough can have its last fold later in the evening.

    The baker lifts a short elastic flap of finely flecked wheat and wholegrain dough, ready to fold it back across the mass.
    Lift an edge gently, fold it across, then let the dough relax before the next set.

    Ready when: Nearly 3× its starting size, though it may rise less in a cool kitchen.

  5. Shape the loaves

    After the first rise

    Gently tip the dough onto a lightly floured counter and divide it equally. Fold each piece’s edges into the middle, turn the folded side down onto a patch without flour, then cup and gently pull it toward you while turning until the surface is firm without tearing. Put the rounds folded-side DOWN in floured rising baskets and cover, keeping as much air in the dough as possible.

    The baker cups one finely flecked wheat and wholegrain dough round with a second equally sized round beside it.
    Divide equally and cup each piece into a smooth round, then place seam down in floured baskets.

    Ready when: Moderately firm rounds that still have air bubbles inside.

  6. Let the loaves rise

    about 4 hours

    Let the covered loaves rise at about 21°C. Gently press a loaf with a floured fingertip to make a small dent: it is ready when the dent slowly rises partway back and leaves a slight mark.

    A floured fingertip gently checks one of two puffy finely flecked wheat and wholegrain dough rounds in cloth-lined baskets.
    Look for a puffy loaf and a small fingertip dent that slowly rises partway back.

    Ready when: A finger dent slowly rises partway back, and the loaf feels airy.

  7. Heat the oven

    At least 45 minutes, overlapping the last rise

    Put the heavy lidded pots on the middle rack. Heat the oven and pots thoroughly to 245°C.

    Two covered cast-iron pots heat on the middle oven rack.
    Heat the covered Dutch ovens thoroughly while the loaves finish proofing.

    Ready when: The oven and pot are fully hot.

  8. Bake

    30 min covered + 20–25 min uncovered

    Turn each loaf out onto a lightly floured counter and carefully lower it folded-side UP into a hot pot. Bake with the lid on for 30 minutes, then remove the lid to finish baking. Use dry oven mitts and keep your hands clear of the hot metal.

    Using dry oven mitts, the baker lifts a lid to reveal a naturally split finely flecked wheat and wholegrain loaf, with a second covered pot nearby.
    Use dry mitts to remove the lid after the covered bake, then finish uncovered until the crust is deep brown.

    Ready when: A deep brown crust; start checking 15 min after removing the lid.

  9. Let it cool

    At least 20 minutes; longer for cleaner slices

    Take the loaves out of the pots and leave them on a rack to cool before slicing.

    One whole finely flecked wheat and wholegrain loaf and both halves of a second cool on a raised rack beside the baker.
    Cool the loaves on a rack before cutting so the crumb can set without tearing.

    Ready when: Most steam has escaped and the inside no longer tears when sliced.

What can go wrong, and how can I fix it?

What you noticeLikely causeWhat to do
Dough is slow to expandCool dough or weak levain.Keep covered in a mildly warmer spot; wait for the volume cue. Confirm the starter is vigorous; log dough and room temperatures.
Loaf spreads or collapsesFermentation went too far or shaping left little tension.Handle gently and bake promptly; expect a lower loaf. Use the volume cue; shape with surface tension and shorten the next warm hold.
Sticky crumb when slicedThe loaf was cut warm or insufficiently baked.Let it cool fully before judging. Bake to an even deep crust colour and allow a longer cooling rest.
Useful recipe notes

Formula totals describe the final dough, not all flour used for feeding. Use only the stated levain portion. An established culture at 80% hydration with an 80:20 white-to-whole-wheat flour blend maintains that composition. After a change of feed, traces of the previous flour blend and hydration remain.

Keep unused levain separately for the next feeding; do not return salted dough to the starter. For one Dutch oven, chill the waiting loaf and reheat the empty pot for 5 minutes before the second bake.
Below 21°C, allow extra time. Keep the 216 g levain portion: adding more changes the flour and water totals.

See the detailed method and ratios in , or follow ingredients through the .

Ingredient proportions & recipe details

Overnight white and whole-wheat sourdough at a glance

Makes
2 loaves
Heat
245°C
Baking time
30 min covered + 20–25 min uncovered
Dough hydration
78%
Prefermented flour
12% of total flour
Bulk fermentation
3–4 sets before bed; total bulk 12–15 h · Nearly 3× starting volume; possibly less in a cool kitchen.
How do the ingredient proportions compare?

Core dough totals include the flour and water in the portion of starter or preferment used. Do not add them again. Toppings, fillings and dusting flour are separate.

Formula componentGramsFlour = 100%
Total flour1000 g100%
Total water780 g78%
Salt22 g2.2%
Instant yeast0 g0%

75% whole-wheat bread with sourdough starter

Makes
2 loaves
Heat
245°C
Baking time
30 min covered + about 20 min uncovered

Preheat covered pots for at least 45 min. Check the crust after 15 min uncovered.

Hybrid levain bread

75% whole-wheat bread with sourdough starter

A high whole-wheat loaf with more water and slightly less yeast than the country loaf.

Method

  1. 01 · Feed

    6–8 hours

    Use: A

    Keep only 100 g mature levain. Mix in the feed flour and water; cover at room temperature.

    Ready when: Bubbly, expanded and webbed inside; pleasantly fermented.

    Baker stirs a thick, softly flecked levain in a clear container.
    01 FeedMix the retained starter with its feed flour and water, then cover and let it expand.
  2. 02 · Autolyse

    20–30 minutes

    Use: B flour + B water

    Near the end of the feed, mix the final-dough flours and water only. Cover. Keep salt, yeast and levain aside.

    Ready when: All flour moistened; no dry pockets.

    Seen from the side, the baker mixes rough grain-rich whole-wheat dough by hand in a clear rectangular tub.
    02 AutolyseMoisten all the final-dough flour with the final water, then cover and rest.
  3. 03 · Mix

    3–6 minutes

    Use: Autolysed dough + remaining B

    With a damp hand, fold edges over the additions; pinch through the mass with thumb and forefinger 5–6 times. Alternate pinching and folding until uniformly mixed, about 3–6 minutes. Rest briefly, then fold again.

    Ready when: Uniform dough, no streaks of levain or salt.

    From an elevated angle, the baker pinches and folds cohesive grain-rich whole-wheat dough in a clear tub.
    03 MixUse a damp hand to pinch and fold the levain, salt and any listed yeast evenly into the dough.
  4. 04 · Fold & bulk

    2–3 sets in first 1½–2 h; total bulk about 5 hours

    Use: Mixed dough

    With a damp hand, stretch one edge until resistance, then fold across the dough. Repeat around 4–5 sides; turn the bundle seam down. Cover between sets; let it relax before the next set. Do not tear it or fold during the last bulk hour.

    Ready when: About 2½× starting volume, aerated and elastic.

    The baker lifts a short elastic flap of grain-rich whole-wheat dough, ready to fold it back across the mass.
    04 Fold & bulkLift an edge gently, fold it across, then let the dough relax before the next set.
  5. 05 · Divide & shape

    After bulk

    Use: Fermented dough

    Gently tip onto a lightly floured counter and divide equally. Fold each perimeter inward; turn seam down. Cup and drag on an unfloured patch, rotating, until the surface holds tension without tearing. Place seam DOWN in floured baskets; cover.

    Ready when: Medium-tight rounds; preserve visible gas.

    The baker cups one grain-rich whole-wheat dough round with a second equally sized round beside it.
    05 Divide & shapeDivide equally and cup each piece into a smooth round, then place seam down in floured baskets.
  6. 06 · Proof

    12–13 hours

    Use: Covered baskets

    Refrigerate in closed bags overnight. Bake directly from the fridge; no warm-up is needed.

    Ready when: Expanded, aerated loaves; firm enough to lift while cold.

    The baker places a pair of bag-covered grain-rich whole-wheat dough rounds in proofing baskets into the refrigerator.
    06 ProofEnclose the baskets in closed bags and refrigerate overnight. Bake the loaves directly from the fridge.
  7. 07 · Preheat

    At least 45 minutes, overlapping final proof

    Use: Oven + covered Dutch ovens

    Put covered pots on a middle rack. Preheat thoroughly to 245°C.

    Ready when: Oven and pot fully heated.

    Two covered cast-iron pots heat on the middle oven rack.
    07 PreheatHeat the covered Dutch ovens thoroughly while the loaves finish proofing.
  8. 08 · Bake

    30 min covered + about 20 min uncovered

    Use: Proofed loaves

    Invert onto a lightly floured counter and carefully lower into hot pot seam UP. Cover for 30 minutes, then uncover to finish. Use dry oven mitts; keep skin clear of hot iron.

    Ready when: Deep brown crust; check 15 min after uncovering.

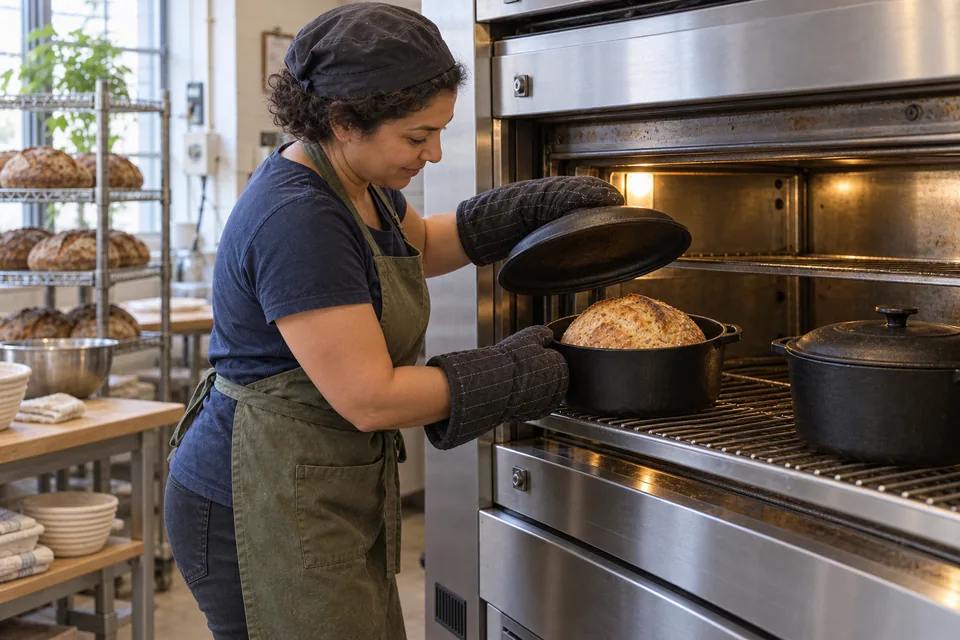
    Using dry oven mitts, the baker lifts a lid to reveal a naturally split grain-rich whole-wheat loaf, with a second covered pot nearby.
    08 BakeUse dry mitts to remove the lid after the covered bake, then finish uncovered until the crust is deep brown.
  9. 09 · Cool

    At least 20 minutes; longer for cleaner slices

    Use: Baked loaves

    Lift out of pots and cool on a rack before cutting.

    Ready when: Steam has subsided; crumb no longer tears when cut.

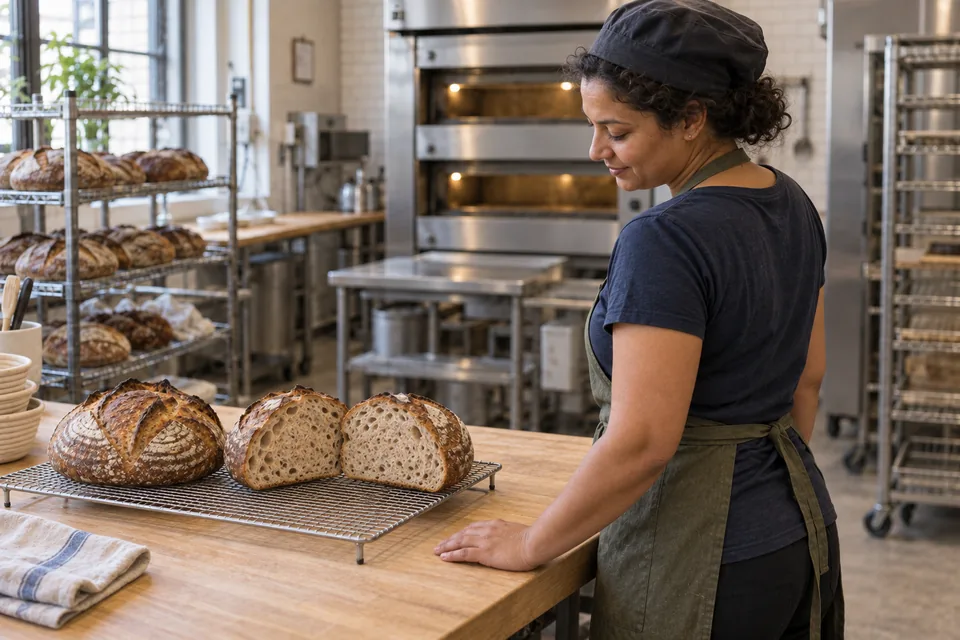
    One whole grain-rich whole-wheat loaf and both halves of a second cool on a raised rack beside the baker.
    09 CoolCool the loaves on a rack before cutting so the crumb can set without tearing.

What to look for

StageLook and feelNeeds attention
Mix & foldsSticky but cohesive dough gains height and elasticity after each fold.A puddle that never gains strength, or a dry dough tearing under a gentle stretch.
ProofUse volume and dough feel alongside the schedule. At room temperature, a poke returns slowly and partly.Immediate rebound suggests more proof; collapse or a lasting deep dent suggests excess proof.

Troubleshooting

If you seeLikely causeWhat to do nowNext time
Dough is slow to expandCool dough or weak levain.Keep covered in a mildly warmer spot; wait for the volume cue.Confirm the starter is vigorous; log dough and room temperatures.
Loaf spreads or collapsesFermentation went too far or shaping left little tension.Handle gently and bake promptly; expect a lower loaf.Use the volume cue; shape with surface tension and shorten the next warm hold.
Sticky crumb when slicedThe loaf was cut warm or insufficiently baked.Let it cool fully before judging.Bake to an even deep crust colour and allow a longer cooling rest.

Recipe notes

  • Formula totals describe the final dough, not all flour used for feeding. Use only the stated levain portion. An established culture at 80% hydration with an 80:20 white-to-whole-wheat flour blend maintains that composition. After a change of feed, traces of the previous flour blend and hydration remain.
  • Keep unused levain separately for the next feeding; do not return salted dough to the starter. For one Dutch oven, chill the waiting loaf and reheat the empty pot for 5 minutes before the second bake.
  • Expect a closer, heartier crumb than the mostly white loaves; avoid chasing an identical open texture by overproofing.
Show ingredient flow

Recipe

75% whole-wheat bread with sourdough starter

A high whole-wheat loaf with more water and slightly less yeast than the country loaf.

How do I make it?

  1. Prepare the starter

    6–8 hours

    Prepare the starter: keep only 100 g of ripe, active starter and mix in the flour and water listed for this feed. Aim for 26–27°C just after mixing, then cover and leave at room temperature. This prepared starter is the levain used later in the dough.

    Baker stirs a thick, softly flecked levain in a clear container.
    Mix the retained starter with its feed flour and water, then cover and let it expand.

    Ready when: The starter has grown, is bubbly and shows fine stretchy strands inside, with a pleasant fermented smell.

  2. Rest the flour and water

    20–30 minutes

    As the prepared starter nears readiness, mix only the flour and water listed for the final dough. Cover and let it rest, keeping the salt, yeast and prepared starter separate for now.

    Seen from the side, the baker mixes rough grain-rich whole-wheat dough by hand in a clear rectangular tub.
    Moisten all the final-dough flour with the final water, then cover and rest.

    Ready when: All the flour is wet, with no dry patches.

  3. Mix the dough

    3–6 minutes

    Add the remaining group B ingredients to the rested dough, then wet your hand and fold the outer edges over them. Pinch through the dough with your thumb and forefinger 5–6 times, alternating with folds until evenly mixed, about 3–6 minutes. Rest briefly, fold again and aim for a dough temperature of 25–26°C.

    From an elevated angle, the baker pinches and folds cohesive grain-rich whole-wheat dough in a clear tub.
    Use a damp hand to pinch and fold the levain, salt and any listed yeast evenly into the dough.

    Ready when: The dough looks even, with no streaks of starter or salt.

  4. Fold and let rise

    2–3 folding rounds in first 1½–2 h; total first rise about 5 hours

    Wet your hand, lift one edge of the dough just until it resists, then fold it across; work around 4–5 sides and turn the dough folded-side down. Keep it covered and let it relax between rounds of folding. Avoid tearing the dough, and leave it untouched for the last hour of this first rise.

    The baker lifts a short elastic flap of grain-rich whole-wheat dough, ready to fold it back across the mass.
    Lift an edge gently, fold it across, then let the dough relax before the next set.

    Ready when: About 2½× its starting size, airy and stretchy.

  5. Shape the loaves

    After the first rise

    Gently tip the dough onto a lightly floured counter and divide it equally. Fold each piece’s edges into the middle, turn the folded side down onto a patch without flour, then cup and gently pull it toward you while turning until the surface is firm without tearing. Put the rounds folded-side DOWN in floured rising baskets and cover, keeping as much air in the dough as possible.

    The baker cups one grain-rich whole-wheat dough round with a second equally sized round beside it.
    Divide equally and cup each piece into a smooth round, then place seam down in floured baskets.

    Ready when: Moderately firm rounds that still have air bubbles inside.

  6. Let the loaves rise

    12–13 hours

    Put the covered rising baskets in closed bags and refrigerate overnight. Bake the loaves straight from the fridge; they do not need to warm up first.

    The baker places a pair of bag-covered grain-rich whole-wheat dough rounds in proofing baskets into the refrigerator.
    Enclose the baskets in closed bags and refrigerate overnight. Bake the loaves directly from the fridge.

    Ready when: The loaves have grown and feel airy, but are firm enough to lift while cold.

  7. Heat the oven

    At least 45 minutes, overlapping the last rise

    Put the heavy lidded pots on the middle rack. Heat the oven and pots thoroughly to 245°C.

    Two covered cast-iron pots heat on the middle oven rack.
    Heat the covered Dutch ovens thoroughly while the loaves finish proofing.

    Ready when: The oven and pot are fully hot.

  8. Bake

    30 min covered + about 20 min uncovered

    Turn each loaf out onto a lightly floured counter and carefully lower it folded-side UP into a hot pot. Bake with the lid on for 30 minutes, then remove the lid to finish baking. Use dry oven mitts and keep your hands clear of the hot metal.

    Using dry oven mitts, the baker lifts a lid to reveal a naturally split grain-rich whole-wheat loaf, with a second covered pot nearby.
    Use dry mitts to remove the lid after the covered bake, then finish uncovered until the crust is deep brown.

    Ready when: A deep brown crust; start checking 15 min after removing the lid.

  9. Let it cool

    At least 20 minutes; longer for cleaner slices

    Take the loaves out of the pots and leave them on a rack to cool before slicing.

    One whole grain-rich whole-wheat loaf and both halves of a second cool on a raised rack beside the baker.
    Cool the loaves on a rack before cutting so the crumb can set without tearing.

    Ready when: Most steam has escaped and the inside no longer tears when sliced.

What can go wrong, and how can I fix it?

What you noticeLikely causeWhat to do
Dough is slow to expandCool dough or weak levain.Keep covered in a mildly warmer spot; wait for the volume cue. Confirm the starter is vigorous; log dough and room temperatures.
Loaf spreads or collapsesFermentation went too far or shaping left little tension.Handle gently and bake promptly; expect a lower loaf. Use the volume cue; shape with surface tension and shorten the next warm hold.
Sticky crumb when slicedThe loaf was cut warm or insufficiently baked.Let it cool fully before judging. Bake to an even deep crust colour and allow a longer cooling rest.
Useful recipe notes

Formula totals describe the final dough, not all flour used for feeding. Use only the stated levain portion. An established culture at 80% hydration with an 80:20 white-to-whole-wheat flour blend maintains that composition. After a change of feed, traces of the previous flour blend and hydration remain.

Keep unused levain separately for the next feeding; do not return salted dough to the starter. For one Dutch oven, chill the waiting loaf and reheat the empty pot for 5 minutes before the second bake.
Expect a closer, heartier crumb than the mostly white loaves; avoid chasing an identical open texture by overproofing.

See the detailed method and ratios in , or follow ingredients through the .

Ingredient proportions & recipe details

75% whole-wheat bread with sourdough starter at a glance

Makes
2 loaves
Heat
245°C
Baking time
30 min covered + about 20 min uncovered
Dough hydration
82%
Prefermented flour
20% of total flour
Leavening
Starter + yeast
Bulk fermentation
2–3 sets in first 1½–2 h; total bulk about 5 hours · About 2½× starting volume, aerated and elastic.
How do the ingredient proportions compare?

Core dough totals include the flour and water in the portion of starter or preferment used. Do not add them again. Toppings, fillings and dusting flour are separate.

Formula componentGramsFlour = 100%
Total flour1000 g100%
Total water820 g82%
Salt21 g2.1%
Instant yeast1.8 g0.2%

Bran-crusted sourdough bread

Makes
2 loaves
Heat
245°C
Baking time
30 min covered + about 20 min uncovered

Preheat covered pots for at least 45 min. Check the crust after 15 min uncovered.

Hybrid levain bread

Bran-crusted sourdough bread

Wheat germ in the dough and bran around the crust.

Method

  1. 01 · Feed

    6–8 hours

    Use: A

    Keep only 100 g mature levain. Mix in the feed flour and water; cover at room temperature.

    Ready when: Bubbly, expanded and webbed inside; pleasantly fermented.

    Baker stirs a thick, softly flecked levain in a clear container.
    01 FeedMix the retained starter with its feed flour and water, then cover and let it expand.
  2. 02 · Autolyse

    20–30 minutes

    Use: B flour + B water

    Mix the final flour, 30 g wheat germ and final water. Cover; leave salt, yeast and levain aside.

    Ready when: All flour moistened; no dry pockets.

    Seen from the side, the baker mixes rough pale wheat dough by hand in a clear rectangular tub.
    02 AutolyseMix the final flour, wheat germ and final water until fully moistened, then cover and rest.
  3. 03 · Mix

    3–6 minutes

    Use: Autolysed dough + remaining B

    With a damp hand, fold edges over the additions; pinch through the mass with thumb and forefinger 5–6 times. Alternate pinching and folding until uniformly mixed, about 3–6 minutes. Rest briefly, then fold again.

    Ready when: Uniform dough, no streaks of levain or salt.

    From an elevated angle, the baker pinches and folds cohesive pale wheat dough in a clear tub.
    03 MixUse a damp hand to pinch and fold the levain, salt and any listed yeast evenly into the dough.
  4. 04 · Fold & bulk

    3–4 sets in first 1½–2 h; total bulk about 5 hours

    Use: Mixed dough

    With a damp hand, stretch one edge until resistance, then fold across the dough. Repeat around 4–5 sides; turn the bundle seam down. Cover between sets; let it relax before the next set. Do not tear it or fold during the last bulk hour.

    Ready when: About 2½× starting volume, aerated and elastic.

    The baker lifts a short elastic flap of pale wheat dough, ready to fold it back across the mass.
    04 Fold & bulkLift an edge gently, fold it across, then let the dough relax before the next set.
  5. 05 · Divide & shape

    After bulk

    Use: Fermented dough

    Gently tip onto a lightly floured counter and divide equally. Fold each perimeter inward; turn seam down. Cup and drag on an unfloured patch, rotating, until the surface holds tension without tearing. Sprinkle 10 g bran into each lightly floured basket. Place seam DOWN in these baskets; cover.

    Ready when: Medium-tight rounds; preserve visible gas.

    Fine wheat bran coats the proofing baskets before the two rounds go in.
    05 Divide & shapeAdd a thin layer of bran to each lightly floured basket, then place the shaped rounds seam down.
  6. 06 · Proof

    12–14 hours

    Use: Covered baskets

    Refrigerate in closed bags overnight. Bake directly from the fridge; no warm-up is needed.

    Ready when: Expanded, aerated loaves; firm enough to lift while cold.

    The baker moves two bag-covered dough rounds in bran-lined baskets into the refrigerator.
    06 ProofEnclose the baskets in closed bags and refrigerate overnight. Bake the loaves directly from the fridge.
  7. 07 · Preheat

    At least 45 minutes, overlapping final proof

    Use: Oven + covered Dutch ovens

    Put covered pots on a middle rack. Preheat thoroughly to 245°C.

    Ready when: Oven and pot fully heated.

    Two covered cast-iron pots heat on the middle oven rack.
    07 PreheatHeat the covered Dutch ovens thoroughly while the loaves finish proofing.
  8. 08 · Bake

    30 min covered + about 20 min uncovered

    Use: Proofed loaves

    Invert onto a lightly floured counter and carefully lower into hot pot seam UP. Cover for 30 minutes, then uncover to finish. Use dry oven mitts; keep skin clear of hot iron.

    Ready when: Deep brown crust; check 15 min after uncovering.

    Using dry oven mitts, the baker lifts a lid to reveal a naturally split bran-coated loaf, with a second covered pot nearby.
    08 BakeUse dry mitts to remove the lid after the covered bake, then finish uncovered until the crust is deep brown.
  9. 09 · Cool

    At least 20 minutes; longer for cleaner slices

    Use: Baked loaves

    Lift out of pots and cool on a rack before cutting.

    Ready when: Steam has subsided; crumb no longer tears when cut.

    One whole bran-coated loaf and both halves of a second cool on a raised rack beside the baker.
    09 CoolCool the loaves on a rack before cutting so the crumb can set without tearing.

What to look for

StageLook and feelNeeds attention
Mix & foldsSticky but cohesive dough gains height and elasticity after each fold.A puddle that never gains strength, or a dry dough tearing under a gentle stretch.
ProofUse volume and dough feel alongside the schedule. At room temperature, a poke returns slowly and partly.Immediate rebound suggests more proof; collapse or a lasting deep dent suggests excess proof.

Troubleshooting

If you seeLikely causeWhat to do nowNext time
Dough is slow to expandCool dough or weak levain.Keep covered in a mildly warmer spot; wait for the volume cue.Confirm the starter is vigorous; log dough and room temperatures.
Loaf spreads or collapsesFermentation went too far or shaping left little tension.Handle gently and bake promptly; expect a lower loaf.Use the volume cue; shape with surface tension and shorten the next warm hold.
Sticky crumb when slicedThe loaf was cut warm or insufficiently baked.Let it cool fully before judging.Bake to an even deep crust colour and allow a longer cooling rest.

Recipe notes

  • Formula totals describe the final dough, not all flour used for feeding. Use only the stated levain portion. An established culture at 80% hydration with an 80:20 white-to-whole-wheat flour blend maintains that composition. After a change of feed, traces of the previous flour blend and hydration remain.
  • Keep unused levain separately for the next feeding; do not return salted dough to the starter. For one Dutch oven, chill the waiting loaf and reheat the empty pot for 5 minutes before the second bake.
Show ingredient flow

Recipe

Bran-crusted sourdough bread

Wheat germ in the dough and bran around the crust.

How do I make it?

  1. Prepare the starter

    6–8 hours

    Prepare the starter: keep only 100 g of ripe, active starter and mix in the flour and water listed for this feed. Aim for 26–27°C just after mixing, then cover and leave at room temperature. This prepared starter is the levain used later in the dough.

    Baker stirs a thick, softly flecked levain in a clear container.
    Mix the retained starter with its feed flour and water, then cover and let it expand.

    Ready when: The starter has grown, is bubbly and shows fine stretchy strands inside, with a pleasant fermented smell.

  2. Rest the flour and water

    20–30 minutes

    Mix the flour and water listed for the final dough with the 30 g wheat germ. Cover and let it rest, keeping the salt, yeast and prepared starter separate for now.

    Seen from the side, the baker mixes rough pale wheat dough by hand in a clear rectangular tub.
    Mix the final flour, wheat germ and final water until fully moistened, then cover and rest.

    Ready when: All the flour is wet, with no dry patches.

  3. Mix the dough

    3–6 minutes

    Add the remaining group B ingredients to the rested dough, then wet your hand and fold the outer edges over them. Pinch through the dough with your thumb and forefinger 5–6 times, alternating with folds until evenly mixed, about 3–6 minutes. Rest briefly, fold again and aim for a dough temperature of 25–26°C.

    From an elevated angle, the baker pinches and folds cohesive pale wheat dough in a clear tub.
    Use a damp hand to pinch and fold the levain, salt and any listed yeast evenly into the dough.

    Ready when: The dough looks even, with no streaks of starter or salt.

  4. Fold and let rise

    3–4 folding rounds in first 1½–2 h; total first rise about 5 hours

    Wet your hand, lift one edge of the dough just until it resists, then fold it across; work around 4–5 sides and turn the dough folded-side down. Keep it covered and let it relax between rounds of folding. Avoid tearing the dough, and leave it untouched for the last hour of this first rise.

    The baker lifts a short elastic flap of pale wheat dough, ready to fold it back across the mass.
    Lift an edge gently, fold it across, then let the dough relax before the next set.

    Ready when: About 2½× its starting size, airy and stretchy.

  5. Shape the loaves

    After the first rise

    Gently tip the dough onto a lightly floured counter and divide it equally. Fold each piece’s edges into the middle, turn folded-side down onto a patch without flour, then cup and gently pull it toward you while turning until the surface is firm without tearing. Sprinkle 10 g bran into each lightly floured rising basket, put the loaves in folded-side DOWN and cover.

    Fine wheat bran coats the proofing baskets before the two rounds go in.
    Add a thin layer of bran to each lightly floured basket, then place the shaped rounds seam down.

    Ready when: Moderately firm rounds that still have air bubbles inside.

  6. Let the loaves rise

    12–14 hours

    Put the covered rising baskets in closed bags and refrigerate overnight. Bake the loaves straight from the fridge; they do not need to warm up first.

    The baker moves two bag-covered dough rounds in bran-lined baskets into the refrigerator.
    Enclose the baskets in closed bags and refrigerate overnight. Bake the loaves directly from the fridge.

    Ready when: The loaves have grown and feel airy, but are firm enough to lift while cold.

  7. Heat the oven

    At least 45 minutes, overlapping the last rise

    Put the heavy lidded pots on the middle rack. Heat the oven and pots thoroughly to 245°C.

    Two covered cast-iron pots heat on the middle oven rack.
    Heat the covered Dutch ovens thoroughly while the loaves finish proofing.

    Ready when: The oven and pot are fully hot.

  8. Bake

    30 min covered + about 20 min uncovered

    Turn each loaf out onto a lightly floured counter and carefully lower it folded-side UP into a hot pot. Bake with the lid on for 30 minutes, then remove the lid to finish baking. Use dry oven mitts and keep your hands clear of the hot metal.

    Using dry oven mitts, the baker lifts a lid to reveal a naturally split bran-coated loaf, with a second covered pot nearby.
    Use dry mitts to remove the lid after the covered bake, then finish uncovered until the crust is deep brown.

    Ready when: A deep brown crust; start checking 15 min after removing the lid.

  9. Let it cool

    At least 20 minutes; longer for cleaner slices

    Take the loaves out of the pots and leave them on a rack to cool before slicing.

    One whole bran-coated loaf and both halves of a second cool on a raised rack beside the baker.
    Cool the loaves on a rack before cutting so the crumb can set without tearing.

    Ready when: Most steam has escaped and the inside no longer tears when sliced.

What can go wrong, and how can I fix it?

What you noticeLikely causeWhat to do
Dough is slow to expandCool dough or weak levain.Keep covered in a mildly warmer spot; wait for the volume cue. Confirm the starter is vigorous; log dough and room temperatures.
Loaf spreads or collapsesFermentation went too far or shaping left little tension.Handle gently and bake promptly; expect a lower loaf. Use the volume cue; shape with surface tension and shorten the next warm hold.
Sticky crumb when slicedThe loaf was cut warm or insufficiently baked.Let it cool fully before judging. Bake to an even deep crust colour and allow a longer cooling rest.
Useful recipe notes

Formula totals describe the final dough, not all flour used for feeding. Use only the stated levain portion. An established culture at 80% hydration with an 80:20 white-to-whole-wheat flour blend maintains that composition. After a change of feed, traces of the previous flour blend and hydration remain.

Keep unused levain separately for the next feeding; do not return salted dough to the starter. For one Dutch oven, chill the waiting loaf and reheat the empty pot for 5 minutes before the second bake.
See the detailed method and ratios in , or follow ingredients through the .

Ingredient proportions & recipe details

Bran-crusted sourdough bread at a glance

Makes
2 loaves
Heat
245°C
Baking time
30 min covered + about 20 min uncovered
Dough hydration
78%
Prefermented flour
20% of total flour
Leavening
Starter + yeast
Bulk fermentation
3–4 sets in first 1½–2 h; total bulk about 5 hours · About 2½× starting volume, aerated and elastic.
How do the ingredient proportions compare?

Core dough totals include the flour and water in the portion of starter or preferment used. Do not add them again. Toppings, fillings and dusting flour are separate.

Formula componentGramsFlour = 100%
Total flour1000 g100%
Total water780 g78%
Salt21 g2.1%
Instant yeast2 g0.2%

Walnut sourdough bread

Makes
2 loaves
Heat
245°C bread; 205°C walnuts
Baking time
Bread: 30 min covered + about 20 min uncovered; walnuts: about 12 min

Roast walnuts separately and cool completely. Preheat covered pots for at least 45 min; check bread after 15 min uncovered.

Hybrid levain bread

Walnut sourdough bread

Roasted walnuts added after the dough is mixed.

Method

  1. 01 · Feed

    6–8 hours

    Use: A

    Keep only 100 g mature levain. Mix in the feed flour and water; cover at room temperature.

    Ready when: Bubbly, expanded and webbed inside; pleasantly fermented.

    Baker stirs a thick, softly flecked levain in a clear container.
    01 FeedMix the retained starter with its feed flour and water, then cover and let it expand.
  2. 02 · Roast nuts

    About 12 minutes; start ≥1 h before autolyse

    Use: C

    Roast walnuts at 205°C; cool completely before the dough mix.

    Ready when: Fragrant and browned, without bitterness or scorched edges.

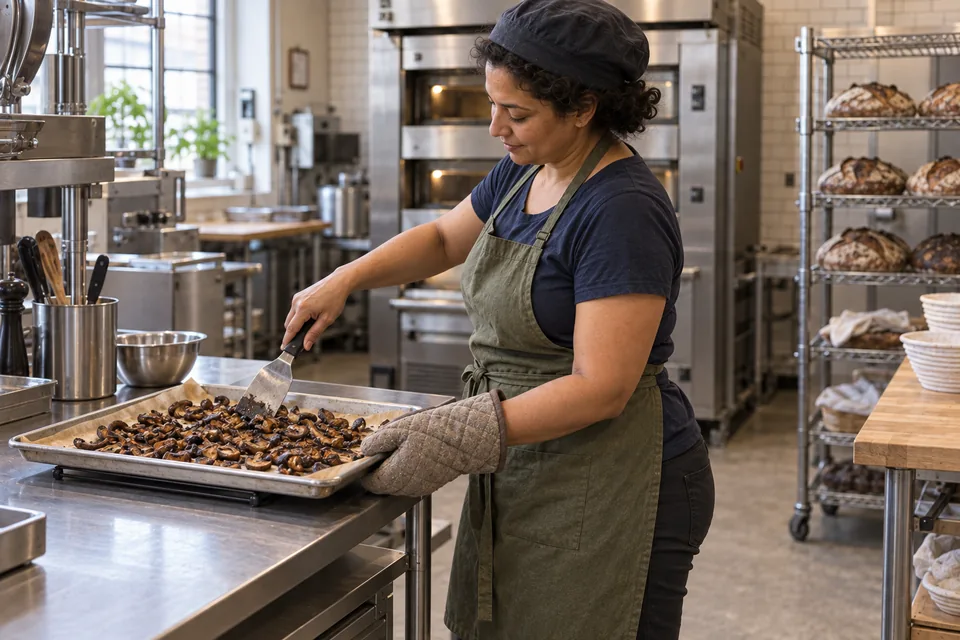
    Walnut halves and pieces are roasted until browned, then left to cool.
    02 Roast nutsRoast the walnuts until browned and fragrant, then cool them completely before adding.
  3. 03 · Autolyse

    20–30 minutes

    Use: B flour + B water

    Near the end of the feed, mix the final-dough flours and water only. Cover. Keep salt, yeast and levain aside.

    Ready when: All flour moistened; no dry pockets.

    Seen from the side, the baker mixes rough pale wheat dough by hand in a clear rectangular tub.
    03 AutolyseMoisten all the final-dough flour with the final water, then cover and rest.
  4. 04 · Mix

    3–6 minutes

    Use: Autolysed dough + remaining B

    With a damp hand, fold edges over the additions; pinch through the mass with thumb and forefinger 5–6 times. Alternate pinching and folding until uniformly mixed, about 3–6 minutes. Rest briefly, then fold again.

    Ready when: Uniform dough, no streaks of levain or salt.

    From an elevated angle, the baker pinches and folds cohesive pale wheat dough in a clear tub.
    04 MixUse a damp hand to pinch and fold the levain, salt and any listed yeast evenly into the dough.
  5. 05 · Add walnuts

    10-minute rest, then incorporate

    Use: Mixed dough + cooled C

    Rest mixed dough 10 minutes. Scatter cooled walnuts over it; pinch and fold gently until distributed.

    Ready when: Even distribution without large torn areas.

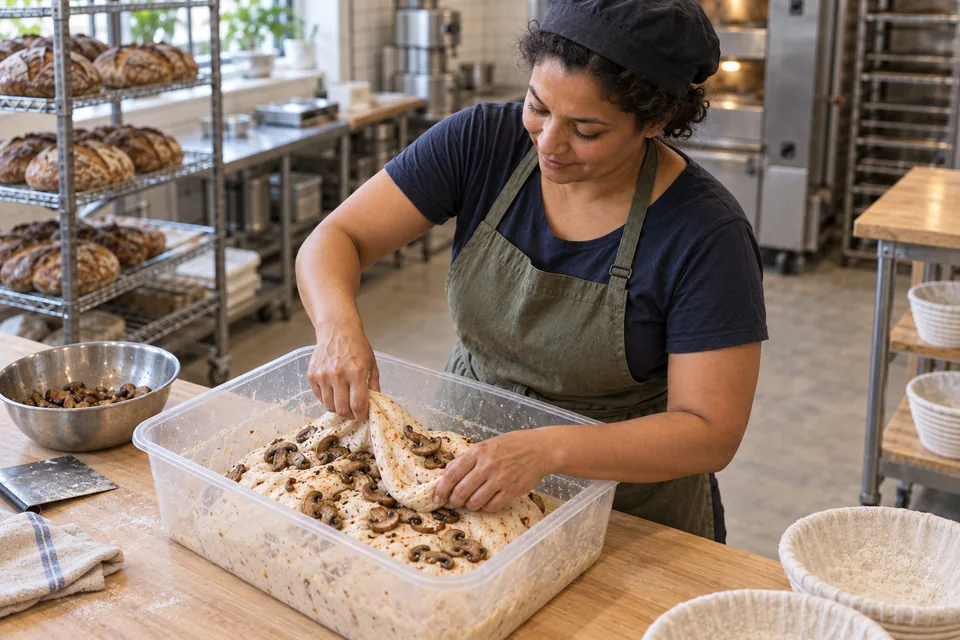
    Cooled walnut pieces are scattered over the soft dough before folding in.
    05 Add walnutsScatter the cooled walnuts over the rested dough, then pinch and fold gently to distribute them.
  6. 06 · Fold & bulk

    3 sets in first 1½–2 h; total bulk about 5 hours

    Use: Mixed dough

    With a damp hand, stretch one edge until resistance, then fold across the dough. Repeat around 4–5 sides; turn the bundle seam down. Cover between sets; let it relax before the next set. Do not tear it or fold during the last bulk hour.

    Ready when: About 2½× starting volume, aerated and elastic.

    The baker lifts a short elastic flap of walnut-studded dough, ready to fold it back across the mass.
    06 Fold & bulkLift an edge gently, fold it across, then let the dough relax before the next set.
  7. 07 · Divide & shape

    After bulk

    Use: Fermented dough

    Gently tip onto a lightly floured counter and divide equally. Fold each perimeter inward; turn seam down. Cup and drag on an unfloured patch, rotating, until the surface holds tension without tearing. Place seam DOWN in floured baskets; cover.

    Ready when: Medium-tight rounds; preserve visible gas.

    The baker cups one walnut-studded dough round with a second equally sized round beside it.
    07 Divide & shapeDivide equally and cup each piece into a smooth round, then place seam down in floured baskets.
  8. 08 · Proof

    12–14 hours

    Use: Covered baskets

    Refrigerate in closed bags overnight. Bake directly from the fridge; no warm-up is needed.

    Ready when: Expanded, aerated loaves; firm enough to lift while cold.

    The baker places a pair of bag-covered walnut-studded dough rounds in proofing baskets into the refrigerator.
    08 ProofEnclose the baskets in closed bags and refrigerate overnight. Bake the loaves directly from the fridge.
  9. 09 · Preheat

    At least 45 minutes, overlapping final proof

    Use: Oven + covered Dutch ovens

    Put covered pots on a middle rack. Preheat thoroughly to 245°C.

    Ready when: Oven and pot fully heated.

    Two covered cast-iron pots heat on the middle oven rack.
    09 PreheatHeat the covered Dutch ovens thoroughly while the loaves finish proofing.
  10. 10 · Bake

    30 min covered + about 20 min uncovered

    Use: Proofed loaves

    Invert onto a lightly floured counter and carefully lower into hot pot seam UP. Cover for 30 minutes, then uncover to finish. Use dry oven mitts; keep skin clear of hot iron.

    Ready when: Deep brown crust; check 15 min after uncovering.

    Using dry oven mitts, the baker lifts a lid to reveal a naturally split walnut-studded loaf, with a second covered pot nearby.
    10 BakeUse dry mitts to remove the lid after the covered bake, then finish uncovered until the crust is deep brown.
  11. 11 · Cool

    At least 20 minutes; longer for cleaner slices

    Use: Baked loaves

    Lift out of pots and cool on a rack before cutting.

    Ready when: Steam has subsided; crumb no longer tears when cut.

    One whole walnut-studded loaf and both halves of a second cool on a raised rack beside the baker.
    11 CoolCool the loaves on a rack before cutting so the crumb can set without tearing.

What to look for

StageLook and feelNeeds attention
Mix & foldsSticky but cohesive dough gains height and elasticity after each fold.A puddle that never gains strength, or a dry dough tearing under a gentle stretch.
ProofUse volume and dough feel alongside the schedule. At room temperature, a poke returns slowly and partly.Immediate rebound suggests more proof; collapse or a lasting deep dent suggests excess proof.

Troubleshooting

If you seeLikely causeWhat to do nowNext time
Dough is slow to expandCool dough or weak levain.Keep covered in a mildly warmer spot; wait for the volume cue.Confirm the starter is vigorous; log dough and room temperatures.
Loaf spreads or collapsesFermentation went too far or shaping left little tension.Handle gently and bake promptly; expect a lower loaf.Use the volume cue; shape with surface tension and shorten the next warm hold.
Sticky crumb when slicedThe loaf was cut warm or insufficiently baked.Let it cool fully before judging.Bake to an even deep crust colour and allow a longer cooling rest.

Recipe notes

  • Formula totals describe the final dough, not all flour used for feeding. Use only the stated levain portion. An established culture at 80% hydration with an 80:20 white-to-whole-wheat flour blend maintains that composition. After a change of feed, traces of the previous flour blend and hydration remain.
  • Keep unused levain separately for the next feeding; do not return salted dough to the starter. For one Dutch oven, chill the waiting loaf and reheat the empty pot for 5 minutes before the second bake.
Show ingredient flow

Recipe

Walnut sourdough bread

Roasted walnuts added after the dough is mixed.

How do I make it?

  1. Prepare the starter

    6–8 hours

    Prepare the starter: keep only 100 g of ripe, active starter and mix in the flour and water listed for this feed. Aim for 26–27°C just after mixing, then cover and leave at room temperature. This prepared starter is the levain used later in the dough.

    Baker stirs a thick, softly flecked levain in a clear container.
    Mix the retained starter with its feed flour and water, then cover and let it expand.

    Ready when: The starter has grown, is bubbly and shows fine stretchy strands inside, with a pleasant fermented smell.

  2. Roast and cool the walnuts

    About 12 minutes; start ≥1 h before autolyse

    Roast the walnuts at 205°C. Let them cool completely before mixing the dough.

    Walnut halves and pieces are roasted until browned, then left to cool.
    Roast the walnuts until browned and fragrant, then cool them completely before adding.

    Ready when: The walnuts smell toasted and are browned, without burnt edges or bitterness.

  3. Rest the flour and water

    20–30 minutes

    As the prepared starter nears readiness, mix only the flour and water listed for the final dough. Cover and let it rest, keeping the salt, yeast and prepared starter separate for now.

    Seen from the side, the baker mixes rough pale wheat dough by hand in a clear rectangular tub.
    Moisten all the final-dough flour with the final water, then cover and rest.

    Ready when: All the flour is wet, with no dry patches.

  4. Mix the dough

    3–6 minutes

    Add the remaining group B ingredients to the rested dough, then wet your hand and fold the outer edges over them. Pinch through the dough with your thumb and forefinger 5–6 times, alternating with folds until evenly mixed, about 3–6 minutes. Rest briefly, fold again and aim for a dough temperature of 25–26°C.

    From an elevated angle, the baker pinches and folds cohesive pale wheat dough in a clear tub.
    Use a damp hand to pinch and fold the levain, salt and any listed yeast evenly into the dough.

    Ready when: The dough looks even, with no streaks of starter or salt.

  5. Mix in the walnuts

    10-minute rest, then incorporate

    Let the mixed dough rest for 10 minutes. Scatter the cooled walnuts over it, then gently pinch through and fold the dough until the nuts are spread throughout.

    Cooled walnut pieces are scattered over the soft dough before folding in.
    Scatter the cooled walnuts over the rested dough, then pinch and fold gently to distribute them.

    Ready when: The nuts are spread evenly, without large tears in the dough.

  6. Fold and let rise

    3 folding rounds in first 1½–2 h; total first rise about 5 hours

    Wet your hand, lift one edge of the dough just until it resists, then fold it across; work around 4–5 sides and turn the dough folded-side down. Keep it covered and let it relax between rounds of folding. Avoid tearing the dough, and leave it untouched for the last hour of this first rise.

    The baker lifts a short elastic flap of walnut-studded dough, ready to fold it back across the mass.
    Lift an edge gently, fold it across, then let the dough relax before the next set.

    Ready when: About 2½× its starting size, airy and stretchy.

  7. Shape the loaves

    After the first rise

    Gently tip the dough onto a lightly floured counter and divide it equally. Fold each piece’s edges into the middle, turn the folded side down onto a patch without flour, then cup and gently pull it toward you while turning until the surface is firm without tearing. Put the rounds folded-side DOWN in floured rising baskets and cover, keeping as much air in the dough as possible.

    The baker cups one walnut-studded dough round with a second equally sized round beside it.
    Divide equally and cup each piece into a smooth round, then place seam down in floured baskets.

    Ready when: Moderately firm rounds that still have air bubbles inside.

  8. Let the loaves rise

    12–14 hours

    Put the covered rising baskets in closed bags and refrigerate overnight. Bake the loaves straight from the fridge; they do not need to warm up first.

    The baker places a pair of bag-covered walnut-studded dough rounds in proofing baskets into the refrigerator.
    Enclose the baskets in closed bags and refrigerate overnight. Bake the loaves directly from the fridge.

    Ready when: The loaves have grown and feel airy, but are firm enough to lift while cold.

  9. Heat the oven

    At least 45 minutes, overlapping the last rise

    Put the heavy lidded pots on the middle rack. Heat the oven and pots thoroughly to 245°C.

    Two covered cast-iron pots heat on the middle oven rack.
    Heat the covered Dutch ovens thoroughly while the loaves finish proofing.

    Ready when: The oven and pot are fully hot.

  10. Bake

    30 min covered + about 20 min uncovered

    Turn each loaf out onto a lightly floured counter and carefully lower it folded-side UP into a hot pot. Bake with the lid on for 30 minutes, then remove the lid to finish baking. Use dry oven mitts and keep your hands clear of the hot metal.

    Using dry oven mitts, the baker lifts a lid to reveal a naturally split walnut-studded loaf, with a second covered pot nearby.
    Use dry mitts to remove the lid after the covered bake, then finish uncovered until the crust is deep brown.

    Ready when: A deep brown crust; start checking 15 min after removing the lid.

  11. Let it cool

    At least 20 minutes; longer for cleaner slices

    Take the loaves out of the pots and leave them on a rack to cool before slicing.

    One whole walnut-studded loaf and both halves of a second cool on a raised rack beside the baker.
    Cool the loaves on a rack before cutting so the crumb can set without tearing.

    Ready when: Most steam has escaped and the inside no longer tears when sliced.

What can go wrong, and how can I fix it?

What you noticeLikely causeWhat to do
Dough is slow to expandCool dough or weak levain.Keep covered in a mildly warmer spot; wait for the volume cue. Confirm the starter is vigorous; log dough and room temperatures.
Loaf spreads or collapsesFermentation went too far or shaping left little tension.Handle gently and bake promptly; expect a lower loaf. Use the volume cue; shape with surface tension and shorten the next warm hold.
Sticky crumb when slicedThe loaf was cut warm or insufficiently baked.Let it cool fully before judging. Bake to an even deep crust colour and allow a longer cooling rest.
Useful recipe notes

Formula totals describe the final dough, not all flour used for feeding. Use only the stated levain portion. An established culture at 80% hydration with an 80:20 white-to-whole-wheat flour blend maintains that composition. After a change of feed, traces of the previous flour blend and hydration remain.

Keep unused levain separately for the next feeding; do not return salted dough to the starter. For one Dutch oven, chill the waiting loaf and reheat the empty pot for 5 minutes before the second bake.
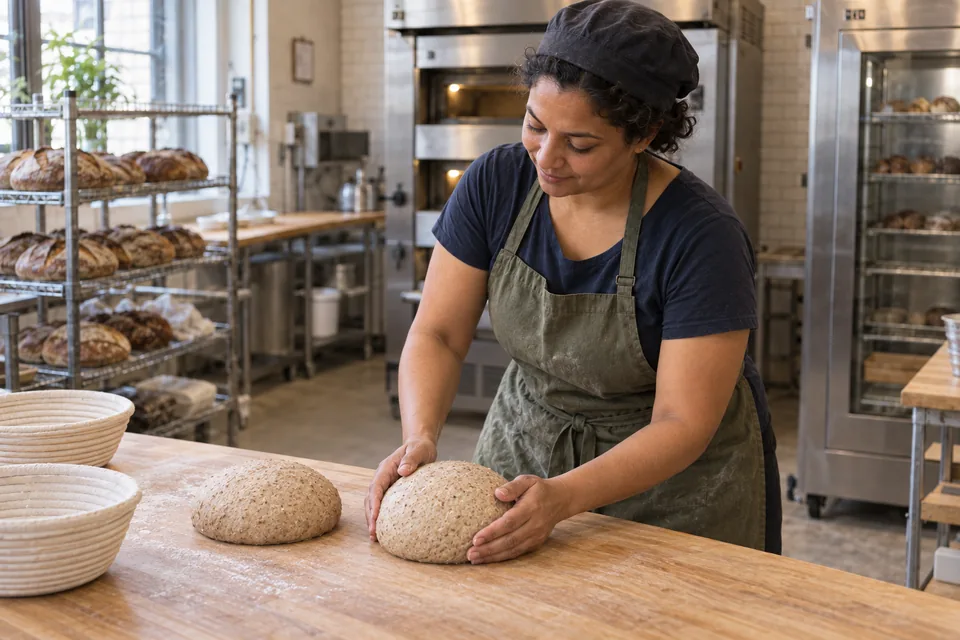
See the detailed method and ratios in , or follow ingredients through the .

Ingredient proportions & recipe details

Walnut sourdough bread at a glance

Makes
2 loaves
Heat
245°C bread; 205°C walnuts
Baking time
Bread: 30 min covered + about 20 min uncovered; walnuts: about 12 min
Dough hydration
78%
Prefermented flour
20% of total flour
Leavening
Starter + yeast
Bulk fermentation
3 sets in first 1½–2 h; total bulk about 5 hours · About 2½× starting volume, aerated and elastic.
How do the ingredient proportions compare?

Core dough totals include the flour and water in the portion of starter or preferment used. Do not add them again. Toppings, fillings and dusting flour are separate.

Formula componentGramsFlour = 100%
Total flour1000 g100%
Total water780 g78%
Salt22 g2.2%
Instant yeast2 g0.2%

Wheat bread with light rye

Makes
2 loaves
Heat
245°C
Baking time
30 min covered + about 20 min uncovered

Preheat covered pots for at least 45 min. Check the crust after 15 min uncovered.

Hybrid levain bread

Wheat bread with light rye

White wheat, whole wheat and light rye combined with a cold overnight proof.

Method

  1. 01 · Feed

    6–8 hours

    Use: A

    Keep only 100 g mature levain. Mix in the feed flour and water; cover at room temperature.

    Ready when: Bubbly, expanded and webbed inside; pleasantly fermented.

    Baker stirs a thick, softly flecked levain in a clear container.
    01 FeedMix the retained starter with its feed flour and water, then cover and let it expand.
  2. 02 · Autolyse

    20–30 minutes

    Use: B flour + B water

    Near the end of the feed, mix the final-dough flours and water only. Cover. Keep salt, yeast and levain aside.

    Ready when: All flour moistened; no dry pockets.

    Seen from the side, the baker mixes rough pale wheat dough by hand in a clear rectangular tub.
    02 AutolyseMoisten all the final-dough flour with the final water, then cover and rest.
  3. 03 · Mix

    3–6 minutes

    Use: Autolysed dough + remaining B

    With a damp hand, fold edges over the additions; pinch through the mass with thumb and forefinger 5–6 times. Alternate pinching and folding until uniformly mixed, about 3–6 minutes. Rest briefly, then fold again.

    Ready when: Uniform dough, no streaks of levain or salt.

    From an elevated angle, the baker pinches and folds cohesive pale wheat dough in a clear tub.
    03 MixUse a damp hand to pinch and fold the levain, salt and any listed yeast evenly into the dough.
  4. 04 · Fold & bulk

    3–4 sets in first 1½–2 h; total bulk about 5 hours

    Use: Mixed dough

    With a damp hand, stretch one edge until resistance, then fold across the dough. Repeat around 4–5 sides; turn the bundle seam down. Cover between sets; let it relax before the next set. Do not tear it or fold during the last bulk hour.

    Ready when: About 2½× starting volume, aerated and elastic.

    The baker lifts a short elastic flap of pale wheat dough, ready to fold it back across the mass.
    04 Fold & bulkLift an edge gently, fold it across, then let the dough relax before the next set.
  5. 05 · Divide & shape

    15-minute preshape rest, then final shaping

    Use: Fermented dough

    Gently divide into two. Fold each piece’s perimeter inward, turn seam down and tighten by cupping and dragging. Rest 15 minutes, then shape again with the same motion. Place seam DOWN in floured baskets; cover.

    Ready when: Medium-tight rounds; preserve visible gas.

    The baker cups one pale wheat dough round with a second equally sized round beside it.
    05 Divide & shapeDivide and preshape two rounds, rest for 15 minutes, then tighten each round and place seam down in floured baskets.
  6. 06 · Proof

    about 12 hours

    Use: Covered baskets

    Refrigerate in closed bags overnight. Bake directly from the fridge; no warm-up is needed.

    Ready when: Expanded, aerated loaves; firm enough to lift while cold.

    The baker places a pair of bag-covered pale wheat dough rounds in proofing baskets into the refrigerator.
    06 ProofEnclose the baskets in closed bags and refrigerate overnight. Bake the loaves directly from the fridge.
  7. 07 · Preheat

    At least 45 minutes, overlapping final proof

    Use: Oven + covered Dutch ovens

    Put covered pots on a middle rack. Preheat thoroughly to 245°C.

    Ready when: Oven and pot fully heated.

    Two covered cast-iron pots heat on the middle oven rack.
    07 PreheatHeat the covered Dutch ovens thoroughly while the loaves finish proofing.
  8. 08 · Bake

    30 min covered + about 20 min uncovered

    Use: Proofed loaves

    Invert onto a lightly floured counter and carefully lower into hot pot seam UP. Cover for 30 minutes, then uncover to finish. Use dry oven mitts; keep skin clear of hot iron.

    Ready when: Deep brown crust; check 15 min after uncovering.

    Using dry oven mitts, the baker lifts a lid to reveal a naturally split pale wheat loaf, with a second covered pot nearby.
    08 BakeUse dry mitts to remove the lid after the covered bake, then finish uncovered until the crust is deep brown.
  9. 09 · Cool

    At least 20 minutes; longer for cleaner slices

    Use: Baked loaves

    Lift out of pots and cool on a rack before cutting.

    Ready when: Steam has subsided; crumb no longer tears when cut.

    One whole pale wheat loaf and both halves of a second cool on a raised rack beside the baker.
    09 CoolCool the loaves on a rack before cutting so the crumb can set without tearing.

What to look for

StageLook and feelNeeds attention
Mix & foldsSticky but cohesive dough gains height and elasticity after each fold.A puddle that never gains strength, or a dry dough tearing under a gentle stretch.
ProofUse volume and dough feel alongside the schedule. At room temperature, a poke returns slowly and partly.Immediate rebound suggests more proof; collapse or a lasting deep dent suggests excess proof.

Troubleshooting

If you seeLikely causeWhat to do nowNext time
Dough is slow to expandCool dough or weak levain.Keep covered in a mildly warmer spot; wait for the volume cue.Confirm the starter is vigorous; log dough and room temperatures.
Loaf spreads or collapsesFermentation went too far or shaping left little tension.Handle gently and bake promptly; expect a lower loaf.Use the volume cue; shape with surface tension and shorten the next warm hold.
Sticky crumb when slicedThe loaf was cut warm or insufficiently baked.Let it cool fully before judging.Bake to an even deep crust colour and allow a longer cooling rest.

Recipe notes

  • Formula totals describe the final dough, not all flour used for feeding. Use only the stated levain portion. An established culture at 80% hydration with an 80:20 white-to-whole-wheat flour blend maintains that composition. After a change of feed, traces of the previous flour blend and hydration remain.
  • Keep unused levain separately for the next feeding; do not return salted dough to the starter. For one Dutch oven, chill the waiting loaf and reheat the empty pot for 5 minutes before the second bake.
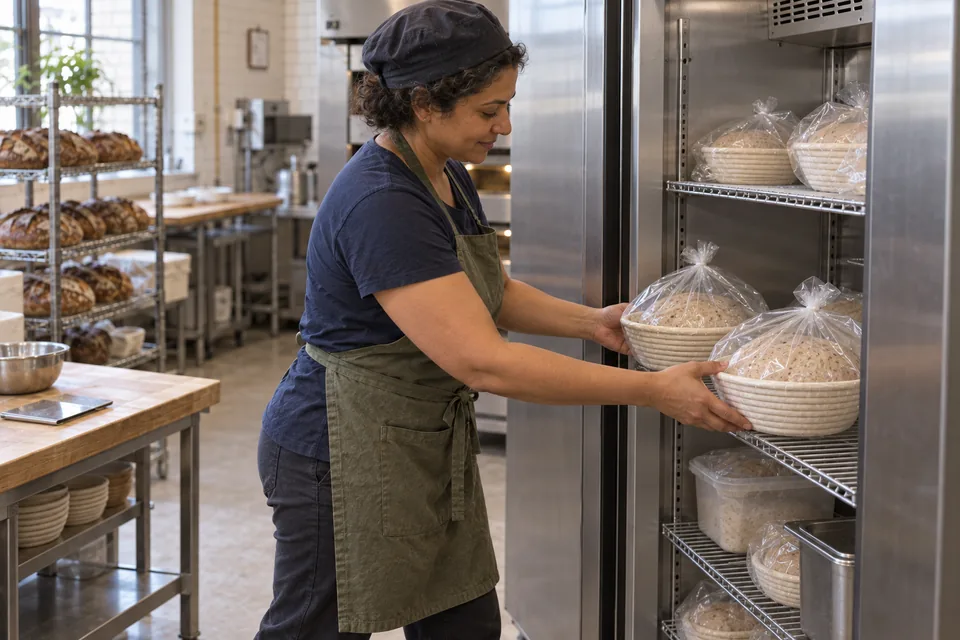
  • Rye makes this dough stickier; flour the exterior lightly and use the preshape rest instead of kneading extra flour into it.
Show ingredient flow

Recipe

Wheat bread with light rye

White wheat, whole wheat and light rye combined with a cold overnight proof.

How do I make it?

  1. Prepare the starter

    6–8 hours

    Prepare the starter: keep only 100 g of ripe, active starter and mix in the flour and water listed for this feed. Aim for 26–27°C just after mixing, then cover and leave at room temperature. This prepared starter is the levain used later in the dough.

    Baker stirs a thick, softly flecked levain in a clear container.
    Mix the retained starter with its feed flour and water, then cover and let it expand.

    Ready when: The starter has grown, is bubbly and shows fine stretchy strands inside, with a pleasant fermented smell.

  2. Rest the flour and water

    20–30 minutes

    As the prepared starter nears readiness, mix only the flour and water listed for the final dough. Cover and let it rest, keeping the salt, yeast and prepared starter separate for now.

    Seen from the side, the baker mixes rough pale wheat dough by hand in a clear rectangular tub.
    Moisten all the final-dough flour with the final water, then cover and rest.

    Ready when: All the flour is wet, with no dry patches.

  3. Mix the dough

    3–6 minutes

    Add the remaining group B ingredients to the rested dough, then wet your hand and fold the outer edges over them. Pinch through the dough with your thumb and forefinger 5–6 times, alternating with folds until evenly mixed, about 3–6 minutes. Rest briefly, fold again and aim for a dough temperature of 25–26°C.

    From an elevated angle, the baker pinches and folds cohesive pale wheat dough in a clear tub.
    Use a damp hand to pinch and fold the levain, salt and any listed yeast evenly into the dough.

    Ready when: The dough looks even, with no streaks of starter or salt.

  4. Fold and let rise

    3–4 folding rounds in first 1½–2 h; total first rise about 5 hours

    Wet your hand, lift one edge of the dough just until it resists, then fold it across; work around 4–5 sides and turn the dough folded-side down. Keep it covered and let it relax between rounds of folding. Avoid tearing the dough, and leave it untouched for the last hour of this first rise.

    The baker lifts a short elastic flap of pale wheat dough, ready to fold it back across the mass.
    Lift an edge gently, fold it across, then let the dough relax before the next set.

    Ready when: About 2½× its starting size, airy and stretchy.

  5. Shape the loaves

    15-minute preshape rest, then final shaping

    Gently divide the dough into two pieces, fold each piece’s edges into the middle, then turn folded-side down and cup and pull it toward you to make a round. Rest for 15 minutes, then tighten each round again using the same cupping and pulling motion. Put them folded-side DOWN in floured rising baskets and cover.

    The baker cups one pale wheat dough round with a second equally sized round beside it.
    Divide and preshape two rounds, rest for 15 minutes, then tighten each round and place seam down in floured baskets.

    Ready when: Moderately firm rounds that still have air bubbles inside.

  6. Let the loaves rise

    about 12 hours

    Put the covered rising baskets in closed bags and refrigerate overnight. Bake the loaves straight from the fridge; they do not need to warm up first.

    The baker places a pair of bag-covered pale wheat dough rounds in proofing baskets into the refrigerator.
    Enclose the baskets in closed bags and refrigerate overnight. Bake the loaves directly from the fridge.

    Ready when: The loaves have grown and feel airy, but are firm enough to lift while cold.

  7. Heat the oven

    At least 45 minutes, overlapping the last rise

    Put the heavy lidded pots on the middle rack. Heat the oven and pots thoroughly to 245°C.

    Two covered cast-iron pots heat on the middle oven rack.
    Heat the covered Dutch ovens thoroughly while the loaves finish proofing.

    Ready when: The oven and pot are fully hot.

  8. Bake

    30 min covered + about 20 min uncovered

    Turn each loaf out onto a lightly floured counter and carefully lower it folded-side UP into a hot pot. Bake with the lid on for 30 minutes, then remove the lid to finish baking. Use dry oven mitts and keep your hands clear of the hot metal.

    Using dry oven mitts, the baker lifts a lid to reveal a naturally split pale wheat loaf, with a second covered pot nearby.
    Use dry mitts to remove the lid after the covered bake, then finish uncovered until the crust is deep brown.

    Ready when: A deep brown crust; start checking 15 min after removing the lid.

  9. Let it cool

    At least 20 minutes; longer for cleaner slices

    Take the loaves out of the pots and leave them on a rack to cool before slicing.

    One whole pale wheat loaf and both halves of a second cool on a raised rack beside the baker.
    Cool the loaves on a rack before cutting so the crumb can set without tearing.

    Ready when: Most steam has escaped and the inside no longer tears when sliced.

What can go wrong, and how can I fix it?

What you noticeLikely causeWhat to do
Dough is slow to expandCool dough or weak levain.Keep covered in a mildly warmer spot; wait for the volume cue. Confirm the starter is vigorous; log dough and room temperatures.
Loaf spreads or collapsesFermentation went too far or shaping left little tension.Handle gently and bake promptly; expect a lower loaf. Use the volume cue; shape with surface tension and shorten the next warm hold.
Sticky crumb when slicedThe loaf was cut warm or insufficiently baked.Let it cool fully before judging. Bake to an even deep crust colour and allow a longer cooling rest.
Useful recipe notes

Formula totals describe the final dough, not all flour used for feeding. Use only the stated levain portion. An established culture at 80% hydration with an 80:20 white-to-whole-wheat flour blend maintains that composition. After a change of feed, traces of the previous flour blend and hydration remain.

Keep unused levain separately for the next feeding; do not return salted dough to the starter. For one Dutch oven, chill the waiting loaf and reheat the empty pot for 5 minutes before the second bake.
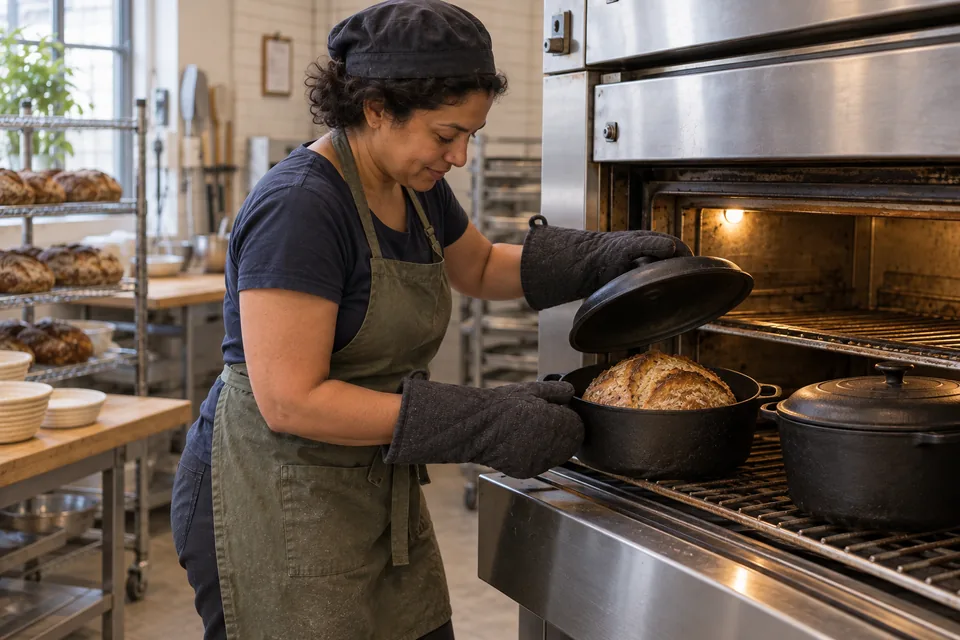
Rye makes this dough stickier; flour the exterior lightly and use the preshape rest instead of kneading extra flour into it.

See the detailed method and ratios in , or follow ingredients through the .

Ingredient proportions & recipe details

Wheat bread with light rye at a glance

Makes
2 loaves
Heat
245°C
Baking time
30 min covered + about 20 min uncovered
Dough hydration
75%
Prefermented flour
20% of total flour
Leavening
Starter + yeast
Bulk fermentation
3–4 sets in first 1½–2 h; total bulk about 5 hours · About 2½× starting volume, aerated and elastic.
How do the ingredient proportions compare?

Core dough totals include the flour and water in the portion of starter or preferment used. Do not add them again. Toppings, fillings and dusting flour are separate.

Formula componentGramsFlour = 100%
Total flour1000 g100%
Total water750 g75%
Salt21 g2.1%
Instant yeast2 g0.2%

Wheat bread with whole rye

Makes
2 loaves
Heat
245°C
Baking time
30 min covered + about 20 min uncovered

Preheat covered pots for at least 45 min. Check the crust after 15 min uncovered.

Hybrid levain bread

Wheat bread with whole rye

A darker wheat-and-rye blend, using whole or pumpernickel rye.

Method

  1. 01 · Feed

    6–8 hours

    Use: A

    Keep only 100 g mature levain. Mix in the feed flour and water; cover at room temperature.

    Ready when: Bubbly, expanded and webbed inside; pleasantly fermented.

    Baker stirs a thick, softly flecked levain in a clear container.
    01 FeedMix the retained starter with its feed flour and water, then cover and let it expand.
  2. 02 · Autolyse

    20–30 minutes

    Use: B flour + B water

    Near the end of the feed, mix the final-dough flours and water only. Cover. Keep salt, yeast and levain aside.

    Ready when: All flour moistened; no dry pockets.

    Seen from the side, the baker mixes rough finely flecked wheat and wholegrain dough by hand in a clear rectangular tub.
    02 AutolyseMoisten all the final-dough flour with the final water, then cover and rest.
  3. 03 · Mix

    3–6 minutes

    Use: Autolysed dough + remaining B

    With a damp hand, fold edges over the additions; pinch through the mass with thumb and forefinger 5–6 times. Alternate pinching and folding until uniformly mixed, about 3–6 minutes. Rest briefly, then fold again.

    Ready when: Uniform dough, no streaks of levain or salt.

    From an elevated angle, the baker pinches and folds cohesive finely flecked wheat and wholegrain dough in a clear tub.
    03 MixUse a damp hand to pinch and fold the levain, salt and any listed yeast evenly into the dough.
  4. 04 · Fold & bulk

    3–4 sets in first 1½–2 h; total bulk about 5 hours

    Use: Mixed dough

    With a damp hand, stretch one edge until resistance, then fold across the dough. Repeat around 4–5 sides; turn the bundle seam down. Cover between sets; let it relax before the next set. Do not tear it or fold during the last bulk hour.

    Ready when: About 2½× starting volume, aerated and elastic.

    The baker lifts a short elastic flap of finely flecked wheat and wholegrain dough, ready to fold it back across the mass.
    04 Fold & bulkLift an edge gently, fold it across, then let the dough relax before the next set.
  5. 05 · Divide & shape

    15-minute preshape rest, then final shaping

    Use: Fermented dough

    Gently divide into two. Fold each piece’s perimeter inward, turn seam down and tighten by cupping and dragging. Rest 15 minutes, then shape again with the same motion. Place seam DOWN in floured baskets; cover.

    Ready when: Medium-tight rounds; preserve visible gas.

    The baker cups one finely flecked wheat and wholegrain dough round with a second equally sized round beside it.
    05 Divide & shapeDivide and preshape two rounds, rest for 15 minutes, then tighten each round and place seam down in floured baskets.
  6. 06 · Proof

    11–12 hours

    Use: Covered baskets

    Refrigerate in closed bags overnight. Bake directly from the fridge; no warm-up is needed.

    Ready when: Expanded, aerated loaves; firm enough to lift while cold.

    The baker places a pair of bag-covered finely flecked wheat and wholegrain dough rounds in proofing baskets into the refrigerator.
    06 ProofEnclose the baskets in closed bags and refrigerate overnight. Bake the loaves directly from the fridge.
  7. 07 · Preheat

    At least 45 minutes, overlapping final proof

    Use: Oven + covered Dutch ovens

    Put covered pots on a middle rack. Preheat thoroughly to 245°C.

    Ready when: Oven and pot fully heated.

    Two covered cast-iron pots heat on the middle oven rack.
    07 PreheatHeat the covered Dutch ovens thoroughly while the loaves finish proofing.
  8. 08 · Bake

    30 min covered + about 20 min uncovered

    Use: Proofed loaves

    Invert onto a lightly floured counter and carefully lower into hot pot seam UP. Cover for 30 minutes, then uncover to finish. Use dry oven mitts; keep skin clear of hot iron.

    Ready when: Deep brown crust; check 15 min after uncovering.

    Using dry oven mitts, the baker lifts a lid to reveal a naturally split finely flecked wheat and wholegrain loaf, with a second covered pot nearby.
    08 BakeUse dry mitts to remove the lid after the covered bake, then finish uncovered until the crust is deep brown.
  9. 09 · Cool

    At least 20 minutes; longer for cleaner slices

    Use: Baked loaves

    Lift out of pots and cool on a rack before cutting.

    Ready when: Steam has subsided; crumb no longer tears when cut.

    One whole finely flecked wheat and wholegrain loaf and both halves of a second cool on a raised rack beside the baker.
    09 CoolCool the loaves on a rack before cutting so the crumb can set without tearing.

What to look for

StageLook and feelNeeds attention
Mix & foldsSticky but cohesive dough gains height and elasticity after each fold.A puddle that never gains strength, or a dry dough tearing under a gentle stretch.
ProofUse volume and dough feel alongside the schedule. At room temperature, a poke returns slowly and partly.Immediate rebound suggests more proof; collapse or a lasting deep dent suggests excess proof.

Troubleshooting

If you seeLikely causeWhat to do nowNext time
Dough is slow to expandCool dough or weak levain.Keep covered in a mildly warmer spot; wait for the volume cue.Confirm the starter is vigorous; log dough and room temperatures.
Loaf spreads or collapsesFermentation went too far or shaping left little tension.Handle gently and bake promptly; expect a lower loaf.Use the volume cue; shape with surface tension and shorten the next warm hold.
Sticky crumb when slicedThe loaf was cut warm or insufficiently baked.Let it cool fully before judging.Bake to an even deep crust colour and allow a longer cooling rest.

Recipe notes

  • Formula totals describe the final dough, not all flour used for feeding. Use only the stated levain portion. An established culture at 80% hydration with an 80:20 white-to-whole-wheat flour blend maintains that composition. After a change of feed, traces of the previous flour blend and hydration remain.
  • Keep unused levain separately for the next feeding; do not return salted dough to the starter. For one Dutch oven, chill the waiting loaf and reheat the empty pot for 5 minutes before the second bake.
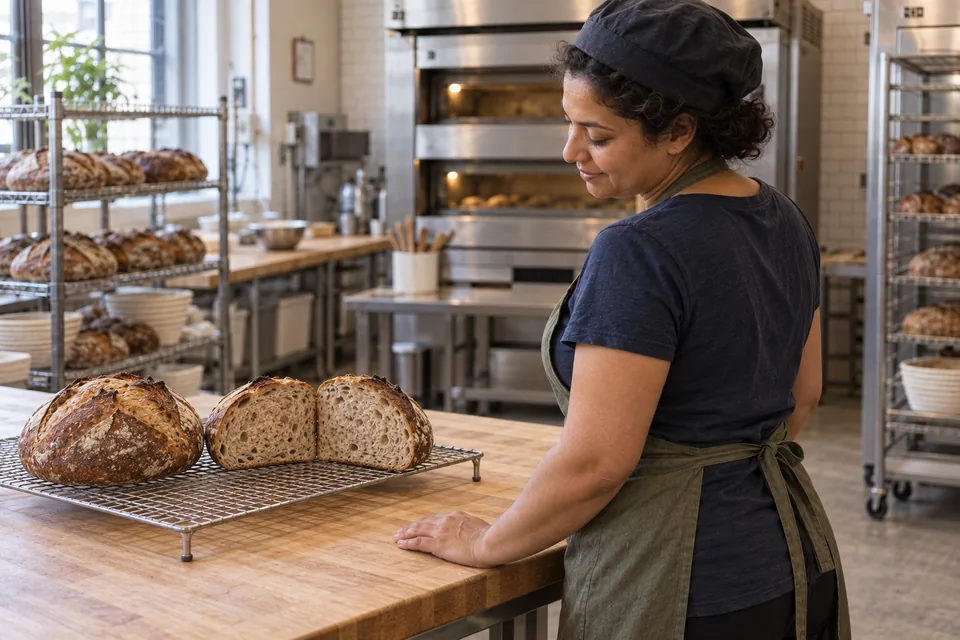
  • Rye makes this dough stickier; flour the exterior lightly and use the preshape rest instead of kneading extra flour into it.
Show ingredient flow

Recipe

Wheat bread with whole rye

A darker wheat-and-rye blend, using whole or pumpernickel rye.

How do I make it?

  1. Prepare the starter

    6–8 hours

    Prepare the starter: keep only 100 g of ripe, active starter and mix in the flour and water listed for this feed. Aim for 26–27°C just after mixing, then cover and leave at room temperature. This prepared starter is the levain used later in the dough.

    Baker stirs a thick, softly flecked levain in a clear container.
    Mix the retained starter with its feed flour and water, then cover and let it expand.

    Ready when: The starter has grown, is bubbly and shows fine stretchy strands inside, with a pleasant fermented smell.

  2. Rest the flour and water

    20–30 minutes

    As the prepared starter nears readiness, mix only the flour and water listed for the final dough. Cover and let it rest, keeping the salt, yeast and prepared starter separate for now.

    Seen from the side, the baker mixes rough finely flecked wheat and wholegrain dough by hand in a clear rectangular tub.
    Moisten all the final-dough flour with the final water, then cover and rest.

    Ready when: All the flour is wet, with no dry patches.

  3. Mix the dough

    3–6 minutes

    Add the remaining group B ingredients to the rested dough, then wet your hand and fold the outer edges over them. Pinch through the dough with your thumb and forefinger 5–6 times, alternating with folds until evenly mixed, about 3–6 minutes. Rest briefly, fold again and aim for a dough temperature of 25–26°C.

    From an elevated angle, the baker pinches and folds cohesive finely flecked wheat and wholegrain dough in a clear tub.
    Use a damp hand to pinch and fold the levain, salt and any listed yeast evenly into the dough.

    Ready when: The dough looks even, with no streaks of starter or salt.

  4. Fold and let rise

    3–4 folding rounds in first 1½–2 h; total first rise about 5 hours

    Wet your hand, lift one edge of the dough just until it resists, then fold it across; work around 4–5 sides and turn the dough folded-side down. Keep it covered and let it relax between rounds of folding. Avoid tearing the dough, and leave it untouched for the last hour of this first rise.

    The baker lifts a short elastic flap of finely flecked wheat and wholegrain dough, ready to fold it back across the mass.
    Lift an edge gently, fold it across, then let the dough relax before the next set.

    Ready when: About 2½× its starting size, airy and stretchy.

  5. Shape the loaves

    15-minute preshape rest, then final shaping

    Gently divide the dough into two pieces, fold each piece’s edges into the middle, then turn folded-side down and cup and pull it toward you to make a round. Rest for 15 minutes, then tighten each round again using the same cupping and pulling motion. Put them folded-side DOWN in floured rising baskets and cover.

    The baker cups one finely flecked wheat and wholegrain dough round with a second equally sized round beside it.
    Divide and preshape two rounds, rest for 15 minutes, then tighten each round and place seam down in floured baskets.

    Ready when: Moderately firm rounds that still have air bubbles inside.

  6. Let the loaves rise

    11–12 hours

    Put the covered rising baskets in closed bags and refrigerate overnight. Bake the loaves straight from the fridge; they do not need to warm up first.

    The baker places a pair of bag-covered finely flecked wheat and wholegrain dough rounds in proofing baskets into the refrigerator.
    Enclose the baskets in closed bags and refrigerate overnight. Bake the loaves directly from the fridge.

    Ready when: The loaves have grown and feel airy, but are firm enough to lift while cold.

  7. Heat the oven

    At least 45 minutes, overlapping the last rise

    Put the heavy lidded pots on the middle rack. Heat the oven and pots thoroughly to 245°C.

    Two covered cast-iron pots heat on the middle oven rack.
    Heat the covered Dutch ovens thoroughly while the loaves finish proofing.

    Ready when: The oven and pot are fully hot.

  8. Bake

    30 min covered + about 20 min uncovered

    Turn each loaf out onto a lightly floured counter and carefully lower it folded-side UP into a hot pot. Bake with the lid on for 30 minutes, then remove the lid to finish baking. Use dry oven mitts and keep your hands clear of the hot metal.

    Using dry oven mitts, the baker lifts a lid to reveal a naturally split finely flecked wheat and wholegrain loaf, with a second covered pot nearby.
    Use dry mitts to remove the lid after the covered bake, then finish uncovered until the crust is deep brown.

    Ready when: A deep brown crust; start checking 15 min after removing the lid.

  9. Let it cool

    At least 20 minutes; longer for cleaner slices

    Take the loaves out of the pots and leave them on a rack to cool before slicing.

    One whole finely flecked wheat and wholegrain loaf and both halves of a second cool on a raised rack beside the baker.
    Cool the loaves on a rack before cutting so the crumb can set without tearing.

    Ready when: Most steam has escaped and the inside no longer tears when sliced.

What can go wrong, and how can I fix it?

What you noticeLikely causeWhat to do
Dough is slow to expandCool dough or weak levain.Keep covered in a mildly warmer spot; wait for the volume cue. Confirm the starter is vigorous; log dough and room temperatures.
Loaf spreads or collapsesFermentation went too far or shaping left little tension.Handle gently and bake promptly; expect a lower loaf. Use the volume cue; shape with surface tension and shorten the next warm hold.
Sticky crumb when slicedThe loaf was cut warm or insufficiently baked.Let it cool fully before judging. Bake to an even deep crust colour and allow a longer cooling rest.
Useful recipe notes

Formula totals describe the final dough, not all flour used for feeding. Use only the stated levain portion. An established culture at 80% hydration with an 80:20 white-to-whole-wheat flour blend maintains that composition. After a change of feed, traces of the previous flour blend and hydration remain.

Keep unused levain separately for the next feeding; do not return salted dough to the starter. For one Dutch oven, chill the waiting loaf and reheat the empty pot for 5 minutes before the second bake.
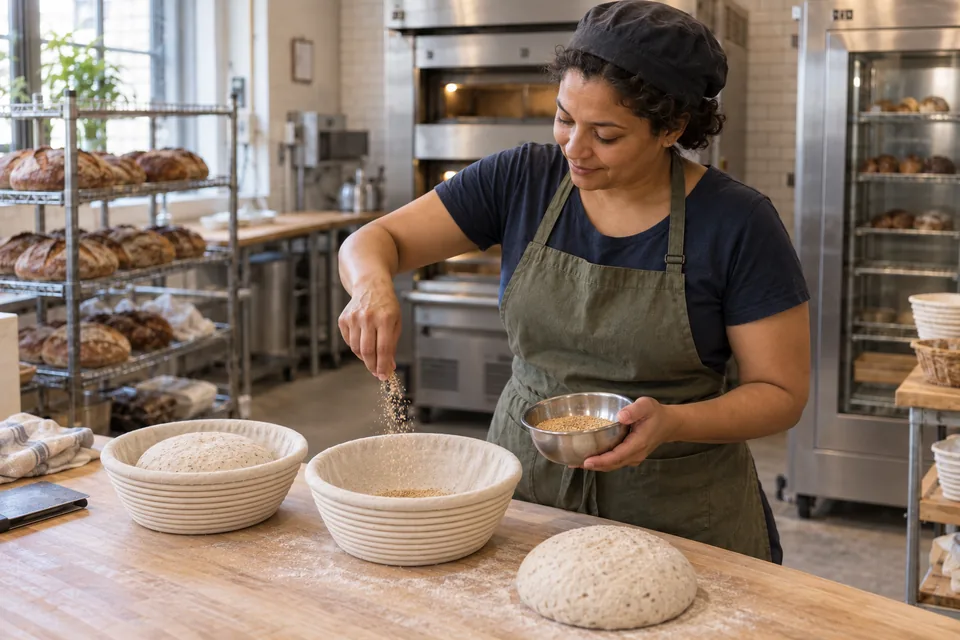
Rye makes this dough stickier; flour the exterior lightly and use the preshape rest instead of kneading extra flour into it.

See the detailed method and ratios in , or follow ingredients through the .

Ingredient proportions & recipe details

Wheat bread with whole rye at a glance

Makes
2 loaves
Heat
245°C
Baking time
30 min covered + about 20 min uncovered
Dough hydration
78%
Prefermented flour
20% of total flour
Leavening
Starter + yeast
Bulk fermentation
3–4 sets in first 1½–2 h; total bulk about 5 hours · About 2½× starting volume, aerated and elastic.
How do the ingredient proportions compare?

Core dough totals include the flour and water in the portion of starter or preferment used. Do not add them again. Toppings, fillings and dusting flour are separate.

Formula componentGramsFlour = 100%
Total flour1000 g100%
Total water780 g78%
Salt21 g2.1%
Instant yeast2 g0.2%

Mushroom and smoked paprika sourdough

Makes
2 loaves
Heat
245°C bread; 205°C mushrooms
Baking time
Bread: 30 min covered + 20–25 min uncovered; mushrooms: about 25–40 min

Roast mushrooms separately until surface-dry, then cool. Preheat covered pots for at least 45 min; check bread after 15 min uncovered.

Pure levain bread

Mushroom and smoked paprika sourdough

A savoury overnight levain bread with cooked mushrooms and olive oil.

Method

  1. 01 · Feed

    9–10 hours

    Use: A

    Keep only 100 g mature levain. Mix in the feed flour and water; cover at room temperature.

    Ready when: Bubbly, expanded and webbed inside; pleasantly fermented.

    Baker stirs a thick, softly flecked levain in a clear container.
    01 FeedMix the retained starter with its feed flour and water, then cover and let it expand.
  2. 02 · Prepare mushrooms

    About 25–40 minutes, depending on moisture

    Use: C mushrooms

    Spread sliced mushrooms on parchment. Roast at 205°C until deeply browned and surface-dry, stirring as needed. Cool promptly, then weigh 225 g; refrigerate if made ahead.

    Ready when: No free liquid; mushrooms are cool before adding.

    Sliced mushrooms are roasted until browned and surface-dry.
    02 Prepare mushroomsRoast the sliced mushrooms until browned and surface-dry, then cool them before weighing and adding.
  3. 03 · Autolyse

    20–30 minutes

    Use: B flour + B water

    Near the end of the feed, mix the final-dough flours and water only. Cover. Keep salt, yeast and levain aside.

    Ready when: All flour moistened; no dry pockets.

    Seen from the side, the baker mixes rough pale wheat dough by hand in a clear rectangular tub.
    03 AutolyseMoisten all the final-dough flour with the final water, then cover and rest.
  4. 04 · Mix

    3–6 minutes

    Use: Autolysed dough + remaining B

    With a damp hand, fold edges over the additions; pinch through the mass with thumb and forefinger 5–6 times. Alternate pinching and folding until uniformly mixed, about 3–6 minutes. Rest briefly, then fold again.

    Ready when: Uniform dough, no streaks of levain or salt.

    From an elevated angle, the baker pinches and folds cohesive pale wheat dough in a clear tub.
    04 MixUse a damp hand to pinch and fold the levain, salt and any listed yeast evenly into the dough.
  5. 05 · Add savoury mixture

    10-minute rest, then incorporate

    Use: Mixed dough + C

    Rest 10 minutes, then fold in the cooled mushrooms, olive oil and paprika until distributed.

    Ready when: Even pieces and no oily streaks.

    Cooled mushrooms, olive oil and smoked paprika are folded into the dough.
    05 Add savoury mixtureFold in the cooled mushrooms, olive oil and smoked paprika until there are no oily streaks.
  6. 06 · Fold & bulk

    3–4 sets in first 1½–2 h; total bulk about 12 hours; judge the dough

    Use: Mixed dough

    With a damp hand, stretch one edge until resistance, then fold across the dough. Repeat around 4–5 sides; turn the bundle seam down. Cover between sets; let it relax before the next set. Do not tear it or fold during the last bulk hour.

    Ready when: Nearly 3× starting volume; possibly less in a cool kitchen.

    The baker lifts a short elastic flap of mushroom-studded dough, ready to fold it back across the mass.
    06 Fold & bulkLift an edge gently, fold it across, then let the dough relax before the next set.
  7. 07 · Divide & shape

    After bulk

    Use: Fermented dough

    Gently tip onto a lightly floured counter and divide equally. Fold each perimeter inward; turn seam down. Cup and drag on an unfloured patch, rotating, until the surface holds tension without tearing. Place seam DOWN in floured baskets; cover.

    Ready when: Medium-tight rounds; preserve visible gas.

    The baker cups one mushroom-studded dough round with a second equally sized round beside it.
    07 Divide & shapeDivide equally and cup each piece into a smooth round, then place seam down in floured baskets.
  8. 08 · Proof

    3½–4 hours

    Use: Covered baskets

    Leave at about 21°C. Gently press the loaf with a floured fingertip to make a small dent. The dent should slowly rise partway back.

    Ready when: Slow, partial rebound; loaf feels aerated.

    A floured fingertip gently checks one of two puffy mushroom-studded dough rounds in cloth-lined baskets.
    08 ProofLook for a puffy loaf and a small fingertip dent that slowly rises partway back.
  9. 09 · Preheat

    At least 45 minutes, overlapping final proof

    Use: Oven + covered Dutch ovens

    Put covered pots on a middle rack. Preheat thoroughly to 245°C.

    Ready when: Oven and pot fully heated.

    Two covered cast-iron pots heat on the middle oven rack.
    09 PreheatHeat the covered Dutch ovens thoroughly while the loaves finish proofing.
  10. 10 · Bake

    30 min covered + 20–25 min uncovered

    Use: Proofed loaves

    Invert onto a lightly floured counter and carefully lower into hot pot seam UP. Cover for 30 minutes, then uncover to finish. Use dry oven mitts; keep skin clear of hot iron.

    Ready when: Deep brown crust; check 15 min after uncovering.

    Using dry oven mitts, the baker lifts a lid to reveal a naturally split mushroom-studded loaf, with a second covered pot nearby.
    10 BakeUse dry mitts to remove the lid after the covered bake, then finish uncovered until the crust is deep brown.
  11. 11 · Cool

    At least 20 minutes; longer for cleaner slices

    Use: Baked loaves

    Lift out of pots and cool on a rack before cutting.

    Ready when: Steam has subsided; crumb no longer tears when cut.

    One whole mushroom-studded loaf and both halves of a second cool on a raised rack beside the baker.
    11 CoolCool the loaves on a rack before cutting so the crumb can set without tearing.

What to look for

StageLook and feelNeeds attention
Mix & foldsSticky but cohesive dough gains height and elasticity after each fold.A puddle that never gains strength, or a dry dough tearing under a gentle stretch.
ProofUse volume and dough feel alongside the schedule. At room temperature, a poke returns slowly and partly.Immediate rebound suggests more proof; collapse or a lasting deep dent suggests excess proof.

Troubleshooting

If you seeLikely causeWhat to do nowNext time
Dough is slow to expandCool dough or weak levain.Keep covered in a mildly warmer spot; wait for the volume cue.Confirm the starter is vigorous; log dough and room temperatures.
Loaf spreads or collapsesFermentation went too far or shaping left little tension.Handle gently and bake promptly; expect a lower loaf.Use the volume cue; shape with surface tension and shorten the next warm hold.
Sticky crumb when slicedThe loaf was cut warm or insufficiently baked.Let it cool fully before judging.Bake to an even deep crust colour and allow a longer cooling rest.

Recipe notes

  • Formula totals describe the final dough, not all flour used for feeding. Use only the stated levain portion. An established culture at 80% hydration with an 80:20 white-to-whole-wheat flour blend maintains that composition. After a change of feed, traces of the previous flour blend and hydration remain.
  • Keep unused levain separately for the next feeding; do not return salted dough to the starter. For one Dutch oven, chill the waiting loaf and reheat the empty pot for 5 minutes before the second bake.
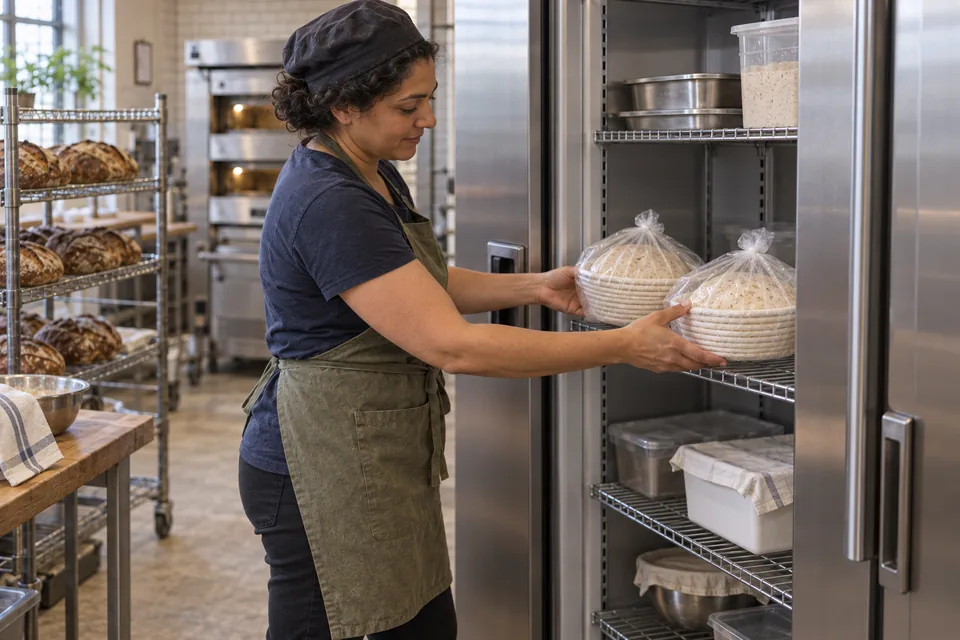
  • Nominal hydration excludes water retained in the cooked mushrooms.
Show ingredient flow

Recipe

Mushroom and smoked paprika sourdough

A savoury overnight levain bread with cooked mushrooms and olive oil.

How do I make it?

  1. Prepare the starter

    9–10 hours

    Prepare the starter: keep only 100 g of ripe, active starter and mix in the flour and water listed for this feed. Aim for 26–27°C just after mixing, then cover and leave at room temperature. This prepared starter is the levain used later in the dough.

    Baker stirs a thick, softly flecked levain in a clear container.
    Mix the retained starter with its feed flour and water, then cover and let it expand.

    Ready when: The starter has grown, is bubbly and shows fine stretchy strands inside, with a pleasant fermented smell.

  2. Roast and cool the mushrooms

    About 25–40 minutes, depending on moisture

    Spread sliced mushrooms on baking parchment and roast at 205°C until deeply browned and dry on the surface, stirring when needed. Cool them promptly, then weigh out 225 g for the dough. Refrigerate them if preparing them ahead of time.

    Sliced mushrooms are roasted until browned and surface-dry.
    Roast the sliced mushrooms until browned and surface-dry, then cool them before weighing and adding.

    Ready when: The mushrooms are cool, with no liquid pooling around them.

  3. Rest the flour and water

    20–30 minutes

    As the prepared starter nears readiness, mix only the flour and water listed for the final dough. Cover and let it rest, keeping the salt, yeast and prepared starter separate for now.

    Seen from the side, the baker mixes rough pale wheat dough by hand in a clear rectangular tub.
    Moisten all the final-dough flour with the final water, then cover and rest.

    Ready when: All the flour is wet, with no dry patches.

  4. Mix the dough

    3–6 minutes

    Add the remaining group B ingredients to the rested dough, then wet your hand and fold the outer edges over them. Pinch through the dough with your thumb and forefinger 5–6 times, alternating with folds until evenly mixed, about 3–6 minutes. Rest briefly, fold again and aim for a dough temperature of 25–26°C.

    From an elevated angle, the baker pinches and folds cohesive pale wheat dough in a clear tub.
    Use a damp hand to pinch and fold the levain, salt and any listed yeast evenly into the dough.

    Ready when: The dough looks even, with no streaks of starter or salt.

  5. Mix in the mushrooms and seasoning

    10-minute rest, then incorporate

    Let the dough rest for 10 minutes. Fold in the cooled mushrooms, olive oil and paprika until spread evenly throughout.

    Cooled mushrooms, olive oil and smoked paprika are folded into the dough.
    Fold in the cooled mushrooms, olive oil and smoked paprika until there are no oily streaks.

    Ready when: The mushrooms are spread evenly, with no streaks of oil.

  6. Fold and let rise

    3–4 folding rounds in first 1½–2 h; total first rise about 12 hours; judge the dough

    Wet your hand, lift one edge of the dough just until it resists, then fold it across; work around 4–5 sides and turn the dough folded-side down. Keep it covered and let it relax between rounds of folding. Avoid tearing the dough, and leave it untouched for the last hour of this first rise.

    The baker lifts a short elastic flap of mushroom-studded dough, ready to fold it back across the mass.
    Lift an edge gently, fold it across, then let the dough relax before the next set.

    Ready when: Nearly 3× its starting size, though it may rise less in a cool kitchen.

  7. Shape the loaves

    After the first rise

    Gently tip the dough onto a lightly floured counter and divide it equally. Fold each piece’s edges into the middle, turn the folded side down onto a patch without flour, then cup and gently pull it toward you while turning until the surface is firm without tearing. Put the rounds folded-side DOWN in floured rising baskets and cover, keeping as much air in the dough as possible.

    The baker cups one mushroom-studded dough round with a second equally sized round beside it.
    Divide equally and cup each piece into a smooth round, then place seam down in floured baskets.

    Ready when: Moderately firm rounds that still have air bubbles inside.

  8. Let the loaves rise

    3½–4 hours

    Let the covered loaves rise at about 21°C. Gently press a loaf with a floured fingertip to make a small dent: it is ready when the dent slowly rises partway back and leaves a slight mark.

    A floured fingertip gently checks one of two puffy mushroom-studded dough rounds in cloth-lined baskets.
    Look for a puffy loaf and a small fingertip dent that slowly rises partway back.

    Ready when: A finger dent slowly rises partway back, and the loaf feels airy.

  9. Heat the oven

    At least 45 minutes, overlapping the last rise

    Put the heavy lidded pots on the middle rack. Heat the oven and pots thoroughly to 245°C.

    Two covered cast-iron pots heat on the middle oven rack.
    Heat the covered Dutch ovens thoroughly while the loaves finish proofing.

    Ready when: The oven and pot are fully hot.

  10. Bake

    30 min covered + 20–25 min uncovered

    Turn each loaf out onto a lightly floured counter and carefully lower it folded-side UP into a hot pot. Bake with the lid on for 30 minutes, then remove the lid to finish baking. Use dry oven mitts and keep your hands clear of the hot metal.

    Using dry oven mitts, the baker lifts a lid to reveal a naturally split mushroom-studded loaf, with a second covered pot nearby.
    Use dry mitts to remove the lid after the covered bake, then finish uncovered until the crust is deep brown.

    Ready when: A deep brown crust; start checking 15 min after removing the lid.

  11. Let it cool

    At least 20 minutes; longer for cleaner slices

    Take the loaves out of the pots and leave them on a rack to cool before slicing.

    One whole mushroom-studded loaf and both halves of a second cool on a raised rack beside the baker.
    Cool the loaves on a rack before cutting so the crumb can set without tearing.

    Ready when: Most steam has escaped and the inside no longer tears when sliced.

What can go wrong, and how can I fix it?

What you noticeLikely causeWhat to do
Dough is slow to expandCool dough or weak levain.Keep covered in a mildly warmer spot; wait for the volume cue. Confirm the starter is vigorous; log dough and room temperatures.
Loaf spreads or collapsesFermentation went too far or shaping left little tension.Handle gently and bake promptly; expect a lower loaf. Use the volume cue; shape with surface tension and shorten the next warm hold.
Sticky crumb when slicedThe loaf was cut warm or insufficiently baked.Let it cool fully before judging. Bake to an even deep crust colour and allow a longer cooling rest.
Useful recipe notes

Formula totals describe the final dough, not all flour used for feeding. Use only the stated levain portion. An established culture at 80% hydration with an 80:20 white-to-whole-wheat flour blend maintains that composition. After a change of feed, traces of the previous flour blend and hydration remain.

Keep unused levain separately for the next feeding; do not return salted dough to the starter. For one Dutch oven, chill the waiting loaf and reheat the empty pot for 5 minutes before the second bake.
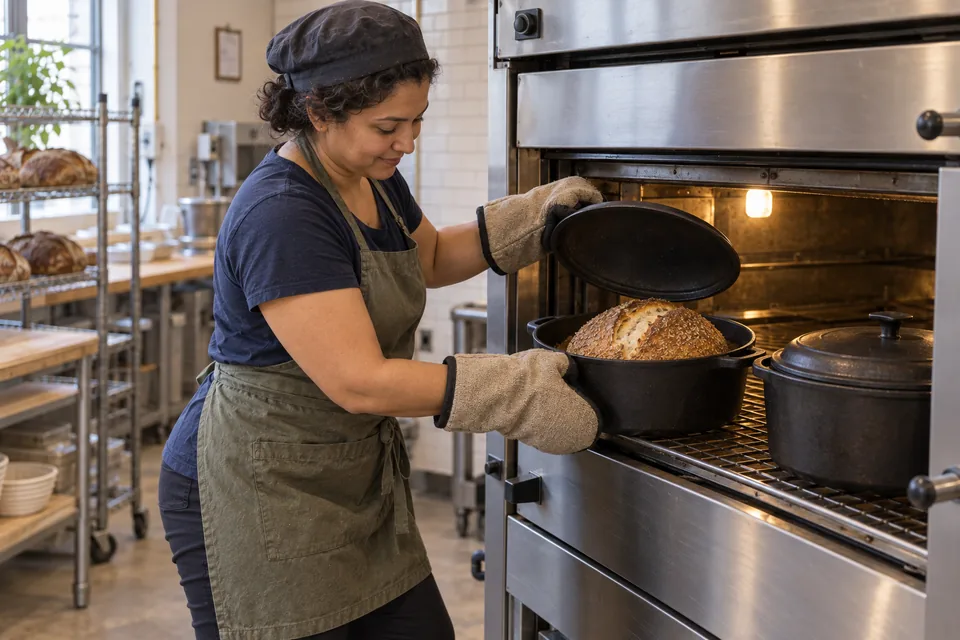
Nominal hydration excludes water retained in the cooked mushrooms.

See the detailed method and ratios in , or follow ingredients through the .

Ingredient proportions & recipe details

Mushroom and smoked paprika sourdough at a glance

Makes
2 loaves
Heat
245°C bread; 205°C mushrooms
Baking time
Bread: 30 min covered + 20–25 min uncovered; mushrooms: about 25–40 min
Dough hydration
78%
Prefermented flour
12% of total flour
Bulk fermentation
3–4 sets in first 1½–2 h; total bulk about 12 hours; judge the dough · Nearly 3× starting volume; possibly less in a cool kitchen.
How do the ingredient proportions compare?

Core dough totals include the flour and water in the portion of starter or preferment used. Do not add them again. Toppings, fillings and dusting flour are separate.

Formula componentGramsFlour = 100%
Total flour1000 g100%
Total water780 g78%
Salt20 g2%
Instant yeast0 g0%

Bread with a twice-fed sourdough starter

Makes
2 loaves
Heat
245°C
Baking time
30 min covered + 20–25 min uncovered

Preheat covered pots for at least 45 min. Check the crust after 15 min uncovered.

Hybrid levain bread

Bread with a twice-fed sourdough starter

Two short, warm levain feeds precede the final dough and overnight cold proof.

Method

  1. 01 · First feed

    3 hours

    Use: A

    Retain 50 g active levain, mix in flour and water; cover at room temperature.

    Ready when: Even mixture, beginning to aerate.

    Baker stirs a thick, softly flecked levain in a clear container.
    01 First feedMix the retained starter with its first feed flour and water; cover and let it begin to aerate.
  2. 02 · Second feed

    4–5 hours

    Use: A2

    Keep only 250 g from the first feed. Add fresh flour and water; mix and cover. Start autolyse 20–30 minutes before this feed is ready.

    Ready when: Young, aerated levain with a mild fermented smell.

    Fresh flour is added to the retained levain for its next feed.
    02 Second feedKeep the listed portion of the first feed, add fresh flour and water, then mix and cover.
  3. 03 · Autolyse

    20–30 minutes

    Use: B flour + B water

    Near the end of the feed, mix the final-dough flours and water only. Cover. Keep salt, yeast and levain aside.

    Ready when: All flour moistened; no dry pockets.

    Seen from the side, the baker mixes rough pale wheat dough by hand in a clear rectangular tub.
    03 AutolyseMoisten all the final-dough flour with the final water, then cover and rest.
  4. 04 · Mix

    3–6 minutes

    Use: Autolysed dough + remaining B

    With a damp hand, fold edges over the additions; pinch through the mass with thumb and forefinger 5–6 times. Alternate pinching and folding until uniformly mixed, about 3–6 minutes. Rest briefly, then fold again.

    Ready when: Uniform dough, no streaks of levain or salt.

    From an elevated angle, the baker pinches and folds cohesive pale wheat dough in a clear tub.
    04 MixUse a damp hand to pinch and fold the levain, salt and any listed yeast evenly into the dough.
  5. 05 · Fold & bulk

    4 sets in first 1½–2 h; total bulk about 5 hours

    Use: Mixed dough

    With a damp hand, stretch one edge until resistance, then fold across the dough. Repeat around 4–5 sides; turn the bundle seam down. Cover between sets; let it relax before the next set. Do not tear it or fold during the last bulk hour.

    Ready when: About 2½× starting volume, aerated and elastic.

    The baker lifts a short elastic flap of pale wheat dough, ready to fold it back across the mass.
    05 Fold & bulkLift an edge gently, fold it across, then let the dough relax before the next set.
  6. 06 · Divide & shape

    After bulk

    Use: Fermented dough

    Gently tip onto a lightly floured counter and divide equally. Fold each perimeter inward; turn seam down. Cup and drag on an unfloured patch, rotating, until the surface holds tension without tearing. Place seam DOWN in floured baskets; cover.

    Ready when: Medium-tight rounds; preserve visible gas.

    The baker cups one pale wheat dough round with a second equally sized round beside it.
    06 Divide & shapeDivide equally and cup each piece into a smooth round, then place seam down in floured baskets.
  7. 07 · Proof

    12–14 hours

    Use: Covered baskets

    Refrigerate in closed bags overnight. Bake directly from the fridge; no warm-up is needed.

    Ready when: Expanded, aerated loaves; firm enough to lift while cold.

    The baker places a pair of bag-covered pale wheat dough rounds in proofing baskets into the refrigerator.
    07 ProofEnclose the baskets in closed bags and refrigerate overnight. Bake the loaves directly from the fridge.
  8. 08 · Preheat

    At least 45 minutes, overlapping final proof

    Use: Oven + covered Dutch ovens

    Put covered pots on a middle rack. Preheat thoroughly to 245°C.

    Ready when: Oven and pot fully heated.

    Two covered cast-iron pots heat on the middle oven rack.
    08 PreheatHeat the covered Dutch ovens thoroughly while the loaves finish proofing.
  9. 09 · Bake

    30 min covered + 20–25 min uncovered

    Use: Proofed loaves

    Invert onto a lightly floured counter and carefully lower into hot pot seam UP. Cover for 30 minutes, then uncover to finish. Use dry oven mitts; keep skin clear of hot iron.

    Ready when: Deep brown crust; check 15 min after uncovering.

    Using dry oven mitts, the baker lifts a lid to reveal a naturally split pale wheat loaf, with a second covered pot nearby.
    09 BakeUse dry mitts to remove the lid after the covered bake, then finish uncovered until the crust is deep brown.
  10. 10 · Cool

    At least 20 minutes; longer for cleaner slices

    Use: Baked loaves

    Lift out of pots and cool on a rack before cutting.

    Ready when: Steam has subsided; crumb no longer tears when cut.

    One whole pale wheat loaf and both halves of a second cool on a raised rack beside the baker.
    10 CoolCool the loaves on a rack before cutting so the crumb can set without tearing.

What to look for

StageLook and feelNeeds attention
Mix & foldsSticky but cohesive dough gains height and elasticity after each fold.A puddle that never gains strength, or a dry dough tearing under a gentle stretch.
ProofUse volume and dough feel alongside the schedule. At room temperature, a poke returns slowly and partly.Immediate rebound suggests more proof; collapse or a lasting deep dent suggests excess proof.

Troubleshooting

If you seeLikely causeWhat to do nowNext time
Dough is slow to expandCool dough or weak levain.Keep covered in a mildly warmer spot; wait for the volume cue.Confirm the starter is vigorous; log dough and room temperatures.
Loaf spreads or collapsesFermentation went too far or shaping left little tension.Handle gently and bake promptly; expect a lower loaf.Use the volume cue; shape with surface tension and shorten the next warm hold.
Sticky crumb when slicedThe loaf was cut warm or insufficiently baked.Let it cool fully before judging.Bake to an even deep crust colour and allow a longer cooling rest.

Recipe notes

  • Formula totals describe the final dough, not all flour used for feeding. Use only the stated levain portion. An established culture at 80% hydration with an 80:20 white-to-whole-wheat flour blend maintains that composition. After a change of feed, traces of the previous flour blend and hydration remain.
  • Keep unused levain separately for the next feeding; do not return salted dough to the starter. For one Dutch oven, chill the waiting loaf and reheat the empty pot for 5 minutes before the second bake.
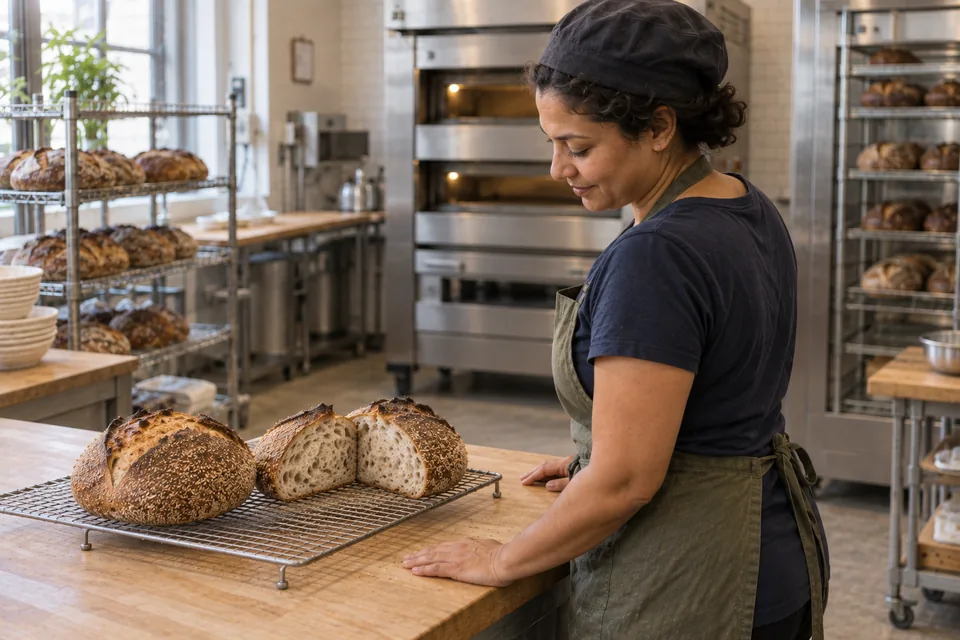
Show ingredient flow

Recipe

Bread with a twice-fed sourdough starter

Two short, warm levain feeds precede the final dough and overnight cold proof.

How do I make it?

  1. Feed the starter once

    3 hours

    Keep 50 g of active starter and mix in the flour and water listed for this feed. Cover and leave at room temperature. You are preparing the starter, called levain, that will raise the dough.

    Baker stirs a thick, softly flecked levain in a clear container.
    Mix the retained starter with its first feed flour and water; cover and let it begin to aerate.

    Ready when: Evenly mixed and beginning to show air bubbles.

  2. Feed the starter again

    4–5 hours

    Keep only 250 g of the starter from the first feed, add the fresh flour and water listed for this feed, then mix and cover. Start the final dough’s flour-and-water rest 20–30 minutes before this feed is ready.

    Fresh flour is added to the retained levain for its next feed.
    Keep the listed portion of the first feed, add fresh flour and water, then mix and cover.

    Ready when: The recently fed starter is airy, with a mild fermented smell.

  3. Rest the flour and water

    20–30 minutes

    As the prepared starter nears readiness, mix only the flour and water listed for the final dough. Cover and let it rest, keeping the salt, yeast and prepared starter separate for now.

    Seen from the side, the baker mixes rough pale wheat dough by hand in a clear rectangular tub.
    Moisten all the final-dough flour with the final water, then cover and rest.

    Ready when: All the flour is wet, with no dry patches.

  4. Mix the dough

    3–6 minutes

    Add the remaining group B ingredients to the rested dough, then wet your hand and fold the outer edges over them. Pinch through the dough with your thumb and forefinger 5–6 times, alternating with folds until evenly mixed, about 3–6 minutes. Rest briefly, fold again and aim for a dough temperature of 25–26°C.

    From an elevated angle, the baker pinches and folds cohesive pale wheat dough in a clear tub.
    Use a damp hand to pinch and fold the levain, salt and any listed yeast evenly into the dough.

    Ready when: The dough looks even, with no streaks of starter or salt.

  5. Fold and let rise

    4 folding rounds in first 1½–2 h; total first rise about 5 hours

    Wet your hand, lift one edge of the dough just until it resists, then fold it across; work around 4–5 sides and turn the dough folded-side down. Keep it covered and let it relax between rounds of folding. Avoid tearing the dough, and leave it untouched for the last hour of this first rise.

    The baker lifts a short elastic flap of pale wheat dough, ready to fold it back across the mass.
    Lift an edge gently, fold it across, then let the dough relax before the next set.

    Ready when: About 2½× its starting size, airy and stretchy.

  6. Shape the loaves

    After the first rise

    Gently tip the dough onto a lightly floured counter and divide it equally. Fold each piece’s edges into the middle, turn the folded side down onto a patch without flour, then cup and gently pull it toward you while turning until the surface is firm without tearing. Put the rounds folded-side DOWN in floured rising baskets and cover, keeping as much air in the dough as possible.

    The baker cups one pale wheat dough round with a second equally sized round beside it.
    Divide equally and cup each piece into a smooth round, then place seam down in floured baskets.

    Ready when: Moderately firm rounds that still have air bubbles inside.

  7. Let the loaves rise

    12–14 hours

    Put the covered rising baskets in closed bags and refrigerate overnight. Bake the loaves straight from the fridge; they do not need to warm up first.

    The baker places a pair of bag-covered pale wheat dough rounds in proofing baskets into the refrigerator.
    Enclose the baskets in closed bags and refrigerate overnight. Bake the loaves directly from the fridge.

    Ready when: The loaves have grown and feel airy, but are firm enough to lift while cold.

  8. Heat the oven

    At least 45 minutes, overlapping the last rise

    Put the heavy lidded pots on the middle rack. Heat the oven and pots thoroughly to 245°C.

    Two covered cast-iron pots heat on the middle oven rack.
    Heat the covered Dutch ovens thoroughly while the loaves finish proofing.

    Ready when: The oven and pot are fully hot.

  9. Bake

    30 min covered + 20–25 min uncovered

    Turn each loaf out onto a lightly floured counter and carefully lower it folded-side UP into a hot pot. Bake with the lid on for 30 minutes, then remove the lid to finish baking. Use dry oven mitts and keep your hands clear of the hot metal.

    Using dry oven mitts, the baker lifts a lid to reveal a naturally split pale wheat loaf, with a second covered pot nearby.
    Use dry mitts to remove the lid after the covered bake, then finish uncovered until the crust is deep brown.

    Ready when: A deep brown crust; start checking 15 min after removing the lid.

  10. Let it cool

    At least 20 minutes; longer for cleaner slices

    Take the loaves out of the pots and leave them on a rack to cool before slicing.

    One whole pale wheat loaf and both halves of a second cool on a raised rack beside the baker.
    Cool the loaves on a rack before cutting so the crumb can set without tearing.

    Ready when: Most steam has escaped and the inside no longer tears when sliced.

What can go wrong, and how can I fix it?

What you noticeLikely causeWhat to do
Dough is slow to expandCool dough or weak levain.Keep covered in a mildly warmer spot; wait for the volume cue. Confirm the starter is vigorous; log dough and room temperatures.
Loaf spreads or collapsesFermentation went too far or shaping left little tension.Handle gently and bake promptly; expect a lower loaf. Use the volume cue; shape with surface tension and shorten the next warm hold.
Sticky crumb when slicedThe loaf was cut warm or insufficiently baked.Let it cool fully before judging. Bake to an even deep crust colour and allow a longer cooling rest.
Useful recipe notes

Formula totals describe the final dough, not all flour used for feeding. Use only the stated levain portion. An established culture at 80% hydration with an 80:20 white-to-whole-wheat flour blend maintains that composition. After a change of feed, traces of the previous flour blend and hydration remain.

Keep unused levain separately for the next feeding; do not return salted dough to the starter. For one Dutch oven, chill the waiting loaf and reheat the empty pot for 5 minutes before the second bake.
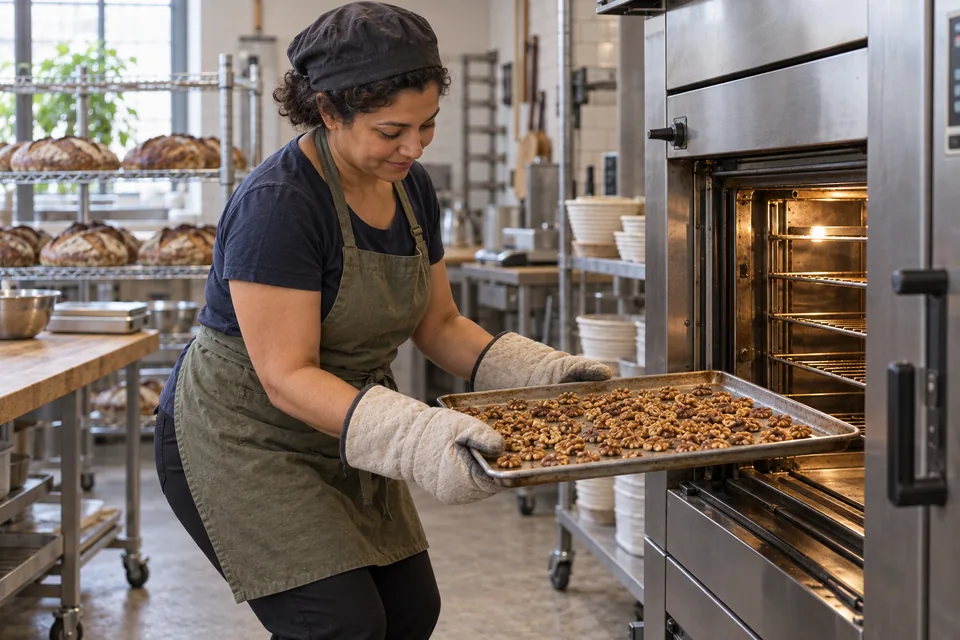
See the detailed method and ratios in , or follow ingredients through the .

Ingredient proportions & recipe details

Bread with a twice-fed sourdough starter at a glance

Makes
2 loaves
Heat
245°C
Baking time
30 min covered + 20–25 min uncovered
Dough hydration
78%
Prefermented flour
30% of total flour
Leavening
Starter + yeast
Bulk fermentation
4 sets in first 1½–2 h; total bulk about 5 hours · About 2½× starting volume, aerated and elastic.
How do the ingredient proportions compare?

Core dough totals include the flour and water in the portion of starter or preferment used. Do not add them again. Toppings, fillings and dusting flour are separate.

Formula componentGramsFlour = 100%
Total flour1000 g100%
Total water780 g78%
Salt20 g2%
Instant yeast2 g0.2%

White bread with warm-fed sourdough starter

Makes
2 loaves
Heat
245°C
Baking time
30 min covered + 20–25 min uncovered

Preheat covered pots for at least 45 min. Check the crust after 15 min uncovered.

Hybrid levain bread

White bread with warm-fed sourdough starter

A stiffer, mostly white levain grown in a reliably warm spot, followed by a cold loaf proof.

Method

  1. 01 · Day 1 · first feed

    About 8 hours

    Use: A

    Keep 50 g starter, add flour and water; mix and cover. Hold in a measured 29–32°C warm spot.

    Ready when: Stiff culture expands 3–4×, with bubbles and a webbed interior.

    The baker mixes a stiff white levain that holds a soft mound.
    01 Day 1 · first feedMix the first stiff feed, cover it and keep it in the measured warm spot.
  2. 02 · Day 1 · second feed

    14–15 hours overnight

    Use: A2

    Retain only 50 g from the first feed; mix with fresh flour and water. Cover in the same warm spot.

    Ready when: Well expanded and aerated again.

    A small piece of stiff levain is retained for its second feeding.
    02 Day 1 · second feedRetain only the listed small portion of stiff starter and mix it with fresh flour and water.
  3. 03 · Day 2 · third feed

    About 6 hours

    Use: A3

    Keep only 100 g; add flour and water. Cover in the warm spot. Begin final flour/water autolyse after about 5½ hours.

    Ready when: Culture has risen vigorously and is webbed inside.

    A larger third feed of stiff levain is set in a warm spot to expand.
    03 Day 2 · third feedMix the larger third feed, cover and keep warm until vigorously expanded and webbed inside.
  4. 04 · Autolyse

    20–30 minutes

    Use: B flour + B water

    Near the end of the feed, mix the final-dough flours and water only. Cover. Keep salt, yeast and levain aside.

    Ready when: All flour moistened; no dry pockets.

    Seen from the side, the baker mixes rough pale wheat dough by hand in a clear rectangular tub.
    04 AutolyseMoisten all the final-dough flour with the final water, then cover and rest.
  5. 05 · Mix

    3–6 minutes

    Use: Autolysed dough + remaining B

    With a damp hand, fold edges over the additions; pinch through the mass with thumb and forefinger 5–6 times. Alternate pinching and folding until uniformly mixed, about 3–6 minutes. Rest briefly, then fold again.

    Ready when: Uniform dough, no streaks of levain or salt.

    From an elevated angle, the baker pinches and folds cohesive pale wheat dough in a clear tub.
    05 MixUse a damp hand to pinch and fold the levain, salt and any listed yeast evenly into the dough.
  6. 06 · Fold & bulk

    3–4 sets in first 1½–2 h; total bulk 5–6 hours

    Use: Mixed dough

    With a damp hand, stretch one edge until resistance, then fold across the dough. Repeat around 4–5 sides; turn the bundle seam down. Cover between sets; let it relax before the next set. Do not tear it or fold during the last bulk hour.

    Ready when: About 2½× starting volume, aerated and elastic.

    The baker lifts a short elastic flap of pale wheat dough, ready to fold it back across the mass.
    06 Fold & bulkLift an edge gently, fold it across, then let the dough relax before the next set.
  7. 07 · Divide & shape

    After bulk

    Use: Fermented dough

    Gently tip onto a lightly floured counter and divide equally. Fold each perimeter inward; turn seam down. Cup and drag on an unfloured patch, rotating, until the surface holds tension without tearing. Place seam DOWN in floured baskets; cover.

    Ready when: Medium-tight rounds; preserve visible gas.

    The baker cups one pale wheat dough round with a second equally sized round beside it.
    07 Divide & shapeDivide equally and cup each piece into a smooth round, then place seam down in floured baskets.
  8. 08 · Proof

    11–12 hours

    Use: Covered baskets

    Refrigerate in closed bags overnight. Bake directly from the fridge; no warm-up is needed.

    Ready when: Expanded, aerated loaves; firm enough to lift while cold.

    The baker places a pair of bag-covered pale wheat dough rounds in proofing baskets into the refrigerator.
    08 ProofEnclose the baskets in closed bags and refrigerate overnight. Bake the loaves directly from the fridge.
  9. 09 · Preheat

    At least 45 minutes, overlapping final proof

    Use: Oven + covered Dutch ovens

    Put covered pots on a middle rack. Preheat thoroughly to 245°C.

    Ready when: Oven and pot fully heated.

    Two covered cast-iron pots heat on the middle oven rack.
    09 PreheatHeat the covered Dutch ovens thoroughly while the loaves finish proofing.
  10. 10 · Bake

    30 min covered + 20–25 min uncovered

    Use: Proofed loaves

    Invert onto a lightly floured counter and carefully lower into hot pot seam UP. Cover for 30 minutes, then uncover to finish. Use dry oven mitts; keep skin clear of hot iron.

    Ready when: Deep brown crust; check 15 min after uncovering.

    Using dry oven mitts, the baker lifts a lid to reveal a naturally split pale wheat loaf, with a second covered pot nearby.
    10 BakeUse dry mitts to remove the lid after the covered bake, then finish uncovered until the crust is deep brown.
  11. 11 · Cool

    At least 20 minutes; longer for cleaner slices

    Use: Baked loaves

    Lift out of pots and cool on a rack before cutting.

    Ready when: Steam has subsided; crumb no longer tears when cut.

    One whole pale wheat loaf and both halves of a second cool on a raised rack beside the baker.
    11 CoolCool the loaves on a rack before cutting so the crumb can set without tearing.

What to look for

StageLook and feelNeeds attention
Mix & foldsSticky but cohesive dough gains height and elasticity after each fold.A puddle that never gains strength, or a dry dough tearing under a gentle stretch.
ProofUse volume and dough feel alongside the schedule. At room temperature, a poke returns slowly and partly.Immediate rebound suggests more proof; collapse or a lasting deep dent suggests excess proof.

Troubleshooting

If you seeLikely causeWhat to do nowNext time
Dough is slow to expandCool dough or weak levain.Keep covered in a mildly warmer spot; wait for the volume cue.Confirm the starter is vigorous; log dough and room temperatures.
Loaf spreads or collapsesFermentation went too far or shaping left little tension.Handle gently and bake promptly; expect a lower loaf.Use the volume cue; shape with surface tension and shorten the next warm hold.
Sticky crumb when slicedThe loaf was cut warm or insufficiently baked.Let it cool fully before judging.Bake to an even deep crust colour and allow a longer cooling rest.

Recipe notes

  • Formula totals describe the final dough, not all flour used for feeding. Use only the stated levain portion. An established culture at 80% hydration with an 80:20 white-to-whole-wheat flour blend maintains that composition. After a change of feed, traces of the previous flour blend and hydration remain.
  • Keep unused levain separately for the next feeding; do not return salted dough to the starter. For one Dutch oven, chill the waiting loaf and reheat the empty pot for 5 minutes before the second bake.
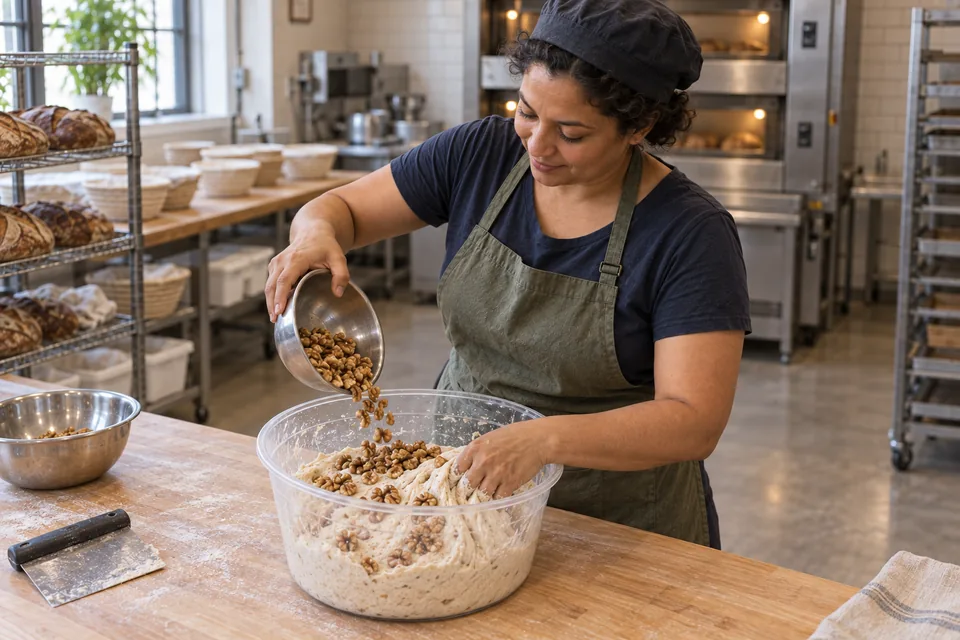
  • Do not turn an oven on while it contains the culture. A switched-off oven light may get too hot; measure the actual warm-spot temperature. To continue this culture, repeat the day-1 feeding proportions twice daily.
Show ingredient flow

Recipe

White bread with warm-fed sourdough starter

A stiffer, mostly white levain grown in a reliably warm spot, followed by a cold loaf proof.

How do I make it?

  1. Day 1: first starter feed

    About 8 hours

    Keep 50 g starter and mix in the flour and water listed for this feed. Cover and put it in a warm place measured at 29–32°C. This prepares the starter, called levain, for the dough.

    The baker mixes a stiff white levain that holds a soft mound.
    Mix the first stiff feed, cover it and keep it in the measured warm spot.

    Ready when: The firm starter has grown 3–4×, with bubbles and fine stretchy strands inside.

  2. Day 1: second starter feed

    14–15 hours overnight

    Keep only 50 g of the starter from the first feed. Mix in the fresh flour and water listed for this second feed, cover and leave it in the same warm place.

    A small piece of stiff levain is retained for its second feeding.
    Retain only the listed small portion of stiff starter and mix it with fresh flour and water.

    Ready when: The starter has grown well and is airy again.

  3. Day 2: third starter feed

    About 6 hours

    Keep only 100 g starter and mix in the flour and water listed for this third feed. Cover and leave it in the warm place. After about 5½ hours, start resting the final dough’s flour and water together.

    A larger third feed of stiff levain is set in a warm spot to expand.
    Mix the larger third feed, cover and keep warm until vigorously expanded and webbed inside.

    Ready when: The starter has risen strongly, with fine stretchy strands inside.

  4. Rest the flour and water

    20–30 minutes

    As the prepared starter nears readiness, mix only the flour and water listed for the final dough. Cover and let it rest, keeping the salt, yeast and prepared starter separate for now.

    Seen from the side, the baker mixes rough pale wheat dough by hand in a clear rectangular tub.
    Moisten all the final-dough flour with the final water, then cover and rest.

    Ready when: All the flour is wet, with no dry patches.

  5. Mix the dough

    3–6 minutes

    Add the remaining group B ingredients to the rested dough, then wet your hand and fold the outer edges over them. Pinch through the dough with your thumb and forefinger 5–6 times, alternating with folds until evenly mixed, about 3–6 minutes. Rest briefly, fold again and aim for a dough temperature of 25–26°C.

    From an elevated angle, the baker pinches and folds cohesive pale wheat dough in a clear tub.
    Use a damp hand to pinch and fold the levain, salt and any listed yeast evenly into the dough.

    Ready when: The dough looks even, with no streaks of starter or salt.

  6. Fold and let rise

    3–4 folding rounds in first 1½–2 h; total first rise 5–6 hours

    Wet your hand, lift one edge of the dough just until it resists, then fold it across; work around 4–5 sides and turn the dough folded-side down. Keep it covered and let it relax between rounds of folding. Avoid tearing the dough, and leave it untouched for the last hour of this first rise.

    The baker lifts a short elastic flap of pale wheat dough, ready to fold it back across the mass.
    Lift an edge gently, fold it across, then let the dough relax before the next set.

    Ready when: About 2½× its starting size, airy and stretchy.

  7. Shape the loaves

    After the first rise

    Gently tip the dough onto a lightly floured counter and divide it equally. Fold each piece’s edges into the middle, turn the folded side down onto a patch without flour, then cup and gently pull it toward you while turning until the surface is firm without tearing. Put the rounds folded-side DOWN in floured rising baskets and cover, keeping as much air in the dough as possible.

    The baker cups one pale wheat dough round with a second equally sized round beside it.
    Divide equally and cup each piece into a smooth round, then place seam down in floured baskets.

    Ready when: Moderately firm rounds that still have air bubbles inside.

  8. Let the loaves rise

    11–12 hours

    Put the covered rising baskets in closed bags and refrigerate overnight. Bake the loaves straight from the fridge; they do not need to warm up first.

    The baker places a pair of bag-covered pale wheat dough rounds in proofing baskets into the refrigerator.
    Enclose the baskets in closed bags and refrigerate overnight. Bake the loaves directly from the fridge.

    Ready when: The loaves have grown and feel airy, but are firm enough to lift while cold.

  9. Heat the oven

    At least 45 minutes, overlapping the last rise

    Put the heavy lidded pots on the middle rack. Heat the oven and pots thoroughly to 245°C.

    Two covered cast-iron pots heat on the middle oven rack.
    Heat the covered Dutch ovens thoroughly while the loaves finish proofing.

    Ready when: The oven and pot are fully hot.

  10. Bake

    30 min covered + 20–25 min uncovered

    Turn each loaf out onto a lightly floured counter and carefully lower it folded-side UP into a hot pot. Bake with the lid on for 30 minutes, then remove the lid to finish baking. Use dry oven mitts and keep your hands clear of the hot metal.

    Using dry oven mitts, the baker lifts a lid to reveal a naturally split pale wheat loaf, with a second covered pot nearby.
    Use dry mitts to remove the lid after the covered bake, then finish uncovered until the crust is deep brown.

    Ready when: A deep brown crust; start checking 15 min after removing the lid.

  11. Let it cool

    At least 20 minutes; longer for cleaner slices

    Take the loaves out of the pots and leave them on a rack to cool before slicing.

    One whole pale wheat loaf and both halves of a second cool on a raised rack beside the baker.
    Cool the loaves on a rack before cutting so the crumb can set without tearing.

    Ready when: Most steam has escaped and the inside no longer tears when sliced.

What can go wrong, and how can I fix it?

What you noticeLikely causeWhat to do
Dough is slow to expandCool dough or weak levain.Keep covered in a mildly warmer spot; wait for the volume cue. Confirm the starter is vigorous; log dough and room temperatures.
Loaf spreads or collapsesFermentation went too far or shaping left little tension.Handle gently and bake promptly; expect a lower loaf. Use the volume cue; shape with surface tension and shorten the next warm hold.
Sticky crumb when slicedThe loaf was cut warm or insufficiently baked.Let it cool fully before judging. Bake to an even deep crust colour and allow a longer cooling rest.
Useful recipe notes

Formula totals describe the final dough, not all flour used for feeding. Use only the stated levain portion. An established culture at 80% hydration with an 80:20 white-to-whole-wheat flour blend maintains that composition. After a change of feed, traces of the previous flour blend and hydration remain.

Keep unused levain separately for the next feeding; do not return salted dough to the starter. For one Dutch oven, chill the waiting loaf and reheat the empty pot for 5 minutes before the second bake.
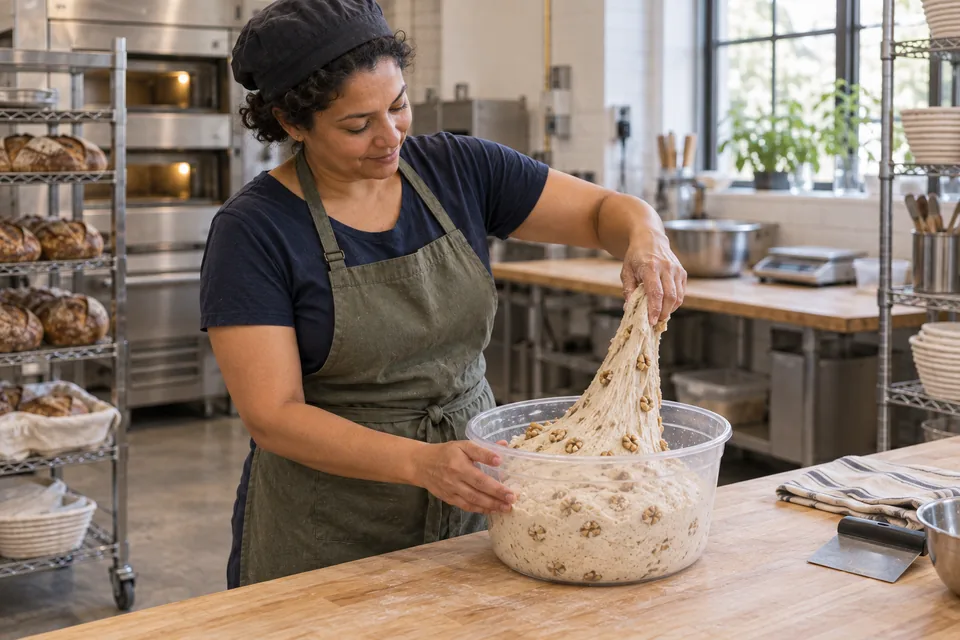
Do not turn an oven on while it contains the culture. A switched-off oven light may get too hot; measure the actual warm-spot temperature. To continue this culture, repeat the day-1 feeding proportions twice daily.

See the detailed method and ratios in , or follow ingredients through the .

Ingredient proportions & recipe details

White bread with warm-fed sourdough starter at a glance

Makes
2 loaves
Heat
245°C
Baking time
30 min covered + 20–25 min uncovered
Dough hydration
78%
Prefermented flour
25% of total flour
Leavening
Starter + yeast
Bulk fermentation
3–4 sets in first 1½–2 h; total bulk 5–6 hours · About 2½× starting volume, aerated and elastic.
How do the ingredient proportions compare?

Core dough totals include the flour and water in the portion of starter or preferment used. Do not add them again. Toppings, fillings and dusting flour are separate.

Formula componentGramsFlour = 100%
Total flour1000 g100%
Total water780 g78%
Salt20 g2%
Instant yeast1 g0.1%

40% whole-wheat bread with warm-fed starter

Makes
2 loaves
Heat
245°C
Baking time
30 min covered + 20–25 min uncovered

Preheat covered pots for at least 45 min. Check the crust after 15 min uncovered.

Hybrid levain bread

40% whole-wheat bread with warm-fed starter

The warm-spot culture used in a dough with 40% whole wheat and 80% nominal hydration.

Method

  1. 01 · Day 1 · first feed

    About 8 hours

    Use: A

    Keep 50 g starter, add flour and water; mix and cover. Hold in a measured 29–32°C warm spot.

    Ready when: Stiff culture expands 3–4×, with bubbles and a webbed interior.

    The baker mixes a stiff white levain that holds a soft mound.
    01 Day 1 · first feedMix the first stiff feed, cover it and keep it in the measured warm spot.
  2. 02 · Day 1 · second feed

    14–15 hours overnight

    Use: A2

    Retain only 50 g from the first feed; mix with fresh flour and water. Cover in the same warm spot.

    Ready when: Well expanded and aerated again.

    A small piece of stiff levain is retained for its second feeding.
    02 Day 1 · second feedRetain only the listed small portion of stiff starter and mix it with fresh flour and water.
  3. 03 · Day 2 · third feed

    About 6 hours

    Use: A3

    Keep only 100 g; add flour and water. Cover in the warm spot. Begin final flour/water autolyse after about 5½ hours.

    Ready when: Culture has risen vigorously and is webbed inside.

    A larger third feed of stiff levain is set in a warm spot to expand.
    03 Day 2 · third feedMix the larger third feed, cover and keep warm until vigorously expanded and webbed inside.
  4. 04 · Autolyse

    20–30 minutes

    Use: B flour + B water

    Near the end of the feed, mix the final-dough flours and water only. Cover. Keep salt, yeast and levain aside.

    Ready when: All flour moistened; no dry pockets.

    Seen from the side, the baker mixes rough finely flecked wheat and wholegrain dough by hand in a clear rectangular tub.
    04 AutolyseMoisten all the final-dough flour with the final water, then cover and rest.
  5. 05 · Mix

    3–6 minutes

    Use: Autolysed dough + remaining B

    With a damp hand, fold edges over the additions; pinch through the mass with thumb and forefinger 5–6 times. Alternate pinching and folding until uniformly mixed, about 3–6 minutes. Rest briefly, then fold again.

    Ready when: Uniform dough, no streaks of levain or salt.

    From an elevated angle, the baker pinches and folds cohesive finely flecked wheat and wholegrain dough in a clear tub.
    05 MixUse a damp hand to pinch and fold the levain, salt and any listed yeast evenly into the dough.
  6. 06 · Fold & bulk

    3–4 sets in first 1½–2 h; total bulk 5–6 hours

    Use: Mixed dough

    With a damp hand, stretch one edge until resistance, then fold across the dough. Repeat around 4–5 sides; turn the bundle seam down. Cover between sets; let it relax before the next set. Do not tear it or fold during the last bulk hour.

    Ready when: About 2½× starting volume, aerated and elastic.

    The baker lifts a short elastic flap of finely flecked wheat and wholegrain dough, ready to fold it back across the mass.
    06 Fold & bulkLift an edge gently, fold it across, then let the dough relax before the next set.
  7. 07 · Divide & shape

    After bulk

    Use: Fermented dough

    Gently tip onto a lightly floured counter and divide equally. Fold each perimeter inward; turn seam down. Cup and drag on an unfloured patch, rotating, until the surface holds tension without tearing. Place seam DOWN in floured baskets; cover.

    Ready when: Medium-tight rounds; preserve visible gas.

    The baker cups one finely flecked wheat and wholegrain dough round with a second equally sized round beside it.
    07 Divide & shapeDivide equally and cup each piece into a smooth round, then place seam down in floured baskets.
  8. 08 · Proof

    11–12 hours

    Use: Covered baskets

    Refrigerate in closed bags overnight. Bake directly from the fridge; no warm-up is needed.

    Ready when: Expanded, aerated loaves; firm enough to lift while cold.

    The baker places a pair of bag-covered finely flecked wheat and wholegrain dough rounds in proofing baskets into the refrigerator.
    08 ProofEnclose the baskets in closed bags and refrigerate overnight. Bake the loaves directly from the fridge.
  9. 09 · Preheat

    At least 45 minutes, overlapping final proof

    Use: Oven + covered Dutch ovens

    Put covered pots on a middle rack. Preheat thoroughly to 245°C.

    Ready when: Oven and pot fully heated.

    Two covered cast-iron pots heat on the middle oven rack.
    09 PreheatHeat the covered Dutch ovens thoroughly while the loaves finish proofing.
  10. 10 · Bake

    30 min covered + 20–25 min uncovered

    Use: Proofed loaves

    Invert onto a lightly floured counter and carefully lower into hot pot seam UP. Cover for 30 minutes, then uncover to finish. Use dry oven mitts; keep skin clear of hot iron.

    Ready when: Deep brown crust; check 15 min after uncovering.

    Using dry oven mitts, the baker lifts a lid to reveal a naturally split finely flecked wheat and wholegrain loaf, with a second covered pot nearby.
    10 BakeUse dry mitts to remove the lid after the covered bake, then finish uncovered until the crust is deep brown.
  11. 11 · Cool

    At least 20 minutes; longer for cleaner slices

    Use: Baked loaves

    Lift out of pots and cool on a rack before cutting.

    Ready when: Steam has subsided; crumb no longer tears when cut.

    One whole finely flecked wheat and wholegrain loaf and both halves of a second cool on a raised rack beside the baker.
    11 CoolCool the loaves on a rack before cutting so the crumb can set without tearing.

What to look for

StageLook and feelNeeds attention
Mix & foldsSticky but cohesive dough gains height and elasticity after each fold.A puddle that never gains strength, or a dry dough tearing under a gentle stretch.
ProofUse volume and dough feel alongside the schedule. At room temperature, a poke returns slowly and partly.Immediate rebound suggests more proof; collapse or a lasting deep dent suggests excess proof.

Troubleshooting

If you seeLikely causeWhat to do nowNext time
Dough is slow to expandCool dough or weak levain.Keep covered in a mildly warmer spot; wait for the volume cue.Confirm the starter is vigorous; log dough and room temperatures.
Loaf spreads or collapsesFermentation went too far or shaping left little tension.Handle gently and bake promptly; expect a lower loaf.Use the volume cue; shape with surface tension and shorten the next warm hold.
Sticky crumb when slicedThe loaf was cut warm or insufficiently baked.Let it cool fully before judging.Bake to an even deep crust colour and allow a longer cooling rest.

Recipe notes

  • Formula totals describe the final dough, not all flour used for feeding. Use only the stated levain portion. An established culture at 80% hydration with an 80:20 white-to-whole-wheat flour blend maintains that composition. After a change of feed, traces of the previous flour blend and hydration remain.
  • Keep unused levain separately for the next feeding; do not return salted dough to the starter. For one Dutch oven, chill the waiting loaf and reheat the empty pot for 5 minutes before the second bake.
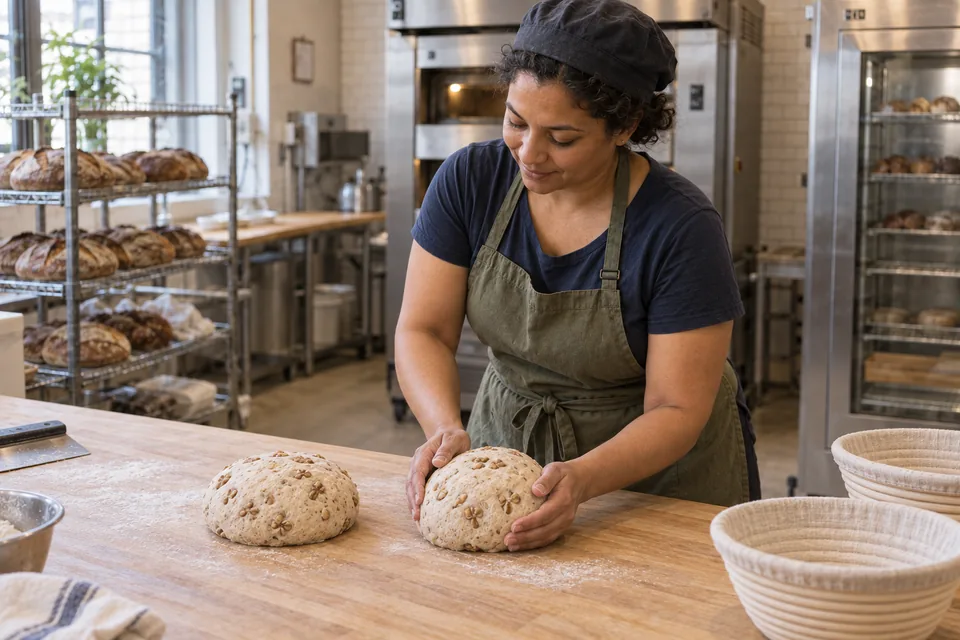
  • Do not turn an oven on while it contains the culture. A switched-off oven light may get too hot; measure the actual warm-spot temperature. To continue this culture, repeat the day-1 feeding proportions twice daily.
Show ingredient flow

Recipe

40% whole-wheat bread with warm-fed starter

The warm-spot culture used in a dough with 40% whole wheat and 80% nominal hydration.

How do I make it?

  1. Day 1: first starter feed

    About 8 hours

    Keep 50 g starter and mix in the flour and water listed for this feed. Cover and put it in a warm place measured at 29–32°C. This prepares the starter, called levain, for the dough.

    The baker mixes a stiff white levain that holds a soft mound.
    Mix the first stiff feed, cover it and keep it in the measured warm spot.

    Ready when: The firm starter has grown 3–4×, with bubbles and fine stretchy strands inside.

  2. Day 1: second starter feed

    14–15 hours overnight

    Keep only 50 g of the starter from the first feed. Mix in the fresh flour and water listed for this second feed, cover and leave it in the same warm place.

    A small piece of stiff levain is retained for its second feeding.
    Retain only the listed small portion of stiff starter and mix it with fresh flour and water.

    Ready when: The starter has grown well and is airy again.

  3. Day 2: third starter feed

    About 6 hours

    Keep only 100 g starter and mix in the flour and water listed for this third feed. Cover and leave it in the warm place. After about 5½ hours, start resting the final dough’s flour and water together.

    A larger third feed of stiff levain is set in a warm spot to expand.
    Mix the larger third feed, cover and keep warm until vigorously expanded and webbed inside.

    Ready when: The starter has risen strongly, with fine stretchy strands inside.

  4. Rest the flour and water

    20–30 minutes

    As the prepared starter nears readiness, mix only the flour and water listed for the final dough. Cover and let it rest, keeping the salt, yeast and prepared starter separate for now.

    Seen from the side, the baker mixes rough finely flecked wheat and wholegrain dough by hand in a clear rectangular tub.
    Moisten all the final-dough flour with the final water, then cover and rest.

    Ready when: All the flour is wet, with no dry patches.

  5. Mix the dough

    3–6 minutes

    Add the remaining group B ingredients to the rested dough, then wet your hand and fold the outer edges over them. Pinch through the dough with your thumb and forefinger 5–6 times, alternating with folds until evenly mixed, about 3–6 minutes. Rest briefly, fold again and aim for a dough temperature of 25–26°C.

    From an elevated angle, the baker pinches and folds cohesive finely flecked wheat and wholegrain dough in a clear tub.
    Use a damp hand to pinch and fold the levain, salt and any listed yeast evenly into the dough.

    Ready when: The dough looks even, with no streaks of starter or salt.

  6. Fold and let rise

    3–4 folding rounds in first 1½–2 h; total first rise 5–6 hours

    Wet your hand, lift one edge of the dough just until it resists, then fold it across; work around 4–5 sides and turn the dough folded-side down. Keep it covered and let it relax between rounds of folding. Avoid tearing the dough, and leave it untouched for the last hour of this first rise.

    The baker lifts a short elastic flap of finely flecked wheat and wholegrain dough, ready to fold it back across the mass.
    Lift an edge gently, fold it across, then let the dough relax before the next set.

    Ready when: About 2½× its starting size, airy and stretchy.

  7. Shape the loaves

    After the first rise

    Gently tip the dough onto a lightly floured counter and divide it equally. Fold each piece’s edges into the middle, turn the folded side down onto a patch without flour, then cup and gently pull it toward you while turning until the surface is firm without tearing. Put the rounds folded-side DOWN in floured rising baskets and cover, keeping as much air in the dough as possible.

    The baker cups one finely flecked wheat and wholegrain dough round with a second equally sized round beside it.
    Divide equally and cup each piece into a smooth round, then place seam down in floured baskets.

    Ready when: Moderately firm rounds that still have air bubbles inside.

  8. Let the loaves rise

    11–12 hours

    Put the covered rising baskets in closed bags and refrigerate overnight. Bake the loaves straight from the fridge; they do not need to warm up first.

    The baker places a pair of bag-covered finely flecked wheat and wholegrain dough rounds in proofing baskets into the refrigerator.
    Enclose the baskets in closed bags and refrigerate overnight. Bake the loaves directly from the fridge.

    Ready when: The loaves have grown and feel airy, but are firm enough to lift while cold.

  9. Heat the oven

    At least 45 minutes, overlapping the last rise

    Put the heavy lidded pots on the middle rack. Heat the oven and pots thoroughly to 245°C.

    Two covered cast-iron pots heat on the middle oven rack.
    Heat the covered Dutch ovens thoroughly while the loaves finish proofing.

    Ready when: The oven and pot are fully hot.

  10. Bake

    30 min covered + 20–25 min uncovered

    Turn each loaf out onto a lightly floured counter and carefully lower it folded-side UP into a hot pot. Bake with the lid on for 30 minutes, then remove the lid to finish baking. Use dry oven mitts and keep your hands clear of the hot metal.

    Using dry oven mitts, the baker lifts a lid to reveal a naturally split finely flecked wheat and wholegrain loaf, with a second covered pot nearby.
    Use dry mitts to remove the lid after the covered bake, then finish uncovered until the crust is deep brown.

    Ready when: A deep brown crust; start checking 15 min after removing the lid.

  11. Let it cool

    At least 20 minutes; longer for cleaner slices

    Take the loaves out of the pots and leave them on a rack to cool before slicing.

    One whole finely flecked wheat and wholegrain loaf and both halves of a second cool on a raised rack beside the baker.
    Cool the loaves on a rack before cutting so the crumb can set without tearing.

    Ready when: Most steam has escaped and the inside no longer tears when sliced.

What can go wrong, and how can I fix it?

What you noticeLikely causeWhat to do
Dough is slow to expandCool dough or weak levain.Keep covered in a mildly warmer spot; wait for the volume cue. Confirm the starter is vigorous; log dough and room temperatures.
Loaf spreads or collapsesFermentation went too far or shaping left little tension.Handle gently and bake promptly; expect a lower loaf. Use the volume cue; shape with surface tension and shorten the next warm hold.
Sticky crumb when slicedThe loaf was cut warm or insufficiently baked.Let it cool fully before judging. Bake to an even deep crust colour and allow a longer cooling rest.
Useful recipe notes

Formula totals describe the final dough, not all flour used for feeding. Use only the stated levain portion. An established culture at 80% hydration with an 80:20 white-to-whole-wheat flour blend maintains that composition. After a change of feed, traces of the previous flour blend and hydration remain.

Keep unused levain separately for the next feeding; do not return salted dough to the starter. For one Dutch oven, chill the waiting loaf and reheat the empty pot for 5 minutes before the second bake.
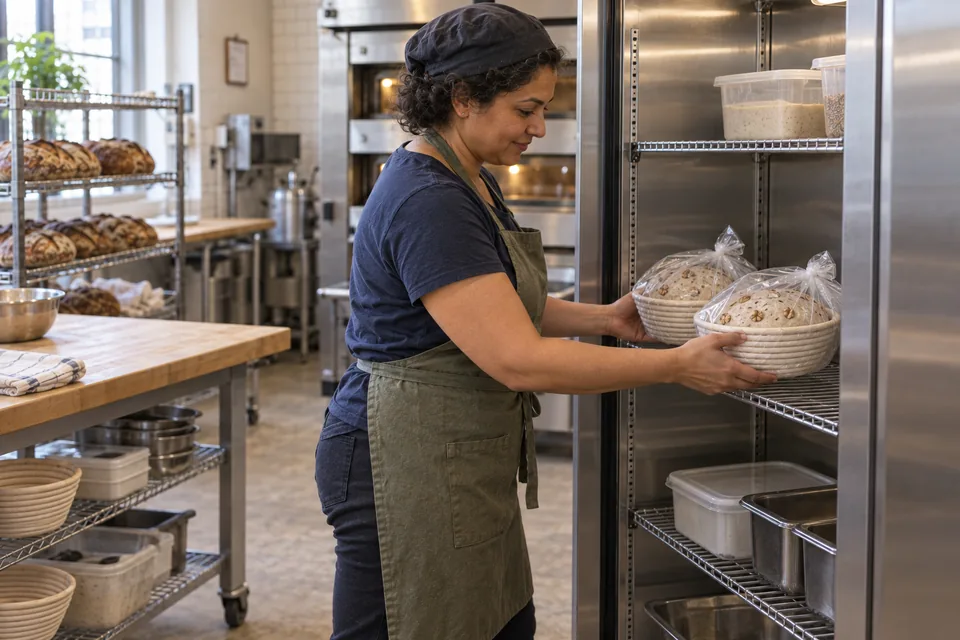
Do not turn an oven on while it contains the culture. A switched-off oven light may get too hot; measure the actual warm-spot temperature. To continue this culture, repeat the day-1 feeding proportions twice daily.

See the detailed method and ratios in , or follow ingredients through the .

Ingredient proportions & recipe details

40% whole-wheat bread with warm-fed starter at a glance

Makes
2 loaves
Heat
245°C
Baking time
30 min covered + 20–25 min uncovered
Dough hydration
80%
Prefermented flour
25% of total flour
Leavening
Starter + yeast
Bulk fermentation
3–4 sets in first 1½–2 h; total bulk 5–6 hours · About 2½× starting volume, aerated and elastic.
How do the ingredient proportions compare?

Core dough totals include the flour and water in the portion of starter or preferment used. Do not add them again. Toppings, fillings and dusting flour are separate.

Formula componentGramsFlour = 100%
Total flour1000 g100%
Total water800 g80%
Salt20 g2%
Instant yeast1 g0.1%

Large round sourdough loaf

Makes
1 large loaf, about 1.8 kg raw dough
Heat
260°C for 5 min, then 245°C
Baking time
5 min + 35–40 min; extend if needed

Preheat stone at least 45 min; use steam when loading. Finish with the oven off and door ajar for a few minutes.

Pure levain bread

Large round sourdough loaf

One large loaf from the entire Overnight wheat and rye sourdough dough; the same shaping and baking variation also applies to White and whole-wheat sourdough.

Method

  1. 01 · Feed

    7–9 hours

    Use: A

    Keep only 100 g mature levain. Mix in the feed flour and water; cover at room temperature.

    Ready when: Bubbly, expanded and webbed inside; pleasantly fermented.

    Baker stirs a thick, softly flecked levain in a clear container.
    01 FeedMix the retained starter with its feed flour and water, then cover and let it expand.
  2. 02 · Autolyse

    20–30 minutes

    Use: B flour + B water

    Near the end of the feed, mix the final-dough flours and water only. Cover. Keep salt, yeast and levain aside.

    Ready when: All flour moistened; no dry pockets.

    Seen from the side, the baker mixes rough pale wheat dough by hand in a clear rectangular tub.
    02 AutolyseMoisten all the final-dough flour with the final water, then cover and rest.
  3. 03 · Mix

    3–6 minutes

    Use: Autolysed dough + remaining B

    With a damp hand, fold edges over the additions; pinch through the mass with thumb and forefinger 5–6 times. Alternate pinching and folding until uniformly mixed, about 3–6 minutes. Rest briefly, then fold again.

    Ready when: Uniform dough, no streaks of levain or salt.

    From an elevated angle, the baker pinches and folds cohesive pale wheat dough in a clear tub.
    03 MixUse a damp hand to pinch and fold the levain, salt and any listed yeast evenly into the dough.
  4. 04 · Fold & bulk

    3–4 sets before bed; total bulk 12–15 h

    Use: Mixed dough

    With a damp hand, stretch one edge until resistance, then fold across the dough. Repeat around 4–5 sides; turn the bundle seam down. Cover between sets; let it relax before the next set. Do not tear it or fold during the last bulk hour. The slow dough can take its last fold later in the evening.

    Ready when: Nearly 3× starting volume; possibly less in a cool kitchen.

    The baker lifts a short elastic flap of pale wheat dough, ready to fold it back across the mass.
    04 Fold & bulkLift an edge gently, fold it across, then let the dough relax before the next set.
  5. 05 · Shape one loaf

    After bulk

    Use: All fermented dough

    Keep the dough whole. Fold the perimeter inward; turn seam down and cup/drag to form one round. Set seam DOWN on a floured lint-free cloth; overlap cloth loosely, leaving about 2.5 cm expansion room.

    Ready when: A taut round with enough cloth slack to rise.

    Baker gently tightening one large round of pale sourdough on a floured bench.
    05 Shape one loafKeep the whole batch together and cup it into one large round; do not divide it.
  6. 06 · Proof

    4½–5 hours

    Use: Covered large loaf

    Leave at about 21°C until aerated; use a gentle floured-finger dent alongside volume.

    Ready when: Slow, partial rebound; loaf holds its rounded form.

    Baker checking the proof of one large round loaf resting in a floured cloth.
    06 ProofLeave the large round room to expand inside its loosely folded cloth; check it with a gentle fingertip dent.
  7. 07 · Preheat

    At least 45 minutes

    Use: Stone + empty metal steam tray

    Put stone on middle rack and a sturdy metal tray below. Preheat to 260°C; keep the stone dry.

    Ready when: Stone and oven fully heated.

    Baker checking a dry baking stone and separate lower steam tray before baking.
    07 PreheatHeat the dry stone on the middle rack with a separate empty metal steam tray below.
  8. 08 · Load & bake

    5 min at 260°C, then 35–40 min at 245°C; extend if needed

    Use: Proofed loaf + steam water

    Turn seam UP onto a floured peel; optionally score an overlapping square around the perimeter. Slide onto stone. Carefully add boiling water to the metal tray, keeping hands away from steam. After 5 minutes lower to 245°C.

    Ready when: Deep brown crust, set sides and a fully baked centre; check colour early at 30 min.

    Baker sliding one large round loaf from a wooden peel onto the baking stone.
    08 Load & bakeSlide the single loaf onto the hot stone. Add the steam water to the separate metal tray as directed.
  9. 09 · Set crust & cool

    A few minutes in oven; several hours cooling

    Use: Baked loaf

    Turn oven off, leave door ajar for a few minutes, then cool completely on a rack before slicing.

    Ready when: Crumb sets throughout this larger loaf.

    The cooled large loaf is cut into two matching halves to reveal the crumb.
    09 Set crust & coolLet the large loaf cool completely on a rack before slicing so its centre has time to set.

What to look for

StageLook and feelNeeds attention
Mix & foldsSticky but cohesive dough gains height and elasticity after each fold.A puddle that never gains strength, or a dry dough tearing under a gentle stretch.
ProofUse volume and dough feel alongside the schedule. At room temperature, a poke returns slowly and partly.Immediate rebound suggests more proof; collapse or a lasting deep dent suggests excess proof.

Troubleshooting

If you seeLikely causeWhat to do nowNext time
Dough is slow to expandCool dough or weak levain.Keep covered in a mildly warmer spot; wait for the volume cue.Confirm the starter is vigorous; log dough and room temperatures.
Loaf spreads or collapsesFermentation went too far or shaping left little tension.Handle gently and bake promptly; expect a lower loaf.Use the volume cue; shape with surface tension and shorten the next warm hold.
Sticky crumb when slicedThe loaf was cut warm or insufficiently baked.Let it cool fully before judging.Bake to an even deep crust colour and allow a longer cooling rest.

Recipe notes

  • Formula totals describe the final dough, not all flour used for feeding. Use only the stated levain portion. An established culture at 80% hydration with an 80:20 white-to-whole-wheat flour blend maintains that composition. After a change of feed, traces of the previous flour blend and hydration remain.
  • Below 21°C, allow extra time. Keep the 216 g levain portion: adding more changes the flour and water totals.
Show ingredient flow

Recipe

Large round sourdough loaf

One large loaf from the entire Overnight wheat and rye sourdough dough; the same shaping and baking variation also applies to White and whole-wheat sourdough.

How do I make it?

  1. Prepare the starter

    7–9 hours

    Prepare the starter: keep only 100 g of ripe, active starter and mix in the flour and water listed for this feed. Aim for 26–27°C just after mixing, then cover and leave at room temperature. This prepared starter is the levain used later in the dough.

    Baker stirs a thick, softly flecked levain in a clear container.
    Mix the retained starter with its feed flour and water, then cover and let it expand.

    Ready when: The starter has grown, is bubbly and shows fine stretchy strands inside, with a pleasant fermented smell.

  2. Rest the flour and water

    20–30 minutes

    As the prepared starter nears readiness, mix only the flour and water listed for the final dough. Cover and let it rest, keeping the salt, yeast and prepared starter separate for now.

    Seen from the side, the baker mixes rough pale wheat dough by hand in a clear rectangular tub.
    Moisten all the final-dough flour with the final water, then cover and rest.

    Ready when: All the flour is wet, with no dry patches.

  3. Mix the dough

    3–6 minutes

    Add the remaining group B ingredients to the rested dough, then wet your hand and fold the outer edges over them. Pinch through the dough with your thumb and forefinger 5–6 times, alternating with folds until evenly mixed, about 3–6 minutes. Rest briefly, fold again and aim for a dough temperature of 25–26°C.

    From an elevated angle, the baker pinches and folds cohesive pale wheat dough in a clear tub.
    Use a damp hand to pinch and fold the levain, salt and any listed yeast evenly into the dough.

    Ready when: The dough looks even, with no streaks of starter or salt.

  4. Fold and let rise

    3–4 folding rounds before bed; total first rise 12–15 h

    Wet your hand, lift one edge just until it resists and fold it across; repeat around 4–5 sides, then turn the dough folded-side down without tearing it. Cover and let it relax between folding rounds, leaving it untouched for the last hour of this first rise. This slowly rising dough can have its last fold later in the evening.

    The baker lifts a short elastic flap of pale wheat dough, ready to fold it back across the mass.
    Lift an edge gently, fold it across, then let the dough relax before the next set.

    Ready when: Nearly 3× its starting size, though it may rise less in a cool kitchen.

  5. Shape one large loaf

    After the first rise

    Keep the dough in one piece, fold its edges into the middle, then turn the folded side down and cup and pull it toward you to make one round loaf. Set it folded-side DOWN on a floured cloth that will not shed fibres. Loosely fold the cloth over it, leaving about 2.5 cm of space for the loaf to expand.

    Baker gently tightening one large round of pale sourdough on a floured bench.
    Keep the whole batch together and cup it into one large round; do not divide it.

    Ready when: A firm round loaf with enough loose cloth around it to keep rising.

  6. Let the loaves rise

    4½–5 hours

    Let the loaf rise at about 21°C until it is airy. Watch how much it has grown and gently press it with a floured finger to check whether it is ready.

    Baker checking the proof of one large round loaf resting in a floured cloth.
    Leave the large round room to expand inside its loosely folded cloth; check it with a gentle fingertip dent.

    Ready when: A finger dent slowly rises partway back, and the loaf stays rounded.

  7. Heat the oven

    At least 45 minutes

    Put the baking stone on the middle rack with a sturdy metal tray on the rack below. Heat the oven to 260°C and keep the stone dry.

    Baker checking a dry baking stone and separate lower steam tray before baking.
    Heat the dry stone on the middle rack with a separate empty metal steam tray below.

    Ready when: The stone and oven are fully hot.

  8. Bake the loaf

    5 min at 260°C, then 35–40 min at 245°C; extend if needed

    Turn the loaf folded-side UP onto a floured baking peel, the flat paddle used to slide it into the oven; if you like, make cuts around the edge in an overlapping square. Slide it onto the stone, then carefully pour boiling water into the metal tray, keeping your hands clear of the steam. After 5 minutes, lower the oven to 245°C.

    Baker sliding one large round loaf from a wooden peel onto the baking stone.
    Slide the single loaf onto the hot stone. Add the steam water to the separate metal tray as directed.

    Ready when: A deep brown crust, firm sides and a fully baked centre; check the colour early at 30 min.

  9. Finish the crust and cool

    A few minutes in oven; several hours cooling

    Turn the oven off and leave the door slightly open for a few minutes. Move the loaf to a rack and let it cool all the way through before slicing.

    The cooled large loaf is cut into two matching halves to reveal the crumb.
    Let the large loaf cool completely on a rack before slicing so its centre has time to set.

    Ready when: The inside has firmed up all the way through this large loaf.

What can go wrong, and how can I fix it?

What you noticeLikely causeWhat to do
Dough is slow to expandCool dough or weak levain.Keep covered in a mildly warmer spot; wait for the volume cue. Confirm the starter is vigorous; log dough and room temperatures.
Loaf spreads or collapsesFermentation went too far or shaping left little tension.Handle gently and bake promptly; expect a lower loaf. Use the volume cue; shape with surface tension and shorten the next warm hold.
Sticky crumb when slicedThe loaf was cut warm or insufficiently baked.Let it cool fully before judging. Bake to an even deep crust colour and allow a longer cooling rest.
Useful recipe notes

Formula totals describe the final dough, not all flour used for feeding. Use only the stated levain portion. An established culture at 80% hydration with an 80:20 white-to-whole-wheat flour blend maintains that composition. After a change of feed, traces of the previous flour blend and hydration remain.

Below 21°C, allow extra time. Keep the 216 g levain portion: adding more changes the flour and water totals.

See the detailed method and ratios in , or follow ingredients through the .

Ingredient proportions & recipe details

Large round sourdough loaf at a glance

Makes
1 large loaf, about 1.8 kg raw dough
Heat
260°C for 5 min, then 245°C
Baking time
5 min + 35–40 min; extend if needed
Dough hydration
78%
Prefermented flour
12% of total flour
Bulk fermentation
3–4 sets before bed; total bulk 12–15 h · Nearly 3× starting volume; possibly less in a cool kitchen.
How do the ingredient proportions compare?

Core dough totals include the flour and water in the portion of starter or preferment used. Do not add them again. Toppings, fillings and dusting flour are separate.

Formula componentGramsFlour = 100%
Total flour1000 g100%
Total water780 g78%
Salt22 g2.2%
Instant yeast0 g0%

Country sourdough with added yeast (liquid starter)

Makes
2 loaves
Heat
245°C
Baking time
30 min covered + about 20 min uncovered

Preheat covered pots for at least 45 min. Check the crust after 15 min uncovered.

Hybrid levain bread

Country sourdough with added yeast (liquid starter)

Country bread at the same 78% nominal hydration, with extra water in the liquid levain offset by less final-mix water.

Method

  1. 01 · Day 1 · morning

    About 9 h; e.g. 9 a.m. to 6 p.m.

    Use: A

    Keep 50 g starter, mix with the new flour and water; cover at room temperature.

    Ready when: Increasing bubbles and volume.

    Baker checking the smooth, loose consistency of a freshly mixed white levain.
    01 Day 1 · morningMix the first liquid feed until smooth and loose, then cover and let it develop.
  2. 02 · Day 1 · evening

    About 15 h overnight

    Use: A2

    Keep 250 g from the first feed, discarding the rest. Mix with flour and water; cover.

    Ready when: Expanded culture with a webbed interior.

    Baker transferring retained liquid levain into a fresh container for feeding.
    02 Day 1 · eveningKeep the listed portion of the first feed and mix it with fresh flour and water.
  3. 03 · Day 2 · morning

    About 6 h; e.g. 9 a.m. to 3 p.m.

    Use: A3

    Keep only 100 g from the second feed. Mix in flour and water; cover until aerated and ready for the final dough.

    Ready when: Bubbly and webbed, with a mild fermented aroma; not collapsed.

    Baker checking the creamy consistency of the larger liquid-levain feed at the fermentation shelf.
    03 Day 2 · morningMix the larger third liquid feed, cover and wait until it is bubbly and ready for the dough.
  4. 04 · Autolyse

    20–30 minutes

    Use: B flour + B water

    Near the end of the feed, mix the final-dough flours and water only. Cover. Keep salt, yeast and levain aside.

    Ready when: All flour moistened; no dry pockets.

    Seen from the side, the baker mixes rough pale wheat dough by hand in a clear rectangular tub.
    04 AutolyseMoisten all the final-dough flour with the final water, then cover and rest.
  5. 05 · Mix

    3–6 minutes

    Use: Autolysed dough + remaining B

    With a damp hand, fold edges over the additions; pinch through the mass with thumb and forefinger 5–6 times. Alternate pinching and folding until uniformly mixed, about 3–6 minutes. Rest briefly, then fold again.

    Ready when: Uniform dough, no streaks of levain or salt.

    From an elevated angle, the baker pinches and folds cohesive pale wheat dough in a clear tub.
    05 MixUse a damp hand to pinch and fold the levain, salt and any listed yeast evenly into the dough.
  6. 06 · Fold & bulk

    3–4 sets in first 1½–2 h; total bulk about 5 hours

    Use: Mixed dough

    With a damp hand, stretch one edge until resistance, then fold across the dough. Repeat around 4–5 sides; turn the bundle seam down. Cover between sets; let it relax before the next set. Do not tear it or fold during the last bulk hour.

    Ready when: About 2½× starting volume, aerated and elastic.

    The baker lifts a short elastic flap of pale wheat dough, ready to fold it back across the mass.
    06 Fold & bulkLift an edge gently, fold it across, then let the dough relax before the next set.
  7. 07 · Divide & shape

    After bulk

    Use: Fermented dough

    Gently tip onto a lightly floured counter and divide equally. Fold each perimeter inward; turn seam down. Cup and drag on an unfloured patch, rotating, until the surface holds tension without tearing. Place seam DOWN in floured baskets; cover.

    Ready when: Medium-tight rounds; preserve visible gas.

    The baker cups one pale wheat dough round with a second equally sized round beside it.
    07 Divide & shapeDivide equally and cup each piece into a smooth round, then place seam down in floured baskets.
  8. 08 · Proof

    12–14 hours

    Use: Covered baskets

    Refrigerate in closed bags overnight. Bake directly from the fridge; no warm-up is needed.

    Ready when: Expanded, aerated loaves; firm enough to lift while cold.

    The baker places a pair of bag-covered pale wheat dough rounds in proofing baskets into the refrigerator.
    08 ProofEnclose the baskets in closed bags and refrigerate overnight. Bake the loaves directly from the fridge.
  9. 09 · Preheat

    At least 45 minutes, overlapping final proof

    Use: Oven + covered Dutch ovens

    Put covered pots on a middle rack. Preheat thoroughly to 245°C.

    Ready when: Oven and pot fully heated.

    Two covered cast-iron pots heat on the middle oven rack.
    09 PreheatHeat the covered Dutch ovens thoroughly while the loaves finish proofing.
  10. 10 · Bake

    30 min covered + about 20 min uncovered

    Use: Proofed loaves

    Invert onto a lightly floured counter and carefully lower into hot pot seam UP. Cover for 30 minutes, then uncover to finish. Use dry oven mitts; keep skin clear of hot iron.

    Ready when: Deep brown crust; check 15 min after uncovering.

    Using dry oven mitts, the baker lifts a lid to reveal a naturally split pale wheat loaf, with a second covered pot nearby.
    10 BakeUse dry mitts to remove the lid after the covered bake, then finish uncovered until the crust is deep brown.
  11. 11 · Cool

    At least 20 minutes; longer for cleaner slices

    Use: Baked loaves

    Lift out of pots and cool on a rack before cutting.

    Ready when: Steam has subsided; crumb no longer tears when cut.

    One whole pale wheat loaf and both halves of a second cool on a raised rack beside the baker.
    11 CoolCool the loaves on a rack before cutting so the crumb can set without tearing.

What to look for

StageLook and feelNeeds attention
Mix & foldsSticky but cohesive dough gains height and elasticity after each fold.A puddle that never gains strength, or a dry dough tearing under a gentle stretch.
ProofUse volume and dough feel alongside the schedule. At room temperature, a poke returns slowly and partly.Immediate rebound suggests more proof; collapse or a lasting deep dent suggests excess proof.

Troubleshooting

If you seeLikely causeWhat to do nowNext time
Dough is slow to expandCool dough or weak levain.Keep covered in a mildly warmer spot; wait for the volume cue.Confirm the starter is vigorous; log dough and room temperatures.
Loaf spreads or collapsesFermentation went too far or shaping left little tension.Handle gently and bake promptly; expect a lower loaf.Use the volume cue; shape with surface tension and shorten the next warm hold.
Sticky crumb when slicedThe loaf was cut warm or insufficiently baked.Let it cool fully before judging.Bake to an even deep crust colour and allow a longer cooling rest.

Recipe notes

  • Formula totals describe the final dough, not all flour used for feeding. Use only the stated levain portion. An established culture at 80% hydration with an 80:20 white-to-whole-wheat flour blend maintains that composition. After a change of feed, traces of the previous flour blend and hydration remain.
  • Keep unused levain separately for the next feeding; do not return salted dough to the starter. For one Dutch oven, chill the waiting loaf and reheat the empty pot for 5 minutes before the second bake.
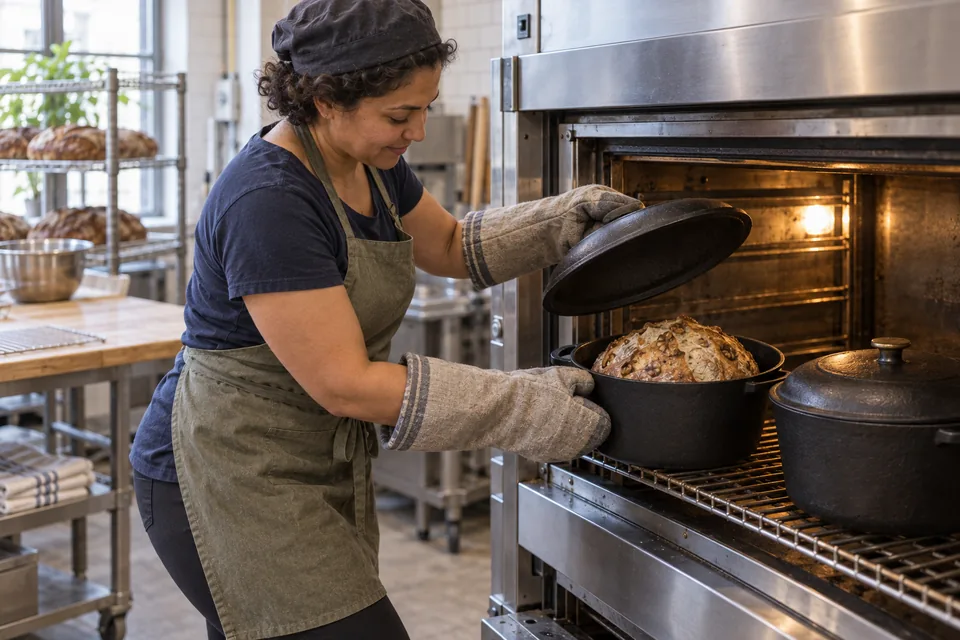
Show ingredient flow

Recipe

Country sourdough with added yeast (liquid starter)

Country bread at the same 78% nominal hydration, with extra water in the liquid levain offset by less final-mix water.

How do I make it?

  1. Day 1: morning starter feed

    About 9 h; e.g. 9 a.m. to 6 p.m.

    Keep 50 g starter and mix in the fresh flour and water listed for this feed. Cover and leave at room temperature.

    Baker checking the smooth, loose consistency of a freshly mixed white levain.
    Mix the first liquid feed until smooth and loose, then cover and let it develop.

    Ready when: More bubbles and a growing mixture.

  2. Day 1: evening starter feed

    About 15 h overnight

    Keep 250 g of the starter from the first feed and discard the rest. Mix in the flour and water listed for this feed and cover.

    Baker transferring retained liquid levain into a fresh container for feeding.
    Keep the listed portion of the first feed and mix it with fresh flour and water.

    Ready when: The starter has grown, with fine stretchy strands inside.

  3. Day 2: morning starter feed

    About 6 h; e.g. 9 a.m. to 3 p.m.

    Keep only 100 g of the starter from the second feed. Mix in the flour and water listed for this feed, then cover and leave until it is airy and ready to use in the dough.

    Baker checking the creamy consistency of the larger liquid-levain feed at the fermentation shelf.
    Mix the larger third liquid feed, cover and wait until it is bubbly and ready for the dough.

    Ready when: Bubbly, with fine stretchy strands and a mild fermented smell; it has not sunk back down.

  4. Rest the flour and water

    20–30 minutes

    As the prepared starter nears readiness, mix only the flour and water listed for the final dough. Cover and let it rest, keeping the salt, yeast and prepared starter separate for now.

    Seen from the side, the baker mixes rough pale wheat dough by hand in a clear rectangular tub.
    Moisten all the final-dough flour with the final water, then cover and rest.

    Ready when: All the flour is wet, with no dry patches.

  5. Mix the dough

    3–6 minutes

    Add the remaining group B ingredients to the rested dough, then wet your hand and fold the outer edges over them. Pinch through the dough with your thumb and forefinger 5–6 times, alternating with folds until evenly mixed, about 3–6 minutes. Rest briefly, fold again and aim for a dough temperature of 25–26°C.

    From an elevated angle, the baker pinches and folds cohesive pale wheat dough in a clear tub.
    Use a damp hand to pinch and fold the levain, salt and any listed yeast evenly into the dough.

    Ready when: The dough looks even, with no streaks of starter or salt.

  6. Fold and let rise

    3–4 folding rounds in first 1½–2 h; total first rise about 5 hours

    Wet your hand, lift one edge of the dough just until it resists, then fold it across; work around 4–5 sides and turn the dough folded-side down. Keep it covered and let it relax between rounds of folding. Avoid tearing the dough, and leave it untouched for the last hour of this first rise.

    The baker lifts a short elastic flap of pale wheat dough, ready to fold it back across the mass.
    Lift an edge gently, fold it across, then let the dough relax before the next set.

    Ready when: About 2½× its starting size, airy and stretchy.

  7. Shape the loaves

    After the first rise

    Gently tip the dough onto a lightly floured counter and divide it equally. Fold each piece’s edges into the middle, turn the folded side down onto a patch without flour, then cup and gently pull it toward you while turning until the surface is firm without tearing. Put the rounds folded-side DOWN in floured rising baskets and cover, keeping as much air in the dough as possible.

    The baker cups one pale wheat dough round with a second equally sized round beside it.
    Divide equally and cup each piece into a smooth round, then place seam down in floured baskets.

    Ready when: Moderately firm rounds that still have air bubbles inside.

  8. Let the loaves rise

    12–14 hours

    Put the covered rising baskets in closed bags and refrigerate overnight. Bake the loaves straight from the fridge; they do not need to warm up first.

    The baker places a pair of bag-covered pale wheat dough rounds in proofing baskets into the refrigerator.
    Enclose the baskets in closed bags and refrigerate overnight. Bake the loaves directly from the fridge.

    Ready when: The loaves have grown and feel airy, but are firm enough to lift while cold.

  9. Heat the oven

    At least 45 minutes, overlapping the last rise

    Put the heavy lidded pots on the middle rack. Heat the oven and pots thoroughly to 245°C.

    Two covered cast-iron pots heat on the middle oven rack.
    Heat the covered Dutch ovens thoroughly while the loaves finish proofing.

    Ready when: The oven and pot are fully hot.

  10. Bake

    30 min covered + about 20 min uncovered

    Turn each loaf out onto a lightly floured counter and carefully lower it folded-side UP into a hot pot. Bake with the lid on for 30 minutes, then remove the lid to finish baking. Use dry oven mitts and keep your hands clear of the hot metal.

    Using dry oven mitts, the baker lifts a lid to reveal a naturally split pale wheat loaf, with a second covered pot nearby.
    Use dry mitts to remove the lid after the covered bake, then finish uncovered until the crust is deep brown.

    Ready when: A deep brown crust; start checking 15 min after removing the lid.

  11. Let it cool

    At least 20 minutes; longer for cleaner slices

    Take the loaves out of the pots and leave them on a rack to cool before slicing.

    One whole pale wheat loaf and both halves of a second cool on a raised rack beside the baker.
    Cool the loaves on a rack before cutting so the crumb can set without tearing.

    Ready when: Most steam has escaped and the inside no longer tears when sliced.

What can go wrong, and how can I fix it?

What you noticeLikely causeWhat to do
Dough is slow to expandCool dough or weak levain.Keep covered in a mildly warmer spot; wait for the volume cue. Confirm the starter is vigorous; log dough and room temperatures.
Loaf spreads or collapsesFermentation went too far or shaping left little tension.Handle gently and bake promptly; expect a lower loaf. Use the volume cue; shape with surface tension and shorten the next warm hold.
Sticky crumb when slicedThe loaf was cut warm or insufficiently baked.Let it cool fully before judging. Bake to an even deep crust colour and allow a longer cooling rest.
Useful recipe notes

Formula totals describe the final dough, not all flour used for feeding. Use only the stated levain portion. An established culture at 80% hydration with an 80:20 white-to-whole-wheat flour blend maintains that composition. After a change of feed, traces of the previous flour blend and hydration remain.

Keep unused levain separately for the next feeding; do not return salted dough to the starter. For one Dutch oven, chill the waiting loaf and reheat the empty pot for 5 minutes before the second bake.
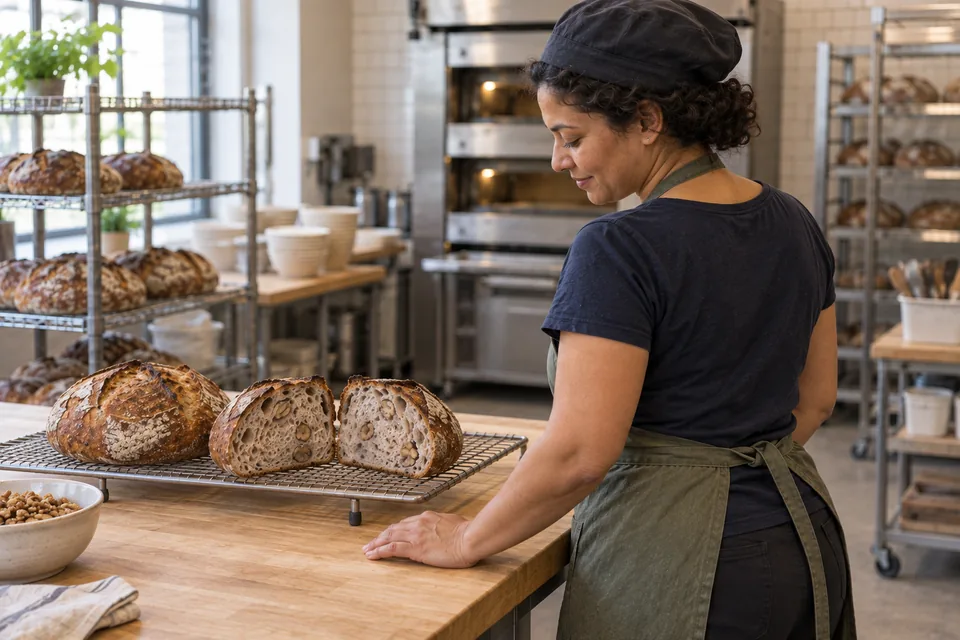
See the detailed method and ratios in , or follow ingredients through the .

Ingredient proportions & recipe details

Country sourdough with added yeast (liquid starter) at a glance

Makes
2 loaves
Heat
245°C
Baking time
30 min covered + about 20 min uncovered
Dough hydration
78%
Prefermented flour
20% of total flour
Leavening
Starter + yeast
Bulk fermentation
3–4 sets in first 1½–2 h; total bulk about 5 hours · About 2½× starting volume, aerated and elastic.
How do the ingredient proportions compare?

Core dough totals include the flour and water in the portion of starter or preferment used. Do not add them again. Toppings, fillings and dusting flour are separate.
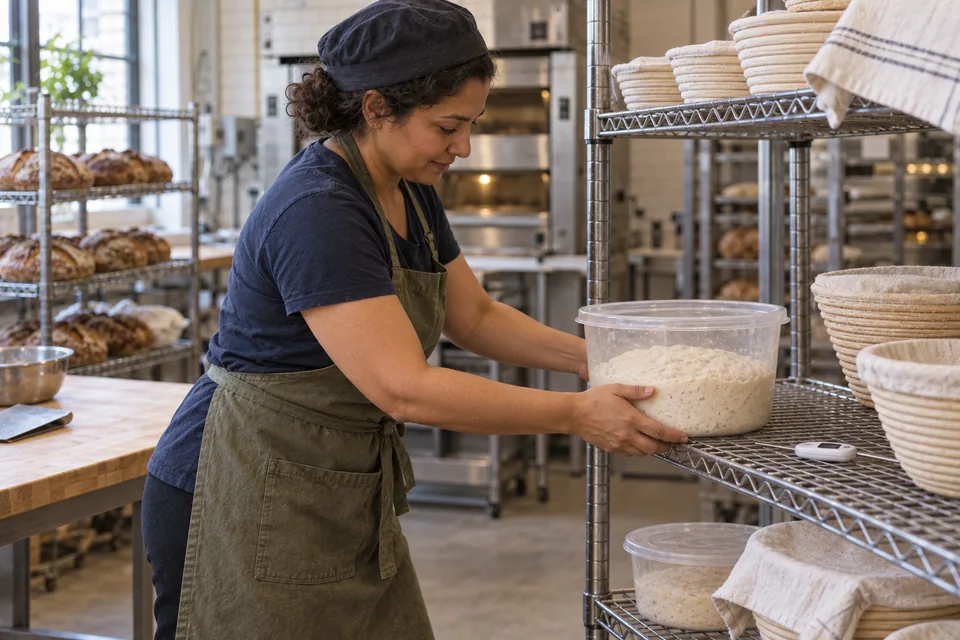
Formula componentGramsFlour = 100%
Total flour1000 g100%
Total water780 g78%
Salt21 g2.1%
Instant yeast2 g0.2%