Sourdough starter care

Build, feed and maintain a sourdough starter with flour and water.

Makes
About 1,050 g after the day-5 feed
Heat
No oven needed
Cooking time
No baking in this starter recipe

Use the active starter in a final dough and follow that recipe for baking.

View

Make a sourdough starter

Makes
About 1,050 g after the day-5 feed
Heat
No oven needed
Cooking time
No baking in this starter recipe

Use the active starter in a final dough and follow that recipe for baking.

Starter & maintenance

Make a sourdough starter

Build a starter with whole-wheat flour and water, then transition toward 80% feed hydration.

Method

  1. 01 · Day 1

    Before noon; rest about 24 h

    Use: 500 g whole wheat + 500 g water

    Mix until incorporated. The source leaves uncovered 1–2 h, then covers; use a clean, protected place. Keep warm, ideally 24–32°C.

    Ready when: Loose, fully moistened mixture.
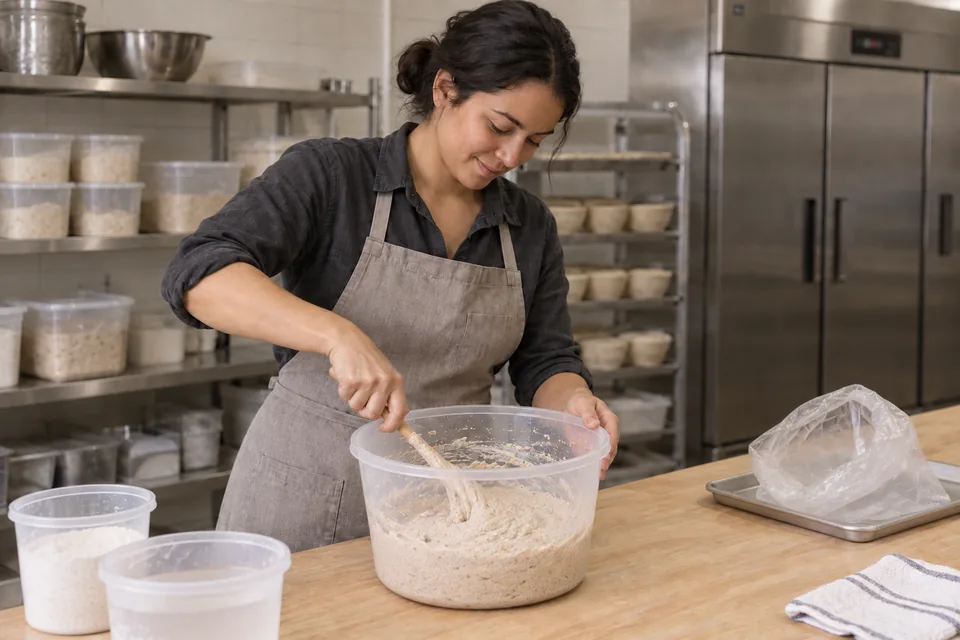
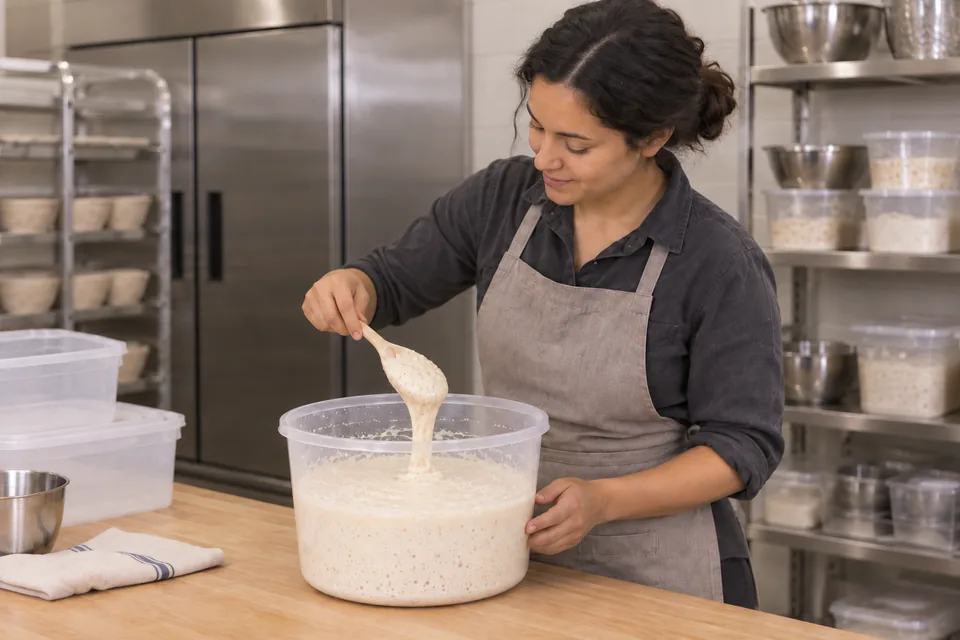
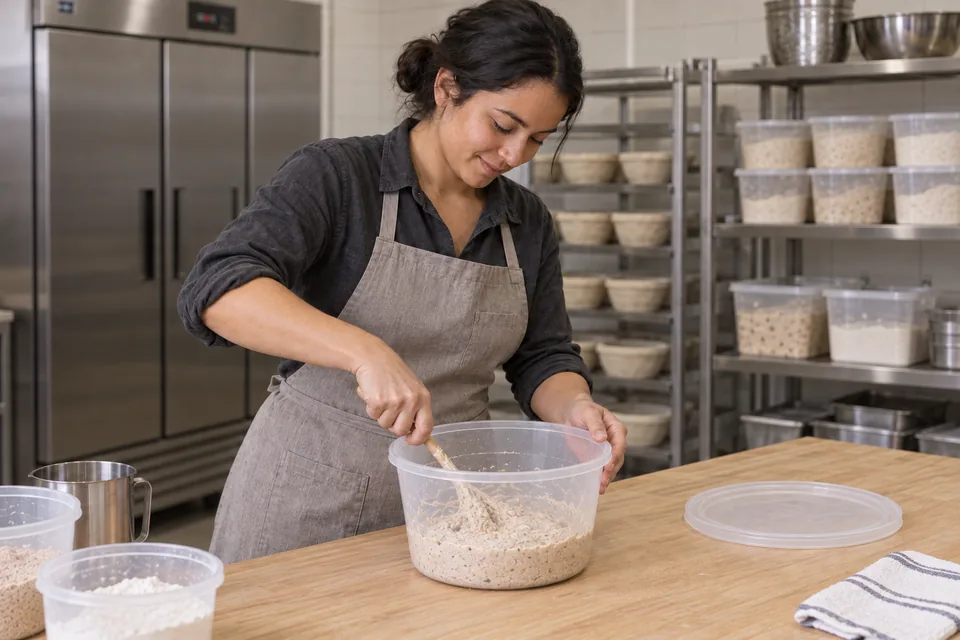
    Baker stirring a fresh whole-wheat flour-and-water mixture in a clear fermentation tub.
    01 Start with flour and waterMix the whole-wheat flour and water until fully moistened.
  2. 02 · Day 2

    Before noon; rest about 24 h

    Use: Retained culture + same fresh feed

    Remove about ¾ of the culture. Add 500 g whole wheat and 500 g warm water. Mix; after 1–2 h cover and keep warm.

    Ready when: Small bubbles may appear; timing varies.
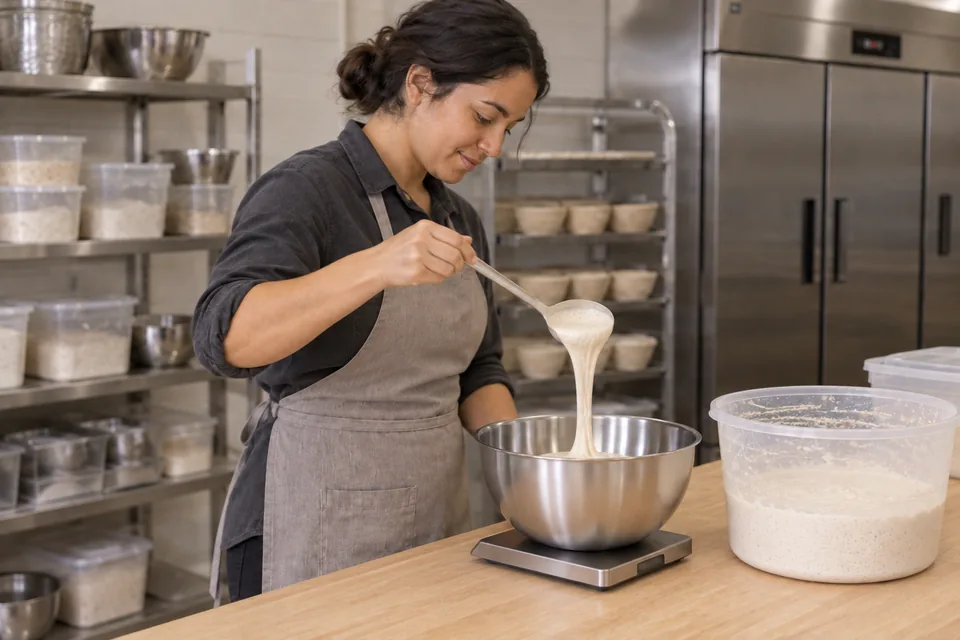
    Baker transferring a retained portion of young whole-wheat starter into a clean container.
    02 Retain part of the cultureRemove the excess culture before feeding the retained portion.
  3. 03 · Day 3

    Before noon; rest about 24 h

    Use: Retained culture + same fresh feed

    Again remove about ¾. Mix the remainder with 500 g whole wheat and 500 g warm water. After 1–2 h cover and keep warm.

    Ready when: Bubbles and an increasingly fermented aroma.
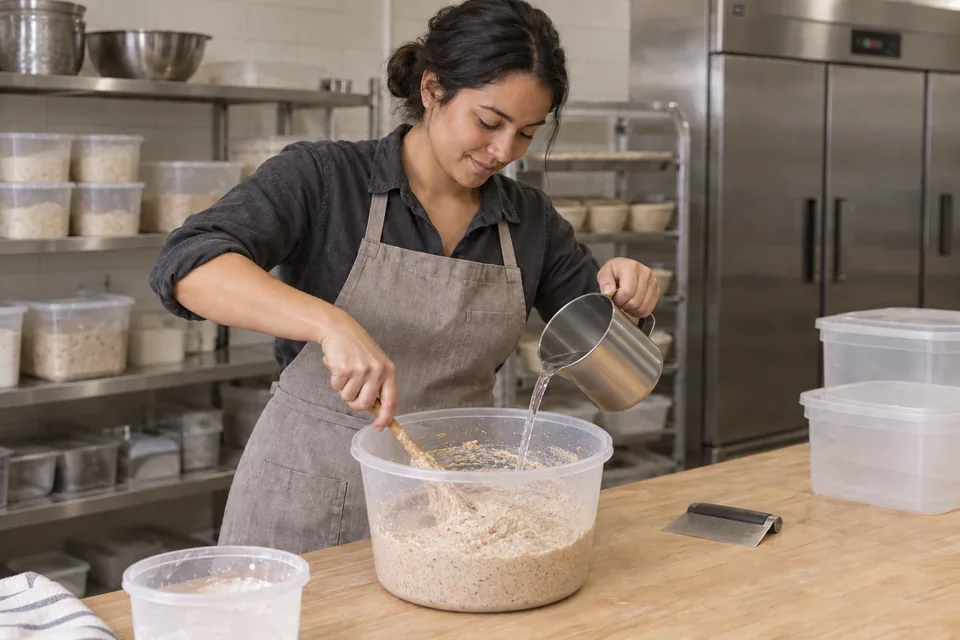
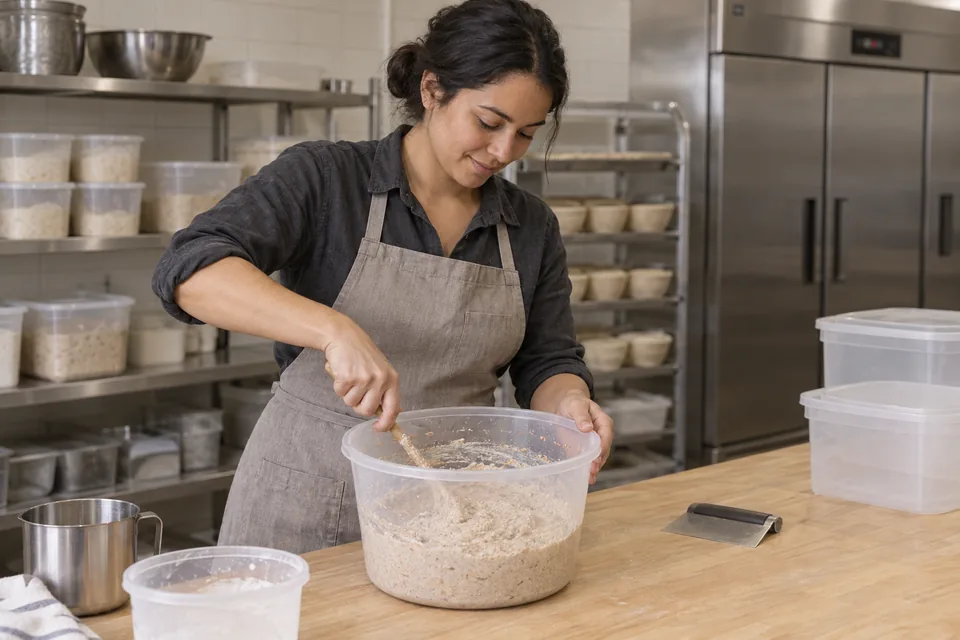
    Baker mixing fresh whole-wheat flour and water into the retained starter.
    03 Feed the whole-wheat cultureMix fresh flour and water into the retained culture.
  4. 04 · Day 4

    Before noon; rest about 24 h

    Use: 200 g culture + same fresh feed

    Accurately retain 200 g and remove the rest. Add 500 g whole wheat and 500 g warm water; mix, cover and keep warm.

    Ready when: Aerated culture with a webbed structure.
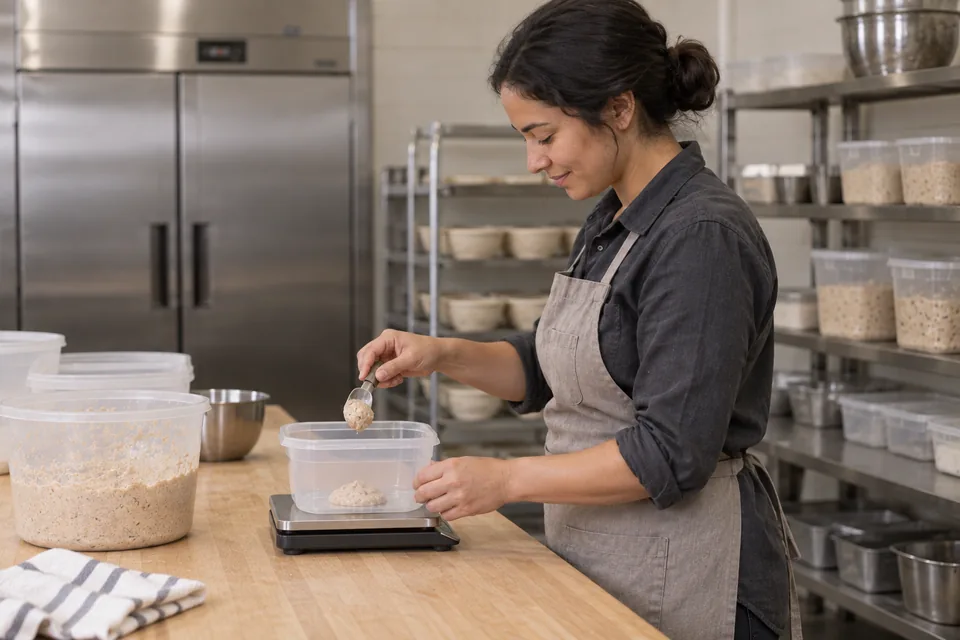
    Baker measuring a retained portion of starter into a clean container on a scale.
    04 Weigh the retained starterWeigh the retained culture, then mix in the fresh flour and water for this feeding.
  5. 05 · Day 5

    Morning feed; assess 7–8 h later

    Use: 150 g culture + day-5 feed

    Keep exactly 150 g. Add 400 g white flour, 100 g whole wheat and 400 g warm water. Mix and cover.

    Ready when: Vigorous expansion, bubbles and a webbed interior; if weak, continue daily feeding.
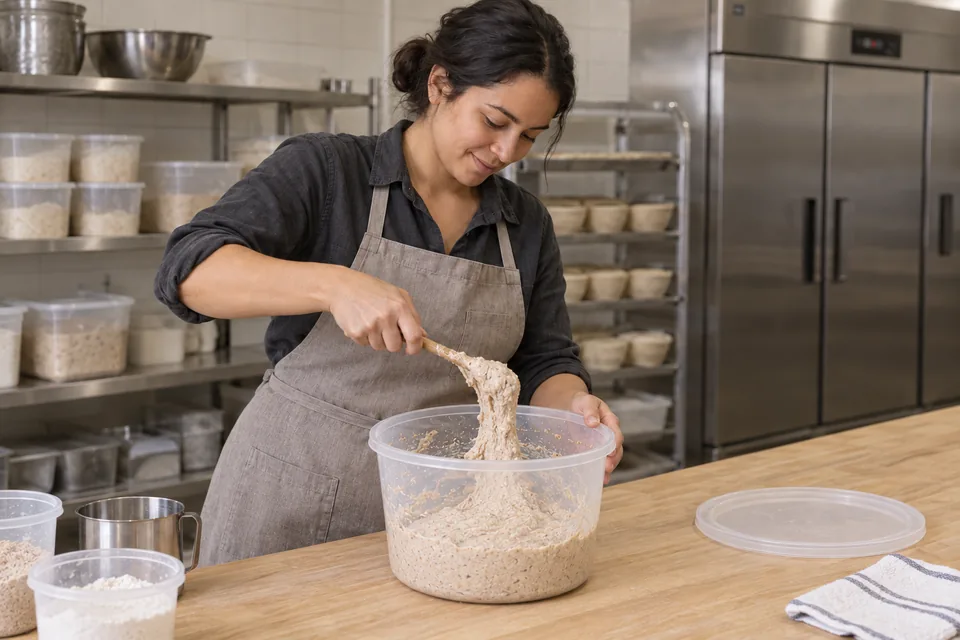
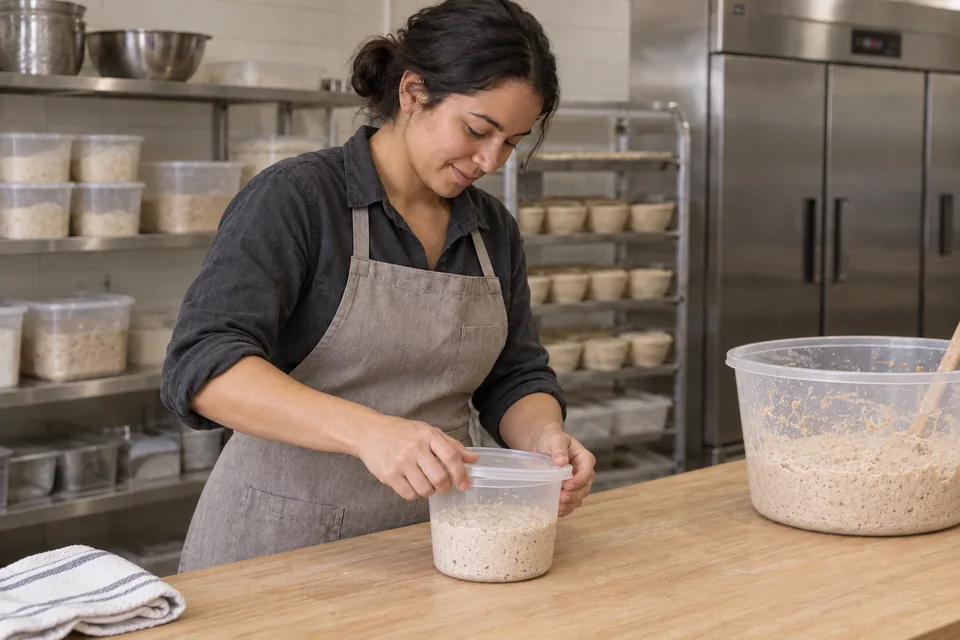
    Baker finishing a starter feed made with white and whole-wheat flour.
    05 Feed with white and whole-wheat flourMix the retained culture with fresh flour and water, then cover.
  6. 06 · Establish maintenance

    Continue daily

    Use: Ripe culture

    Once reliable, use the amount your bread needs and retain a separate portion for daily feeding or refrigeration. Never add salt or final dough back to the culture.

    Ready when: Repeatable vigorous activity after feeding.
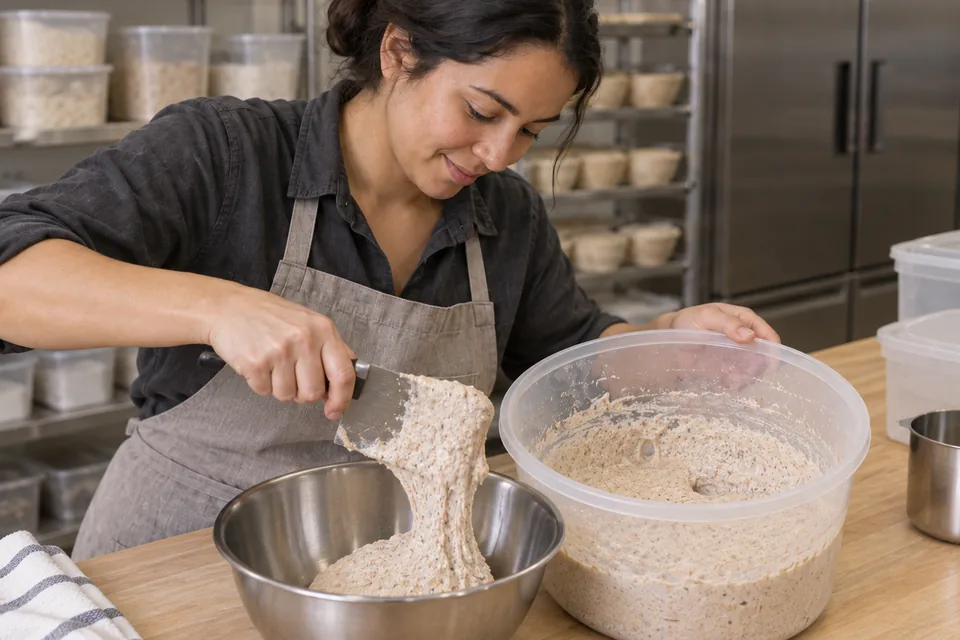
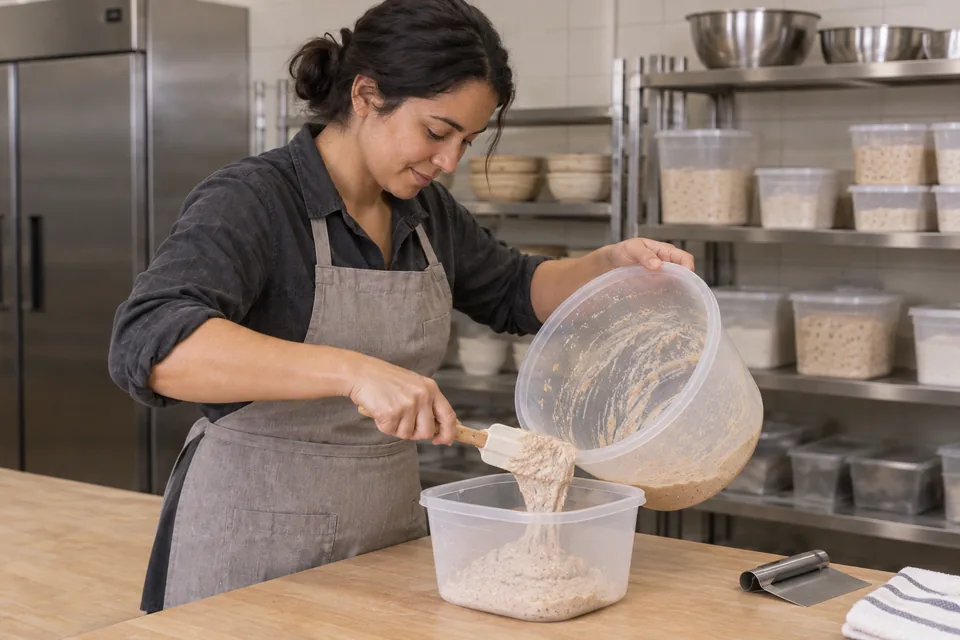
    Baker transferring a webbed, bubbly portion of ripe starter into a separate bowl.
    06 Use the ripe cultureOnce activity is reliable, use the needed portion and retain a separate culture for future feedings.

What to look for

StageLook and feelNeeds attention
ActivityFeedings lead to repeatable expansion, bubbles and an internal web.Calendar age alone does not show that a new culture can raise bread.

Troubleshooting

If you seeLikely causeWhat to do nowNext time
Starter is not vigorous yetA young or cool culture needs more development.Continue regular feedings and wait for reliable activity before using in bread.Keep feeding amounts and temperature consistent.
Pink/orange colour or fuzzy growthThe culture is contaminated.Discard it and start again in clean equipment.Keep the container covered and utensils clean.

Recipe notes

  • No commercial yeast, sugar, fruit, pork or added alcohol is used. Fermentation itself naturally produces small amounts of ethanol; this is not a guarantee of chemically zero alcohol.
  • Day-5 feed is 80% new-water/new-flour, but 150 g retained 100%-hydration culture makes the combined day-5 mixture about 82.6% hydration. It approaches 80% through subsequent feeds.
Show ingredient flow

Recipe

Make a sourdough starter

Build a starter with whole-wheat flour and water, then transition toward 80% feed hydration.

How do I make it?

  1. Day 1: mix flour and water

    Before noon; rest about 24 h

    Mix 500 g whole-wheat flour with 500 g water until all the flour is wet. Leave uncovered for 1–2 hours in a clean, protected place, then cover. Keep the mixture warm, ideally 24–32°C.

    Baker stirring a fresh whole-wheat flour-and-water mixture in a clear fermentation tub.
    Mix the whole-wheat flour and water until fully moistened.

    Ready when: A loose mixture with all the flour wet.

  2. Day 2: feed the starter

    Before noon; rest about 24 h

    Remove about ¾ of the starter mixture. Mix the remainder with 500 g whole-wheat flour and 500 g warm water. After 1–2 hours, cover and keep warm.

    Baker transferring a retained portion of young whole-wheat starter into a clean container.
    Remove the excess culture before feeding the retained portion.

    Ready when: Small bubbles may appear; the time varies.

  3. Day 3: feed again

    Before noon; rest about 24 h

    Again remove about ¾ of the starter mixture. Mix the remainder with 500 g whole-wheat flour and 500 g warm water. After 1–2 hours, cover and keep warm.

    Baker mixing fresh whole-wheat flour and water into the retained starter.
    Mix fresh flour and water into the retained culture.

    Ready when: Bubbles and a stronger fermented smell.

  4. Day 4: keep a measured portion

    Before noon; rest about 24 h

    Weigh out 200 g of the starter mixture and remove the rest. Add 500 g whole-wheat flour and 500 g warm water. Mix, cover and keep warm.

    Baker measuring a retained portion of starter into a clean container on a scale.
    Weigh the retained culture, then mix in the fresh flour and water for this feeding.

    Ready when: An airy starter with fine stretchy strands inside.

  5. Day 5: change the flour mix

    Morning feed; assess 7–8 h later

    Keep exactly 150 g of the starter mixture. Add 400 g white flour, 100 g whole-wheat flour and 400 g warm water. Mix and cover.

    Baker finishing a starter feed made with white and whole-wheat flour.
    Mix the retained culture with fresh flour and water, then cover.

    Ready when: Strong growth, bubbles and fine stretchy strands inside; if weak, keep feeding it daily.

  6. Keep your starter going

    Continue daily

    Once the starter reliably rises after feeding, use only the amount your bread needs and keep a separate portion to feed daily or refrigerate. Never put salt or mixed bread dough back into the starter.

    Baker transferring a webbed, bubbly portion of ripe starter into a separate bowl.
    Once activity is reliable, use the needed portion and retain a separate culture for future feedings.

    Ready when: The starter repeatedly grows strongly after feeding.

What can go wrong, and how can I fix it?

What you noticeLikely causeWhat to do
Starter is not vigorous yetA young or cool culture needs more development.Continue regular feedings and wait for reliable activity before using in bread. Keep feeding amounts and temperature consistent.
Pink/orange colour or fuzzy growthThe culture is contaminated.Discard it and start again in clean equipment. Keep the container covered and utensils clean.
Useful recipe notes

No commercial yeast, sugar, fruit, pork or added alcohol is used. Fermentation itself naturally produces small amounts of ethanol; this is not a guarantee of chemically zero alcohol.

Day-5 feed is 80% new-water/new-flour, but 150 g retained 100%-hydration culture makes the combined day-5 mixture about 82.6% hydration. It approaches 80% through subsequent feeds.

See the detailed method and ratios in , or follow ingredients through the .

Ingredient proportions & recipe details

Make a sourdough starter at a glance

Makes
About 1,050 g after the day-5 feed
Heat
No oven needed
Cooking time
No baking in this starter recipe

Daily sourdough starter feeding

Makes
About 1000 g fed culture
Heat
No oven needed
Cooking time
No baking in this starter recipe

Use the active starter in a final dough and follow that recipe for baking.

Starter & maintenance

Daily sourdough starter feeding

Maintain an established culture at 80% hydration with an 80:20 white-to-whole-wheat flour blend.

Method

  1. 01 · Retain & feed

    Once each morning

    Use: All listed ingredients

    About 24 h after the last feed, keep only 100 g culture. Mix in fresh flour and water; cover at room temperature.

    Ready when: Immediately after mixing: 26–27°C.

    Baker finishing a starter feed made with white and whole-wheat flour.
    01 Feed with white and whole-wheat flourMix the retained culture with fresh flour and water, then cover.
  2. 02 · Use

    Usually 6–9 h after feeding; follow recipe

    Use: Ripe culture

    Take only the amount your recipe needs once the culture is bubbly, expanded and webbed. Keep the remaining culture separate.

    Ready when: Mature enough for dough, before prolonged collapse.

    Baker transferring a webbed, bubbly portion of ripe starter into a separate bowl.
    02 Use the ripe cultureTake the portion needed for dough when the culture is bubbly, expanded and webbed.
  3. 03 · Repeat or store

    Daily, or refrigerate after use

    Use: Remaining culture

    Repeat the retain-and-feed routine next morning, or use the refrigeration and restoration protocol.

    Ready when: A retained seed remains available for the next bake.

    Baker covering a small retained seed culture in its own clean container.
    03 Keep a separate seed cultureKeep a separate portion available for the next feeding.

What to look for

StageLook and feelNeeds attention
ActivityFeedings lead to repeatable expansion, bubbles and an internal web.Calendar age alone does not show that a new culture can raise bread.

Troubleshooting

If you seeLikely causeWhat to do nowNext time
Starter is not vigorous yetA young or cool culture needs more development.Continue regular feedings and wait for reliable activity before using in bread.Keep feeding amounts and temperature consistent.
Pink/orange colour or fuzzy growthThe culture is contaminated.Discard it and start again in clean equipment.Keep the container covered and utensils clean.

Recipe notes

  • No commercial yeast, sugar, fruit, pork or added alcohol is used. Fermentation itself naturally produces small amounts of ethanol; this is not a guarantee of chemically zero alcohol.
Show ingredient flow

Recipe

Daily sourdough starter feeding

Maintain an established culture at 80% hydration with an 80:20 white-to-whole-wheat flour blend.

How do I make it?

  1. Keep a portion and feed it

    Once each morning

    About 24 hours after the last feed, weigh out 100 g starter and remove the rest. Mix in the fresh flour and water listed for the feed, then cover and leave at room temperature.

    Baker finishing a starter feed made with white and whole-wheat flour.
    Mix the retained culture with fresh flour and water, then cover.

    Ready when: 26–27°C just after mixing.

  2. Take the starter you need

    Usually 6–9 h after feeding; follow recipe

    Once the starter has risen and looks bubbly with fine strands inside, take only the amount your recipe needs. Keep the remaining starter separate.

    Baker transferring a webbed, bubbly portion of ripe starter into a separate bowl.
    Take the portion needed for dough when the culture is bubbly, expanded and webbed.

    Ready when: The starter is ready to raise dough; do not leave it long after it has sunk back down.

  3. Feed again or refrigerate

    Daily, or refrigerate after use

    Next morning, keep the listed small portion of starter and feed it again with fresh flour and water. If you are not feeding it daily, follow the storage and restarting guide instead.

    Baker covering a small retained seed culture in its own clean container.
    Keep a separate portion available for the next feeding.

    Ready when: Some starter is kept separate for the next bake.

What can go wrong, and how can I fix it?

What you noticeLikely causeWhat to do
Starter is not vigorous yetA young or cool culture needs more development.Continue regular feedings and wait for reliable activity before using in bread. Keep feeding amounts and temperature consistent.
Pink/orange colour or fuzzy growthThe culture is contaminated.Discard it and start again in clean equipment. Keep the container covered and utensils clean.
Useful recipe notes

No commercial yeast, sugar, fruit, pork or added alcohol is used. Fermentation itself naturally produces small amounts of ethanol; this is not a guarantee of chemically zero alcohol.

See the detailed method and ratios in , or follow ingredients through the .

Ingredient proportions & recipe details

Daily sourdough starter feeding at a glance

Makes
About 1000 g fed culture
Heat
No oven needed
Cooking time
No baking in this starter recipe
Dough hydration
80%
How do the ingredient proportions compare?

Core dough totals include the flour and water in the portion of starter or preferment used. Do not add them again. Toppings, fillings and dusting flour are separate.

Formula componentGramsFlour = 100%
Total flour555.6 g100%
Total water444.4 g80%
Salt0 g0%
Instant yeast0 g0%

Small-batch sourdough starter feeding

Makes
About 500 g fed culture
Heat
No oven needed
Cooking time
No baking in this starter recipe

Use the active starter in a final dough and follow that recipe for baking.

Starter & maintenance

Small-batch sourdough starter feeding

Maintain an established culture at 80% hydration with an 80:20 white-to-whole-wheat flour blend.

Method

  1. 01 · Retain & feed

    Once each morning

    Use: All listed ingredients

    About 24 h after the last feed, keep only 50 g culture. Mix in fresh flour and water; cover at room temperature.

    Ready when: Immediately after mixing: 26–27°C.

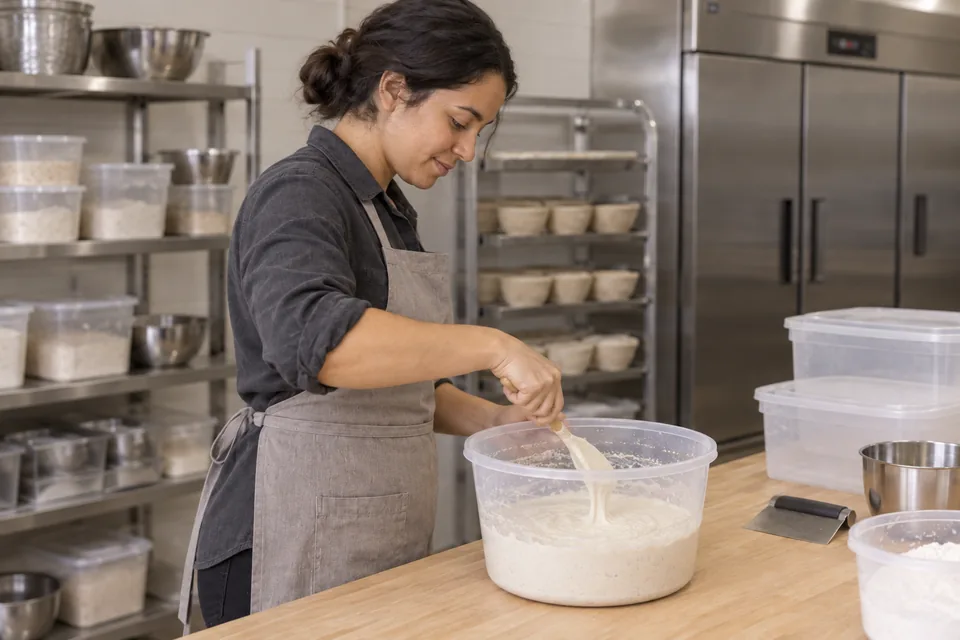
    Baker mixing a smaller starter feed in a clear tub with plenty of empty space above it.
    01 Feed a smaller batchFeed the retained culture, keeping the smaller batch proportions.
  2. 02 · Use

    Usually 6–9 h after feeding; follow recipe

    Use: Ripe culture

    Take only the amount your recipe needs once the culture is bubbly, expanded and webbed. Keep the remaining culture separate.

    Ready when: Mature enough for dough, before prolonged collapse.

    Baker transferring a webbed, bubbly portion of ripe starter into a separate bowl.
    02 Use the ripe cultureTake the portion needed for dough when the culture is bubbly, expanded and webbed.
  3. 03 · Repeat or store

    Daily, or refrigerate after use

    Use: Remaining culture

    Repeat the retain-and-feed routine next morning, or use the refrigeration and restoration protocol.

    Ready when: A retained seed remains available for the next bake.

    Baker covering a small retained seed culture in its own clean container.
    03 Keep a separate seed cultureKeep a separate portion available for the next feeding.

What to look for

StageLook and feelNeeds attention
ActivityFeedings lead to repeatable expansion, bubbles and an internal web.Calendar age alone does not show that a new culture can raise bread.

Troubleshooting

If you seeLikely causeWhat to do nowNext time
Starter is not vigorous yetA young or cool culture needs more development.Continue regular feedings and wait for reliable activity before using in bread.Keep feeding amounts and temperature consistent.
Pink/orange colour or fuzzy growthThe culture is contaminated.Discard it and start again in clean equipment.Keep the container covered and utensils clean.

Recipe notes

  • No commercial yeast, sugar, fruit, pork or added alcohol is used. Fermentation itself naturally produces small amounts of ethanol; this is not a guarantee of chemically zero alcohol.
  • At 500 g total, this feed is insufficient for a recipe needing 540 g levain plus retained culture. Use the full feed or scale all feed ingredients consistently.
Show ingredient flow

Recipe

Small-batch sourdough starter feeding

Maintain an established culture at 80% hydration with an 80:20 white-to-whole-wheat flour blend.

How do I make it?

  1. Keep a portion and feed it

    Once each morning

    About 24 hours after the last feed, weigh out 50 g starter and remove the rest. Mix in the fresh flour and water listed for the feed, then cover and leave at room temperature.

    Baker mixing a smaller starter feed in a clear tub with plenty of empty space above it.
    Feed the retained culture, keeping the smaller batch proportions.

    Ready when: 26–27°C just after mixing.

  2. Take the starter you need

    Usually 6–9 h after feeding; follow recipe

    Once the starter has risen and looks bubbly with fine strands inside, take only the amount your recipe needs. Keep the remaining starter separate.

    Baker transferring a webbed, bubbly portion of ripe starter into a separate bowl.
    Take the portion needed for dough when the culture is bubbly, expanded and webbed.

    Ready when: The starter is ready to raise dough; do not leave it long after it has sunk back down.

  3. Feed again or refrigerate

    Daily, or refrigerate after use

    Next morning, keep the listed small portion of starter and feed it again with fresh flour and water. If you are not feeding it daily, follow the storage and restarting guide instead.

    Baker covering a small retained seed culture in its own clean container.
    Keep a separate portion available for the next feeding.

    Ready when: Some starter is kept separate for the next bake.

What can go wrong, and how can I fix it?

What you noticeLikely causeWhat to do
Starter is not vigorous yetA young or cool culture needs more development.Continue regular feedings and wait for reliable activity before using in bread. Keep feeding amounts and temperature consistent.
Pink/orange colour or fuzzy growthThe culture is contaminated.Discard it and start again in clean equipment. Keep the container covered and utensils clean.
Useful recipe notes

No commercial yeast, sugar, fruit, pork or added alcohol is used. Fermentation itself naturally produces small amounts of ethanol; this is not a guarantee of chemically zero alcohol.

At 500 g total, this feed is insufficient for a recipe needing 540 g levain plus retained culture. Use the full feed or scale all feed ingredients consistently.

See the detailed method and ratios in , or follow ingredients through the .

Ingredient proportions & recipe details

Small-batch sourdough starter feeding at a glance

Makes
About 500 g fed culture
Heat
No oven needed
Cooking time
No baking in this starter recipe
Dough hydration
80%
How do the ingredient proportions compare?

Core dough totals include the flour and water in the portion of starter or preferment used. Do not add them again. Toppings, fillings and dusting flour are separate.

Formula componentGramsFlour = 100%
Total flour277.8 g100%
Total water222.2 g80%
Salt0 g0%
Instant yeast0 g0%

Store and revive a sourdough starter

Makes
About 1,000 g after second refresh
Heat
No oven needed
Cooking time
No baking in this starter recipe

Use the active starter in a final dough and follow that recipe for baking.

Starter & maintenance

Store and revive a sourdough starter

A dormant-culture routine followed by two fresh feeds before mixing bread.

Method

  1. 01 · Store

    Up to 1 month in the source

    Use: Store ingredients

    Coat about 300 g mature culture with a thin water film. Place in a closed, nonperforated food-safe bag and refrigerate.

    Ready when: Culture protected from drying; no contamination.

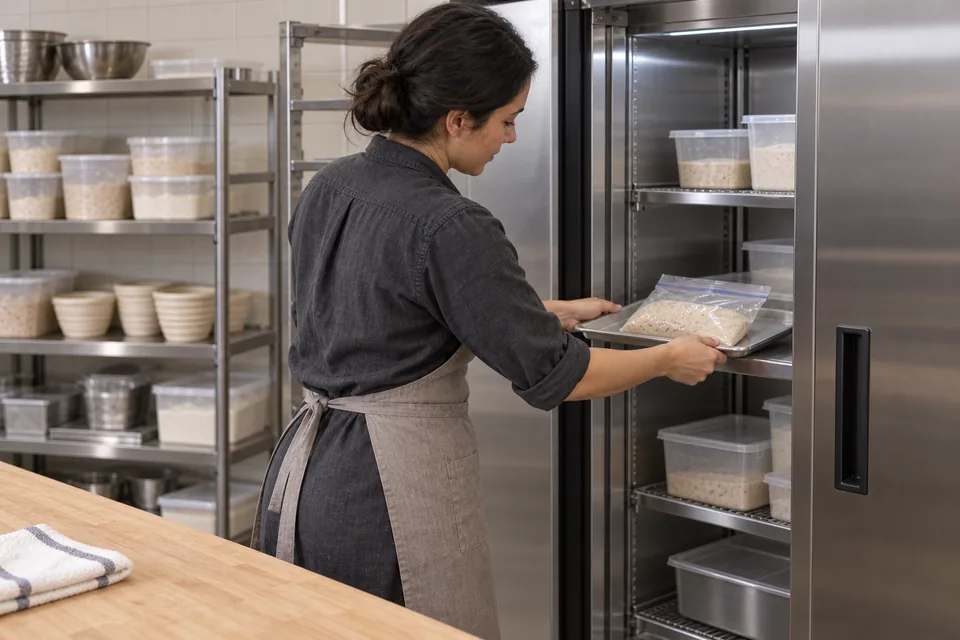
    Baker sliding a tray holding a sealed bag of starter into a refrigerator.
    01 Refrigerate the cultureProtect the starter from drying and refrigerate it as directed.
  2. 02 · Refresh 1

    30–60 min warm-up; then overnight

    Use: Refresh 1 ingredients

    Two days before baking, keep 200 g refrigerated culture. If possible let it warm briefly. Mix with fresh flour and water; cover in a warm spot.

    Ready when: Renewed bubbles and expansion.

    Baker refreshing a stored starter with fresh flour and water, with the emptied storage bag set aside.
    02 Refresh after refrigerationMix the retained cold culture with fresh flour and water and let it revive.
  3. 03 · Refresh 2

    About 6–9 h, depending on dough recipe

    Use: Refresh 2 ingredients

    Next morning retain only 100 g. Add flour and water; mix and cover. This is the recipe’s morning levain feed.

    Ready when: Vigorous, expanded and webbed culture.

    Baker finishing a starter feed made with white and whole-wheat flour.
    03 Feed with white and whole-wheat flourRetain the required portion and feed again; wait for vigorous activity before mixing dough.
  4. 04 · Mix dough

    Bake the following day after the chosen bulk/proof

    Use: Ripe culture

    Use the required portion in final dough later that day; retain a separate portion to continue the culture. If still weak, repeat regular feeds before baking.

    Ready when: Starter is active enough to raise the dough.

    Baker transferring a webbed, bubbly portion of ripe starter into a separate bowl.
    04 Use the ripe cultureTake the portion needed for dough when the culture is bubbly, expanded and webbed.

What to look for

StageLook and feelNeeds attention
ActivityFeedings lead to repeatable expansion, bubbles and an internal web.Calendar age alone does not show that a new culture can raise bread.

Troubleshooting

If you seeLikely causeWhat to do nowNext time
Starter is not vigorous yetA young or cool culture needs more development.Continue regular feedings and wait for reliable activity before using in bread.Keep feeding amounts and temperature consistent.
Pink/orange colour or fuzzy growthThe culture is contaminated.Discard it and start again in clean equipment.Keep the container covered and utensils clean.

Recipe notes

  • No commercial yeast, sugar, fruit, pork or added alcohol is used. Fermentation itself naturally produces small amounts of ethanol; this is not a guarantee of chemically zero alcohol.
Show ingredient flow

Recipe

Store and revive a sourdough starter

A dormant-culture routine followed by two fresh feeds before mixing bread.

How do I make it?

  1. Put the starter in the fridge

    Up to 1 month

    Lightly coat about 300 g of ripe, active starter with water. Put it in a closed food-safe bag with no holes and refrigerate.

    Baker sliding a tray holding a sealed bag of starter into a refrigerator.
    Protect the starter from drying and refrigerate it as directed.

    Ready when: The starter stays moist and free from contamination.

  2. Wake the starter: first feed

    30–60 min warm-up; then overnight

    Two days before baking, keep 200 g of the refrigerated starter. If possible, let it warm briefly, then mix in the fresh flour and water listed for the first refresh. Cover and leave in a warm place.

    Baker refreshing a stored starter with fresh flour and water, with the emptied storage bag set aside.
    Mix the retained cold culture with fresh flour and water and let it revive.

    Ready when: Bubbles and growth have returned.

  3. Give it a second feed

    About 6–9 h, depending on dough recipe

    Next morning, keep only 100 g starter. Add the flour and water listed for the second refresh, mix and cover. This is the morning feed that prepares your starter for the dough.

    Baker finishing a starter feed made with white and whole-wheat flour.
    Retain the required portion and feed again; wait for vigorous activity before mixing dough.

    Ready when: The starter has grown strongly, with fine stretchy strands inside.

  4. Use the starter in your dough

    Bake the following day after the chosen first rise and shaped rise

    Later that day, add only the amount of prepared starter your dough needs and keep a separate portion to feed again. If it is still weak, keep giving it regular feeds before using it to bake.

    Baker transferring a webbed, bubbly portion of ripe starter into a separate bowl.
    Take the portion needed for dough when the culture is bubbly, expanded and webbed.

    Ready when: The starter is active enough to raise the dough.

What can go wrong, and how can I fix it?

What you noticeLikely causeWhat to do
Starter is not vigorous yetA young or cool culture needs more development.Continue regular feedings and wait for reliable activity before using in bread. Keep feeding amounts and temperature consistent.
Pink/orange colour or fuzzy growthThe culture is contaminated.Discard it and start again in clean equipment. Keep the container covered and utensils clean.
Useful recipe notes

No commercial yeast, sugar, fruit, pork or added alcohol is used. Fermentation itself naturally produces small amounts of ethanol; this is not a guarantee of chemically zero alcohol.

See the detailed method and ratios in , or follow ingredients through the .

Ingredient proportions & recipe details

Store and revive a sourdough starter at a glance

Makes
About 1,000 g after second refresh
Heat
No oven needed
Cooking time
No baking in this starter recipe

Liquid sourdough starter

Makes
About 1,100 g after third feeding
Heat
No oven needed
Cooking time
No baking in this starter recipe

Use the active starter in a final dough and follow that recipe for baking.

Starter & maintenance

Liquid sourdough starter

Transitions an established base starter toward an all-white, 100%-hydration culture.

Method

  1. 01 · Day 1 · morning

    About 9 h; e.g. 9 a.m. to 6 p.m.

    Use: A

    Keep 50 g starter, mix with the new flour and water; cover at room temperature.

    Ready when: Increasing bubbles and volume.

    Baker mixing a pale, loose liquid starter in a clear fermentation tub.
    01 Begin the liquid feedMix the retained starter with equal weights of new flour and water.
  2. 02 · Day 1 · evening

    About 15 h overnight

    Use: A2

    Keep 250 g from the first feed, discarding the rest. Mix with flour and water; cover.

    Ready when: Expanded culture with a webbed interior.

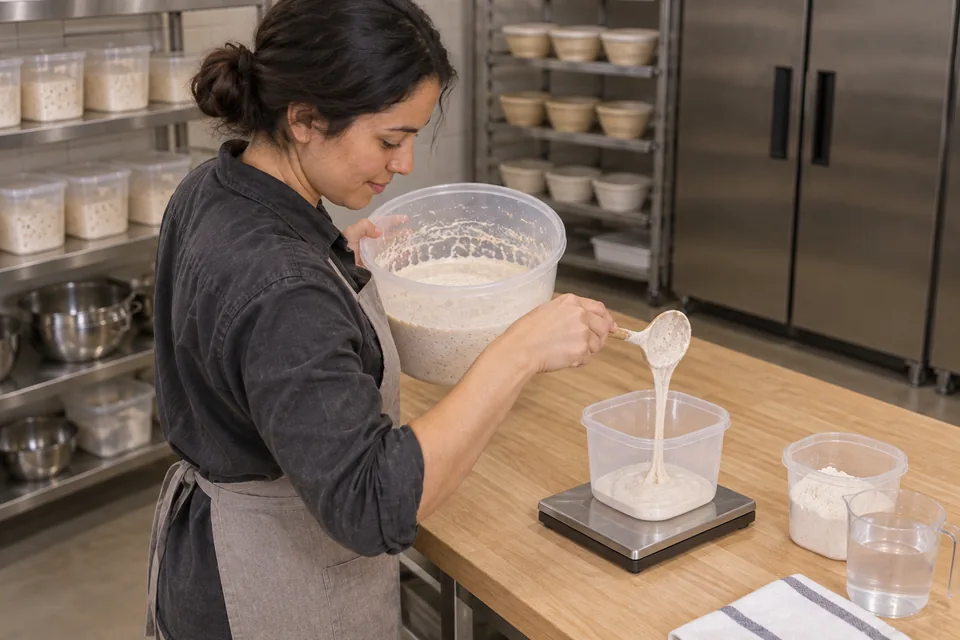
    Baker measuring a portion of liquid starter before its next feeding.
    02 Feed again after expansionRetain the required amount, mix in fresh flour and water, and cover.
  3. 03 · Day 2 · morning

    About 6 h; e.g. 9 a.m. to 3 p.m.

    Use: A3

    Keep only 100 g from the second feed. Mix in flour and water; cover until aerated and ready for the final dough.

    Ready when: Bubbly and webbed, with a mild fermented aroma; not collapsed.

    Baker lifting a short ribbon of bubbly liquid starter to inspect its consistency.
    03 Watch for bubbles and a webbed interiorAllow the fed liquid culture to become aerated before using it.
  4. 04 · Use or maintain

    Use at maturity

    Use: Ripe culture

    Weigh the portion your dough needs. Keep the remainder separate. For ongoing liquid culture, repeat the third-feed proportions; for refrigeration, use the storage protocol.

    Ready when: Only the weighed portion enters the dough.

    Baker weighing liquid starter into a bowl while keeping the remaining culture in its tub.
    04 Weigh the portion for the doughUse only the needed portion and keep the remainder separate.

What to look for

StageLook and feelNeeds attention
MaturityBubbles, expansion and an internal web after feeding.A collapsed, thin culture indicates its peak has passed.

Troubleshooting

If you seeLikely causeWhat to do nowNext time
Culture is sluggishThe seed was weak or the room is cool.Allow more time in a gently warmer spot before using.Start with a reliably active culture and record the temperature.

Recipe notes

  • Treat feeding times as estimates and judge the levain by its activity and maturity cues.
  • Nominal 100% hydration and all-white flour are approached over successive feeds. Trace seed flour and its earlier hydration remain after the initial transition.
Show ingredient flow

Recipe

Liquid sourdough starter

Transitions an established base starter toward an all-white, 100%-hydration culture.

How do I make it?

  1. Day 1: morning starter feed

    About 9 h; e.g. 9 a.m. to 6 p.m.

    Keep 50 g starter and mix in the fresh flour and water listed for this feed. Cover and leave at room temperature.

    Baker mixing a pale, loose liquid starter in a clear fermentation tub.
    Mix the retained starter with equal weights of new flour and water.

    Ready when: More bubbles and a growing mixture.

  2. Day 1: evening starter feed

    About 15 h overnight

    Keep 250 g of the starter from the first feed and discard the rest. Mix in the flour and water listed for this feed and cover.

    Baker measuring a portion of liquid starter before its next feeding.
    Retain the required amount, mix in fresh flour and water, and cover.

    Ready when: The starter has grown, with fine stretchy strands inside.

  3. Day 2: morning starter feed

    About 6 h; e.g. 9 a.m. to 3 p.m.

    Keep only 100 g of the starter from the second feed. Mix in the flour and water listed for this feed, then cover and leave until it is airy and ready to use in the dough.

    Baker lifting a short ribbon of bubbly liquid starter to inspect its consistency.
    Allow the fed liquid culture to become aerated before using it.

    Ready when: Bubbly, with fine stretchy strands and a mild fermented smell; it has not sunk back down.

  4. Use the starter and save some

    Use at maturity

    Weigh out only the prepared starter your dough needs and keep the rest separate. To keep this runnier starter going, feed it using the same proportions as the third feed. To refrigerate it, follow the Store & Restore a Levain guide.

    Baker weighing liquid starter into a bowl while keeping the remaining culture in its tub.
    Use only the needed portion and keep the remainder separate.

    Ready when: Only the weighed amount goes into the dough.

What can go wrong, and how can I fix it?

What you noticeLikely causeWhat to do
Culture is sluggishThe seed was weak or the room is cool.Allow more time in a gently warmer spot before using. Start with a reliably active culture and record the temperature.
Useful recipe notes

Treat feeding times as estimates and judge the levain by its activity and maturity cues.

Nominal 100% hydration and all-white flour are approached over successive feeds. Trace seed flour and its earlier hydration remain after the initial transition.

See the detailed method and ratios in , or follow ingredients through the .

Ingredient proportions & recipe details

Liquid sourdough starter at a glance

Makes
About 1,100 g after third feeding
Heat
No oven needed
Cooking time
No baking in this starter recipe
Dough hydration
100%
How do the ingredient proportions compare?

Core dough totals include the flour and water in the portion of starter or preferment used. Do not add them again. Toppings, fillings and dusting flour are separate.

Formula componentGramsFlour = 100%
Total flour550 g100%
Total water550 g100%
Salt0 g0%
Instant yeast0 g0%