Nepedia

Wheat germ and bran bread with poolish

A poolish loaf with 10% whole wheat, wheat germ and bran; suited to focaccia.

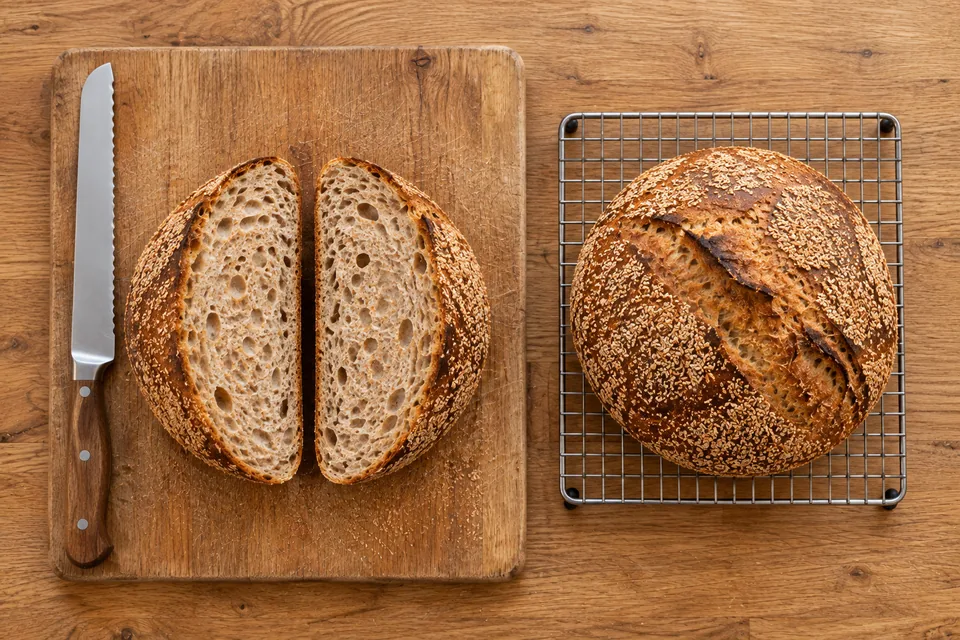
Overhead view of two matching cut halves on a board and the second whole bran-coated round on a rack.
Makes
2 loaves, each about 680 g after baking
Heat
245°C conventional
Baking time
30 min covered + about 20 min uncovered

Preheat covered pots for at least 45 min. Check the crust after 15 min uncovered.

Explore variations · 12 →Jump to ingredients & method ↓
View

Wheat germ and bran bread with poolish

Makes
2 loaves, each about 680 g after baking
Heat
245°C conventional
Baking time
30 min covered + about 20 min uncovered

Preheat covered pots for at least 45 min. Check the crust after 15 min uncovered.

Breads with preferments

Wheat germ and bran bread with poolish

A poolish loaf with 10% whole wheat, wheat germ and bran; suited to focaccia.

Method

  1. 01 · Build poolish

    12–14 h at 18–21°C

    Use: P

    Mix P flour and yeast, then stir in all P water until thoroughly combined. Cover and leave at 18–21°C.

    Ready when: Bubbly and roughly tripled; bubbles break at the surface every few seconds.
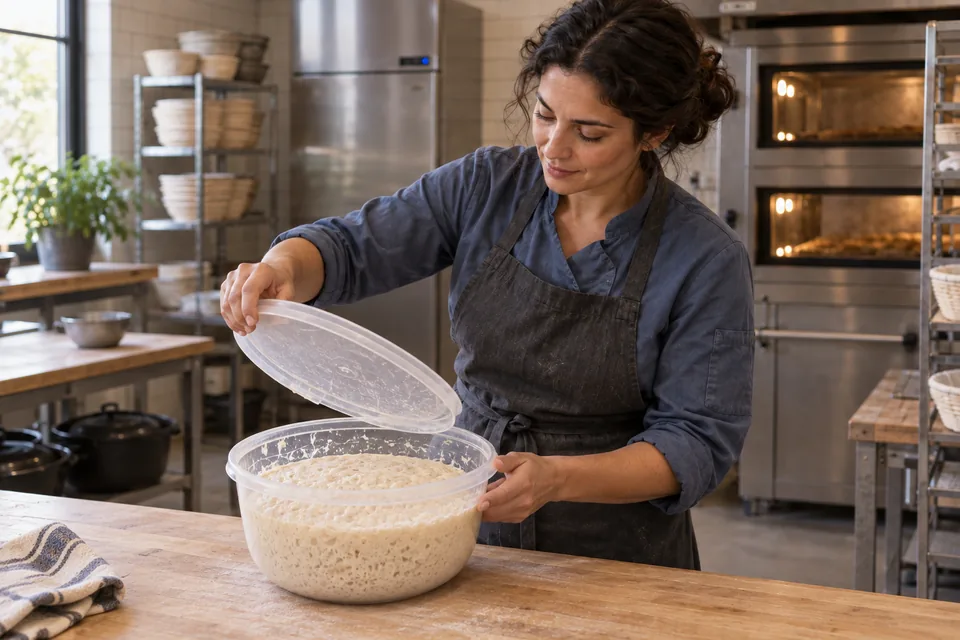
    A baker lifts the lid from a round clear bowl of bubbly, batter-like mature poolish.
    01 Build poolishUse the poolish when it is well expanded and covered in lively bubbles.
  2. 02 · Mix final dough

    A few minutes

    Use: D + all mature P

    Mix the D flour(s), salt and yeast, wheat germ and dough bran. Pour D water around the poolish to release it, then tip all of it into D. Wet your hand and alternate 5–6 thumb-and-forefinger pinch cuts with folds until evenly combined. No autolyse is used.

    Ready when: Uniform dough with no unmixed lumps of preferment.
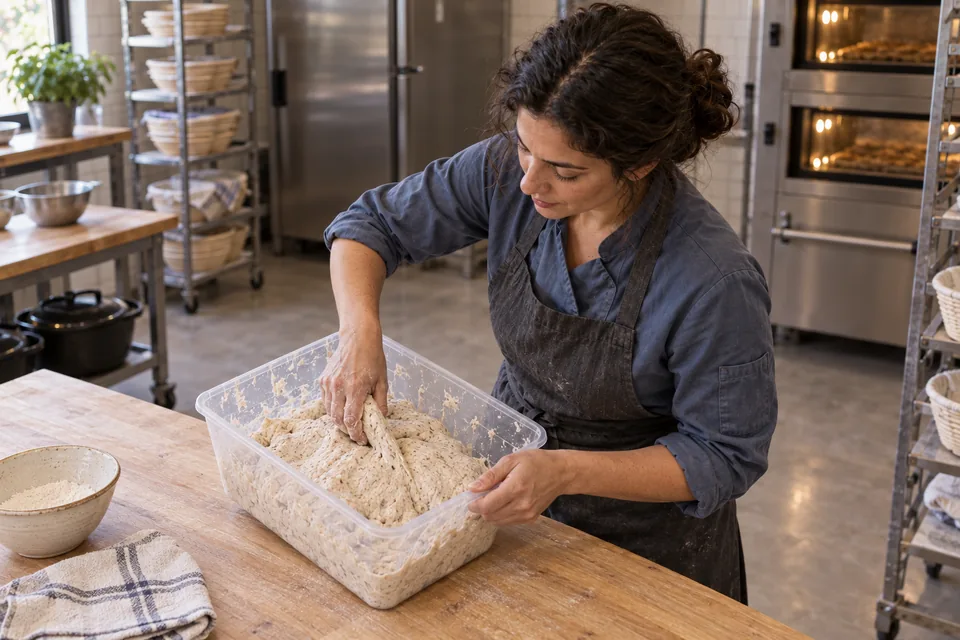
    Viewed from above, a baker pinches through uniform light-beige dough with fine wholegrain flecks.
    02 Mix final doughMix in all the ripe poolish, wheat germ and dough bran; pinch and fold to a uniform flecked dough.
  3. 03 · Fold and bulk

    2–3 h from end of final mix

    Use: Mixed dough

    Apply 2 sets during the first hour. For each set, wet your hand; stretch one edge upward only to resistance and fold across. Repeat around 4–5 edges until the dough firms, then turn the whole mass seam down. Let it relax before the next set. Cover between folds and during the remaining rise.

    Ready when: About 2½ times its initial volume.
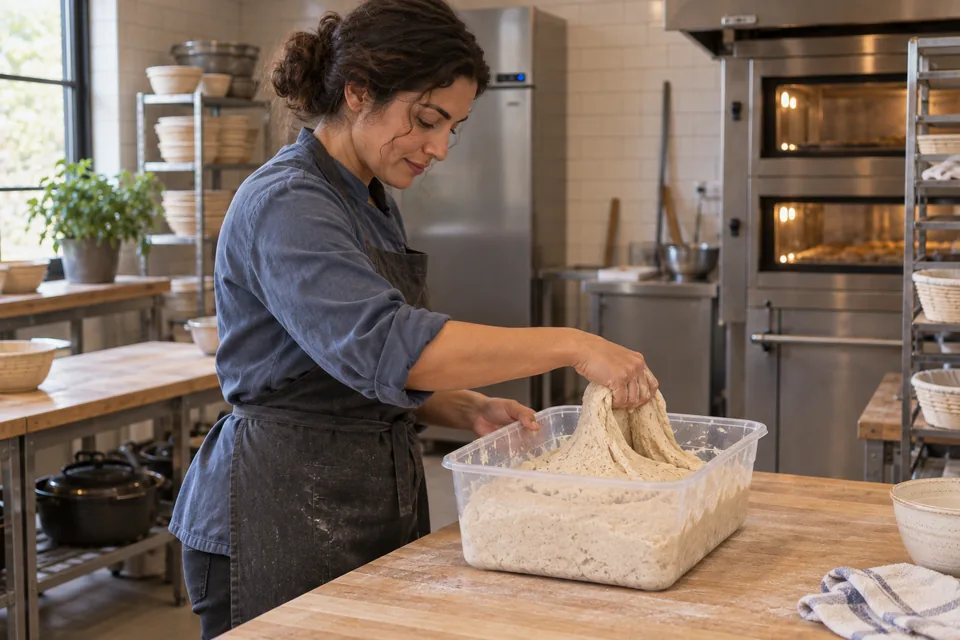
    A side-on baker lifts a connected edge of light-beige flecked dough in a tub.
    03 Fold and bulkFold gently to build strength while keeping the dough connected and untorn.
  4. 04 · Divide and shape

    A few minutes

    Use: Risen dough; dusting flour

    Ease dough onto a lightly floured counter without tearing. Divide equally. Fold each piece’s edges inward to enclose it, turn seam down onto a clean unfloured patch, and cup and drag toward you while turning to make a medium-tight ball. If using the optional bran coating, prepare the baskets and moisten the seam as in the next row before placing the loaves. Otherwise set seam DOWN in a well-floured basket; flour the top and cover.

    Ready when: Two rounds with moderate tension and intact surfaces.
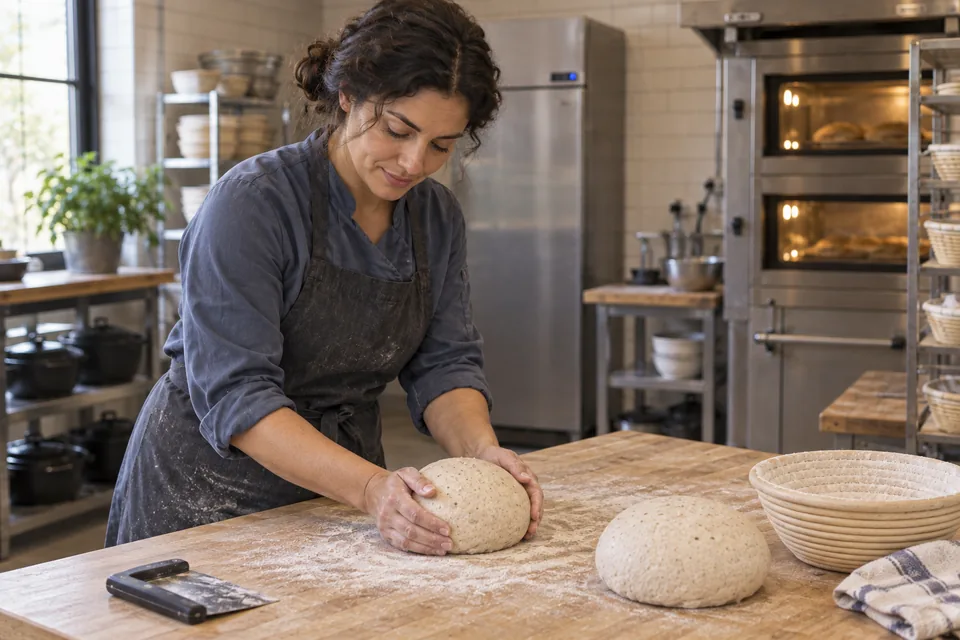
    A baker shapes one light-beige, finely flecked dough round with a second round beside it.
    04 Divide and shapeDivide evenly and cup the two rounds until their surfaces hold gentle tension.
  5. 05 · Optional bran crust

    During shaping

    Use: Extra finish bran and spritz water

    Before placing the shaped loaves in their baskets, dust each empty basket with flour, then scatter 10 g extra bran inside. Lightly moisten the seam side of each shaped loaf and place seam DOWN onto the bran. Flour the tops lightly and cover.

    Ready when: A light, even coating; avoid loose piles of bran.
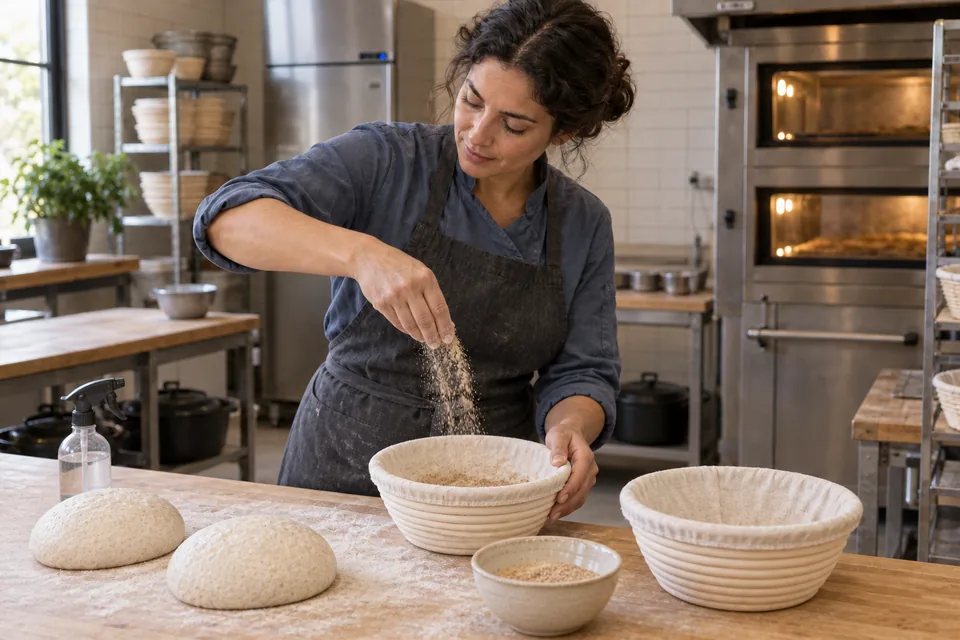
    A baker scatters fine bran into an empty floured basket, with a second empty basket and two shaped rounds nearby.
    05 Optional bran crustFor the optional coating, scatter a thin layer of bran into the floured baskets before adding the moistened seam sides.
  6. 06 · Proof

    About 1 h; preheat promptly

    Use: Shaped loaves

    Proof covered. Gently press the loaf with a floured fingertip to make a small dent: a slow, incomplete return indicates readiness; immediate spring-back means wait; no return with a slack loaf suggests overproofing.

    Ready when: Loaf aerated and expanded; indentation recovers slowly and incompletely.
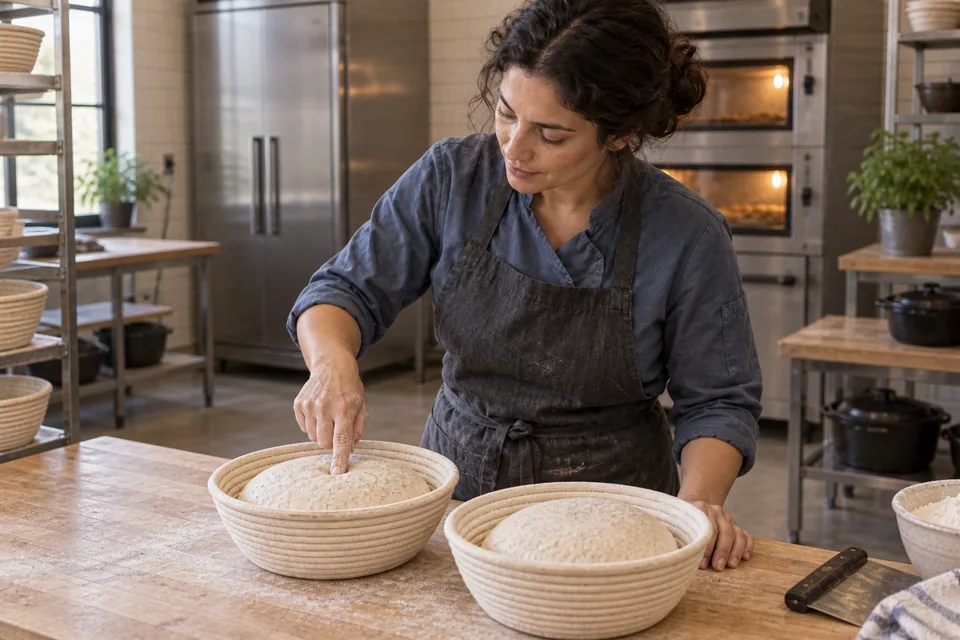
    A baker presses a small dent into one of two light-beige mixed-grain rounds in baskets.
    06 ProofProof with the seam-side coating underneath in the baskets. Judge expansion and slow partial recovery from a gentle press.
  7. 07 · Preheat during proof

    At least 45 min at 245°C

    Use: Oven and lidded pots

    Put lidded Dutch ovens on the middle rack and heat fully. If using one pot, refrigerate the second room-proofing loaf about 20 minutes before baking the first; reheat the empty pot 5 minutes between loaves.

    Ready when: Pots and oven fully heat-soaked.
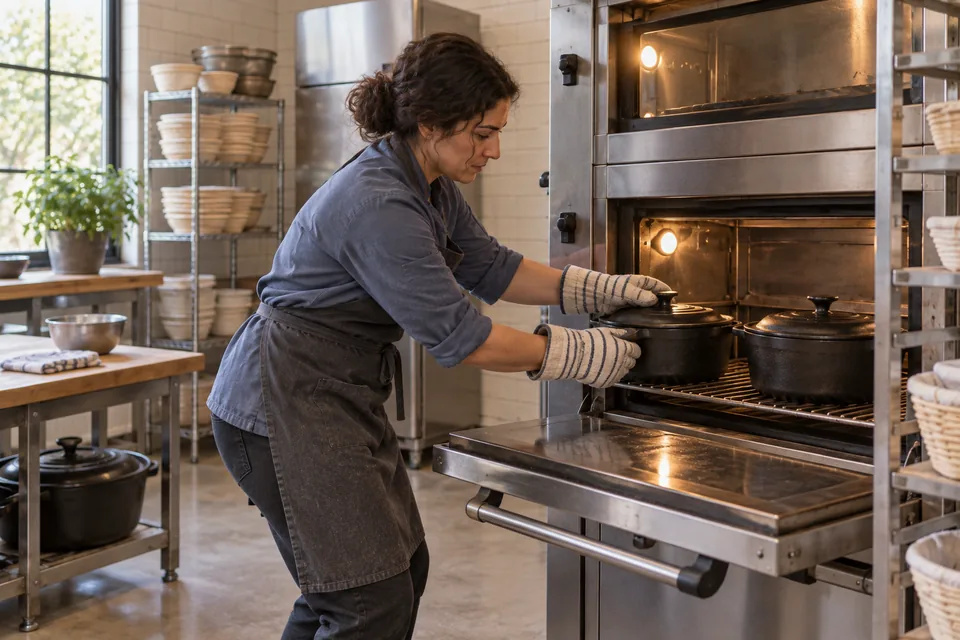
    A baker wearing oven mitts positions two lidded black Dutch ovens on an oven rack.
    07 Preheat during proofHeat the covered pots thoroughly while the loaves finish proofing.
  8. 08 · Load and bake

    245°C throughout

    Use: Proofed loaf

    Invert the loaf onto a lightly floured counter, then carefully lower it seam UP into the hot pot, avoiding the hot sides. No scoring is needed: the seam opens naturally. Use mitts for the pot and lid. Bake covered 30 minutes, then uncovered about 20 min. Check from 15 minutes uncovered.

    Ready when: Crust at least medium-dark brown all around; bran can be deeply colored.
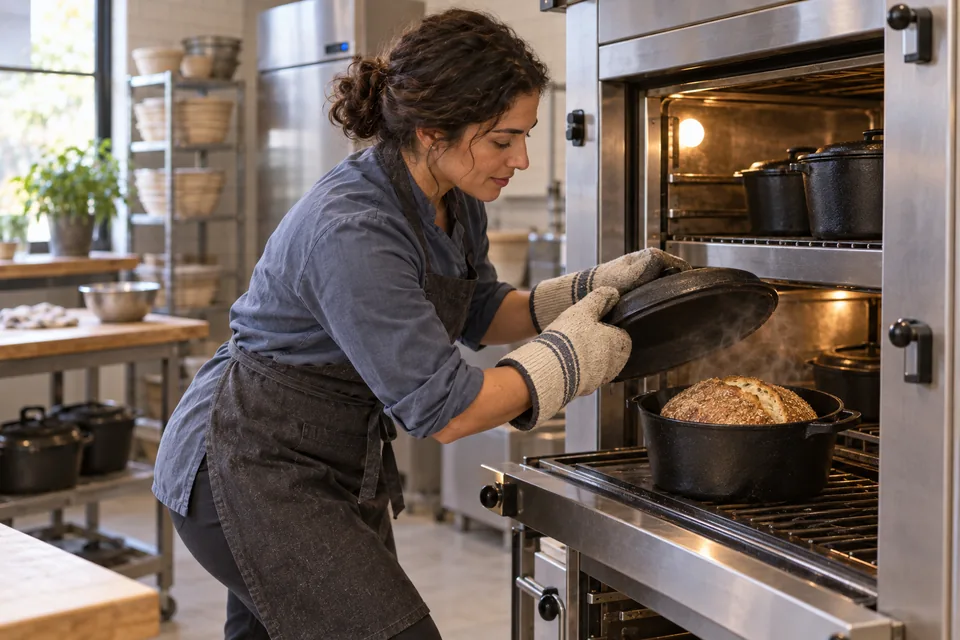
    A baker bends toward the oven and lifts a pot lid with mitts, revealing a bran-coated round loaf.
    08 Load and bakeThe optional bran coating can brown quickly, so begin checking after the first part of the uncovered bake.
  9. 09 · Cool

    At least 20 min

    Use: Baked loaves

    Turn the bread out and cool on a rack with air beneath it. Wait at least 20 minutes before slicing; allow longer if the center is still very hot.

    Ready when: Crumb begins to set; crust stays aired on the rack.
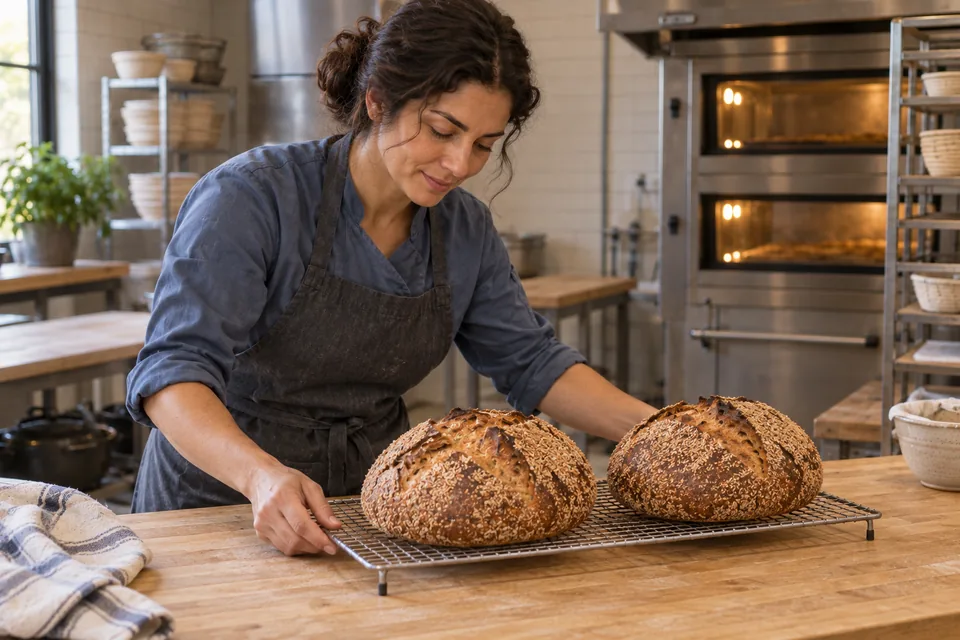
    A baker sets down a cooling rack with two intact, deeply browned round loaves coated in fine toasted bran.
    09 CoolCool the bran-coated loaves on an open rack before slicing.

What to look for

StageLook and feelNeeds attention
Mature poolishBubbly and roughly tripled; bubbles break at the surface every few seconds.Using a quiet, underdeveloped build or waiting until it has collapsed well past peak.
Bulk doughAbout 2½ times its initial volume. Folds should give increasing support.Tearing the dough during folds or judging only by time.
ProofA gentle finger dent returns slowly and incompletely.Waiting until the whole loaf is fragile or collapses at a touch.

Troubleshooting

If you seeLikely causeWhat to do nowNext time
Poolish is ready too earlyThe room was warmer than the reference recipe’s overnight reference temperature.Use the build at its mature stage if possible; do not deliberately leave it collapsing for hours.Use a cooler location or adjust the next build’s water temperature and timing.
Little rise by the stated timeCooler dough or room; weak or inaccurate yeast dose.Check dough temperature and expansion. Allow more time in a gently warm place; continue only when the recipe’s volume cue is reached.Weigh yeast carefully and record final dough temperature; adjust the next batch’s water temperature.
Loaf spreads or collapses at loadingFinal proof went too far or shaping left insufficient tension.Load gently and bake promptly; expect reduced height.Begin checking early, particularly in warmth. Shape with moderate tension and refrigerate a second loaf while the first bakes.
Dark bottom but pale upper crustUneven oven heat or a rack too close to the bottom element.Check oven temperature and finish by crust color while monitoring the base.Use the middle rack and a fully heated pot; verify actual oven temperature.

Recipe notes

  • The P ingredients are part of the total formula. The D row saying “all of P” is a transfer, not another portion of flour, water or yeast.
  • Plan the overnight rise for 18–21°C; warmer rooms shorten preferment maturity and dough rise.
  • The poolish’s useful peak lasts about 2 hours in a cool room, nearer 1 hour above 24°C.
  • Use the entire poolish build, including its small yeast dose; its mass is about 1,000 g.
  • Nominal baker’s percentages use 1,000 g flour. The additional 50 g wheat germ and 20 g bran are listed at 5% and 2%; neither is added to that denominator. Bran coating is extra.
Show ingredient flow
Overhead view of two matching cut halves on a board and the second whole bran-coated round on a rack.
Wheat germ and bran bread with poolish.

Recipe

Wheat germ and bran bread with poolish

A poolish loaf with 10% whole wheat, wheat germ and bran; suited to focaccia.

How do I make it?

  1. Make the overnight mixture

    12–14 h at 18–21°C

    Make the poolish, a flour-and-water mixture that rises before the main dough: mix the flour and yeast listed in group P, then stir in all the group P water. Cover and leave at 18–21°C.

    A baker lifts the lid from a round clear bowl of bubbly, batter-like mature poolish.
    Use the poolish when it is well expanded and covered in lively bubbles.

    Ready when: Bubbly and roughly three times bigger, with bubbles popping at the surface every few seconds.

  2. Mix the main dough

    A few minutes

    Mix the flour, salt, yeast, wheat germ and dough bran listed in group D. Pour the group D water around the prepared poolish to loosen it, then add all this mixture to the group D dry ingredients. With a wet hand, alternate 5–6 pinches through the dough using your thumb and forefinger with folds until evenly mixed; there is no separate flour-and-water rest.

    Viewed from above, a baker pinches through uniform light-beige dough with fine wholegrain flecks.
    Mix in all the ripe poolish, wheat germ and dough bran; pinch and fold to a uniform flecked dough.

    Ready when: Evenly mixed dough with no lumps of the prepared overnight mixture.

  3. Fold and let rise

    2–3 h from end of final mix

    Fold the dough twice during the first hour of its first rise. Each time, wet your hand, lift one edge just until it resists and fold it across; repeat around 4–5 edges until the dough firms, then turn it folded-side down. Let it relax between folding rounds, and keep it covered between rounds and for the rest of the rise.

    A side-on baker lifts a connected edge of light-beige flecked dough in a tub.
    Fold gently to build strength while keeping the dough connected and untorn.

    Ready when: About 2½ times its starting size.

  4. Shape the loaves

    A few minutes

    Gently tip the dough onto a lightly floured counter without tearing it and divide it equally. Fold each piece’s edges into the middle, turn the folded side down onto a clean patch without flour, then cup and gently pull it toward you while turning to form a moderately firm ball. For a bran coating, prepare the baskets and dampen the folded sides as described in the next step before putting the loaves in; otherwise place them folded-side DOWN in well-floured baskets, flour their tops and cover.

    A baker shapes one light-beige, finely flecked dough round with a second round beside it.
    Divide evenly and cup the two rounds until their surfaces hold gentle tension.

    Ready when: Two moderately firm rounds with no tears on the surface.

  5. Add a bran coating, if you like

    During shaping

    Before putting the shaped loaves in their baskets, dust each empty basket with flour and scatter 10 g extra bran inside. Lightly dampen the folded side of each loaf, then set that side DOWN on the bran. Lightly flour the tops and cover.

    A baker scatters fine bran into an empty floured basket, with a second empty basket and two shaped rounds nearby.
    For the optional coating, scatter a thin layer of bran into the floured baskets before adding the moistened seam sides.

    Ready when: A light, even bran coating, without loose piles.

  6. Let the loaves rise

    About 1 h; preheat promptly

    Keep the shaped loaves covered as they rise. Gently press a loaf with a floured fingertip to make a small dent: it is ready when the dent slowly rises partway back. If it springs straight back, wait longer; if the dent stays and the loaf feels loose and weak, it may have risen too far.

    A baker presses a small dent into one of two light-beige mixed-grain rounds in baskets.
    Proof with the seam-side coating underneath in the baskets. Judge expansion and slow partial recovery from a gentle press.

    Ready when: The loaf has grown and feels airy; a finger dent slowly rises partway back.

  7. Heat the oven and pots

    At least 45 min at 245°C

    Heat the heavy lidded pots on the oven’s middle rack until fully hot. If you have only one pot, put the second loaf in the fridge about 20 minutes before baking the first. Reheat the empty pot for 5 minutes before baking the second loaf.

    A baker wearing oven mitts positions two lidded black Dutch ovens on an oven rack.
    Heat the covered pots thoroughly while the loaves finish proofing.

    Ready when: The pots and oven are fully hot.

  8. Bake the bread

    245°C throughout

    Turn the loaf out onto a lightly floured counter, then use oven mitts to lower it folded-side UP into the hot pot without touching the sides. Leave the top uncut—the fold will open as it bakes—and bake with the lid on for 30 minutes. Remove the lid and bake about 20 minutes more, checking from 15 minutes after removing it.

    A baker bends toward the oven and lifts a pot lid with mitts, revealing a bran-coated round loaf.
    The optional bran coating can brown quickly, so begin checking after the first part of the uncovered bake.

    Ready when: The crust is medium-dark brown or darker all around; the bran may be very dark.

  9. Let it cool

    At least 20 min

    Take the bread out of the pot and set it on a rack so air can pass underneath. Wait at least 20 minutes before slicing, and longer if the middle is still very hot.

    A baker sets down a cooling rack with two intact, deeply browned round loaves coated in fine toasted bran.
    Cool the bran-coated loaves on an open rack before slicing.

    Ready when: The inside is beginning to firm up while air can reach the crust.

What can go wrong, and how can I fix it?

What you noticeLikely causeWhat to do
Poolish is ready too earlyThe room was warmer than the reference recipe’s overnight reference temperature.Use the build at its mature stage if possible; do not deliberately leave it collapsing for hours. Use a cooler location or adjust the next build’s water temperature and timing.
Little rise by the stated timeCooler dough or room; weak or inaccurate yeast dose.Check dough temperature and expansion. Allow more time in a gently warm place; continue only when the recipe’s volume cue is reached. Weigh yeast carefully and record final dough temperature; adjust the next batch’s water temperature.
Loaf spreads or collapses at loadingFinal proof went too far or shaping left insufficient tension.Load gently and bake promptly; expect reduced height. Begin checking early, particularly in warmth. Shape with moderate tension and refrigerate a second loaf while the first bakes.
Dark bottom but pale upper crustUneven oven heat or a rack too close to the bottom element.Check oven temperature and finish by crust color while monitoring the base. Use the middle rack and a fully heated pot; verify actual oven temperature.
Useful recipe notes

The P ingredients are part of the total formula. The D row saying “all of P” is a transfer, not another portion of flour, water or yeast.

Plan the overnight rise for 18–21°C; warmer rooms shorten preferment maturity and dough rise.

The poolish’s useful peak lasts about 2 hours in a cool room, nearer 1 hour above 24°C.

Use the entire poolish build, including its small yeast dose; its mass is about 1,000 g.

Nominal baker’s percentages use 1,000 g flour. The additional 50 g wheat germ and 20 g bran are listed at 5% and 2%; neither is added to that denominator. Bran coating is extra.

See the detailed method and ratios in , or follow ingredients through the .

Ingredient proportions & recipe details

Wheat germ and bran bread with poolish at a glance

Makes
2 loaves, each about 680 g after baking
Heat
245°C conventional
Baking time
30 min covered + about 20 min uncovered
Dough hydration
78%
Prefermented flour
50% of total flour
Leavening
Yeast
Bulk fermentation
2–3 h from end of final mix · About 2½ times its initial volume.
How do the ingredient proportions compare?

Core dough totals include the flour and water in the portion of starter or preferment used. Do not add them again. Toppings, fillings and dusting flour are separate.

Formula componentGramsFlour = 100%
Total flour1000 g100%
Total water780 g78%
Salt21 g2.1%
Instant yeast3.4 g0.3%