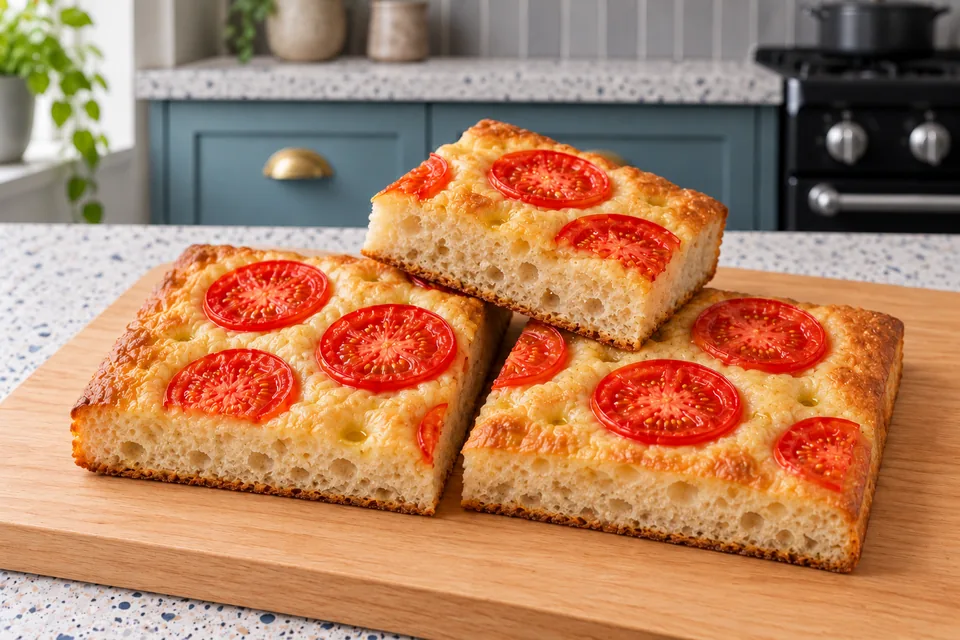
Tomato and garlic focaccia
A shallow tray focaccia with sliced plum tomatoes and fresh garlic oil mixed just before baking. Draining the tomatoes helps the bread set beneath the topping.
Method
01 · Mix the wet focaccia dough
7–10 minUse: Strong white bread flour; Water for the dough; Extra-virgin olive oil for the dough; Fine salt; Instant dried yeast
Combine the flour, dough water, dough oil, salt and instant yeast in a stand-mixer bowl. Mix with the paddle on low for 4 minutes, scrape the bowl, then mix for 2–3 minutes at medium-low or the machine’s recommended speed.Ready when: The dough is sticky but cohesive, and begins to stretch rather than break.
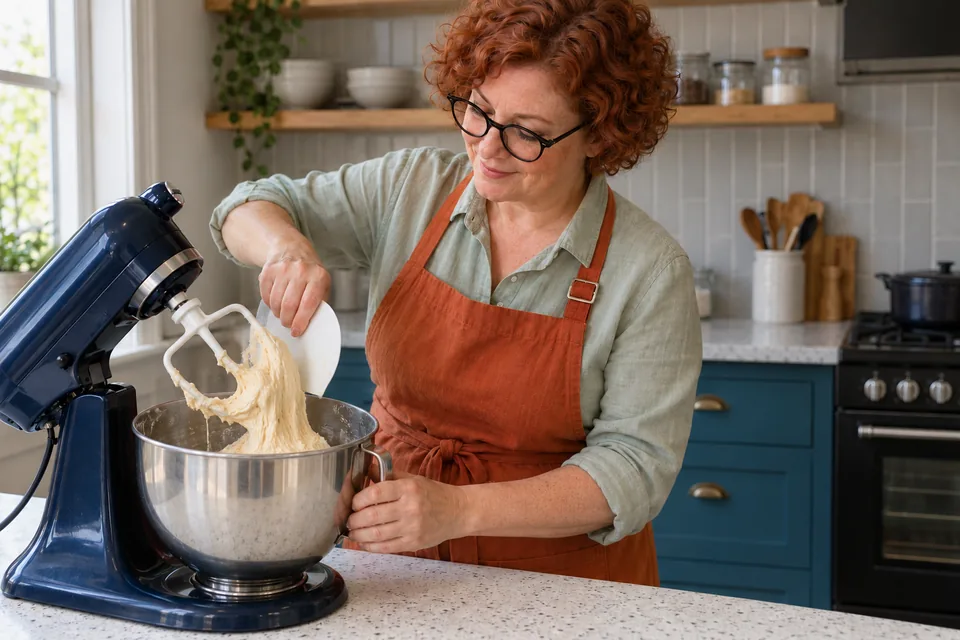
01 Tomato and garlic focacciaMix until the dough begins to stretch. 02 · Fold during the bulk rise
90 minUse: Olive oil for the bowl
Coat a clean bowl with the separate bowl oil and add the dough. Cover and leave at 22–24°C for 90 minutes. At 30 and 60 minutes, lift one edge with oiled fingers and fold it over the centre; repeat around all four sides, then cover again. Leave topping preparation until the later pan-proof steps.Ready when: The dough is aerated, elastic and noticeably expanded.
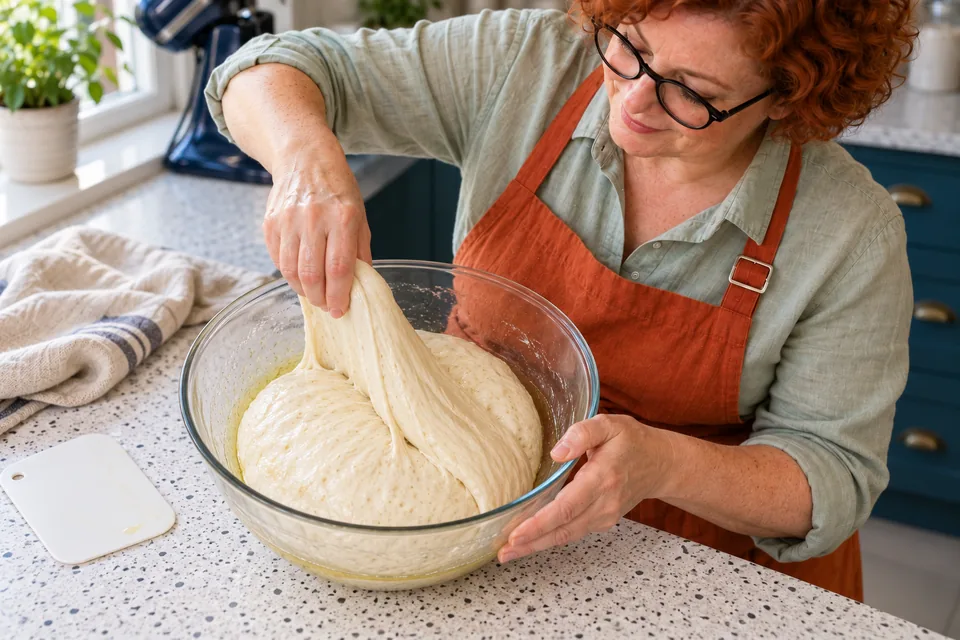
02 Tomato and garlic focacciaFold the dough as it rises. 03 · Ease the dough into the oiled pan
8–10 minUse: Olive oil for the tray
Line the base of a 30×40 cm rimmed tray with baking paper rated for 230°C, and brush the paper and tray sides with the pan oil. Transfer the dough with a scraper and ease it outward with oiled fingertips. If it springs back, cover for 5 minutes before continuing. Aim for an even shallow rectangle rather than forcing it into every corner.Ready when: The tray holds an evenly spread layer, with no torn thin patches.
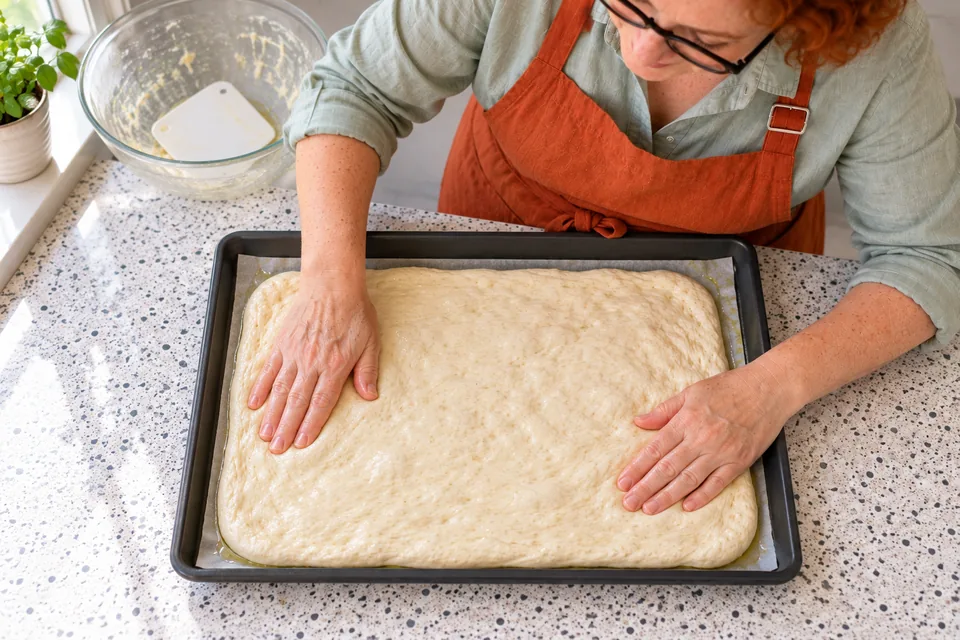
03 Tomato and garlic focacciaSpread the dough in the oiled tray. 04 · Begin the pan proof
35–50 minUse:
Cover loosely and leave at 22–24°C for 35–50 minutes. If the dough resisted stretching, gently ease it toward the corners after 20 minutes, then cover again. Keep it covered for the further 25 minutes of topping preparation in the next step.Ready when: The dough has begun expanding and its surface is softer; the final part of proof follows in the next step.
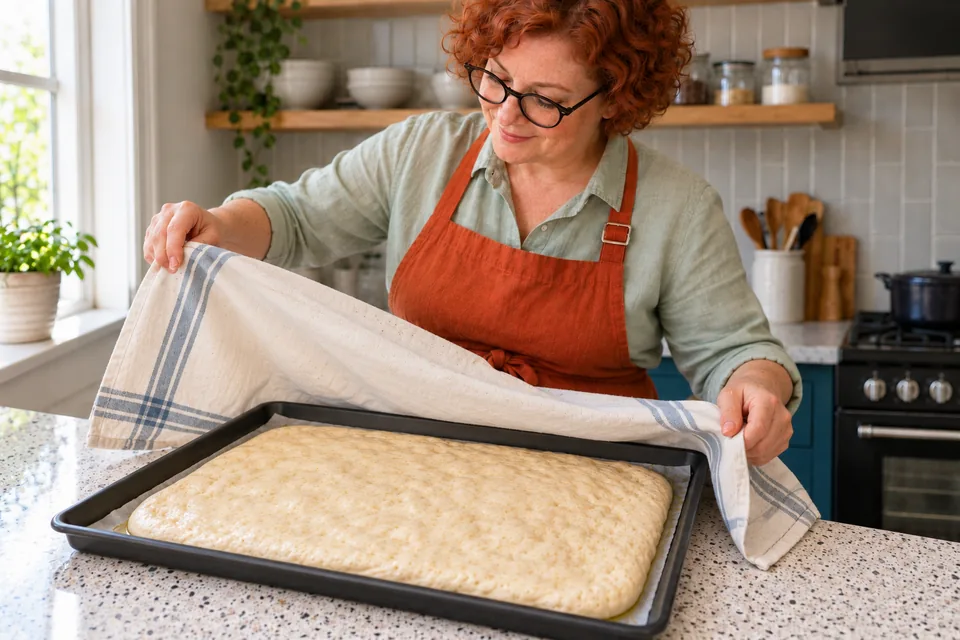
04 Tomato and garlic focacciaBegin the proof in the tray. 05 · Complete proof while draining tomatoes and heating the oven
25 minUse: Plum tomatoes; Water for the surface brine; Fine salt for the brine
Keep the covered dough proofing for another 25 minutes while preparing the topping. Cut the tomatoes during the first 5 minutes, then leave the slices in a sieve over a bowl for 15 minutes. Pat them dry during the final 5 minutes. Meanwhile, dissolve the surface salt in its separate 20 g water and heat the oven to 230°C conventional. Keep the garlic whole until topping.Ready when: The tomatoes are drained and dry on the surface. The dough is puffy, jiggles when nudged and holds a light fingertip dent.
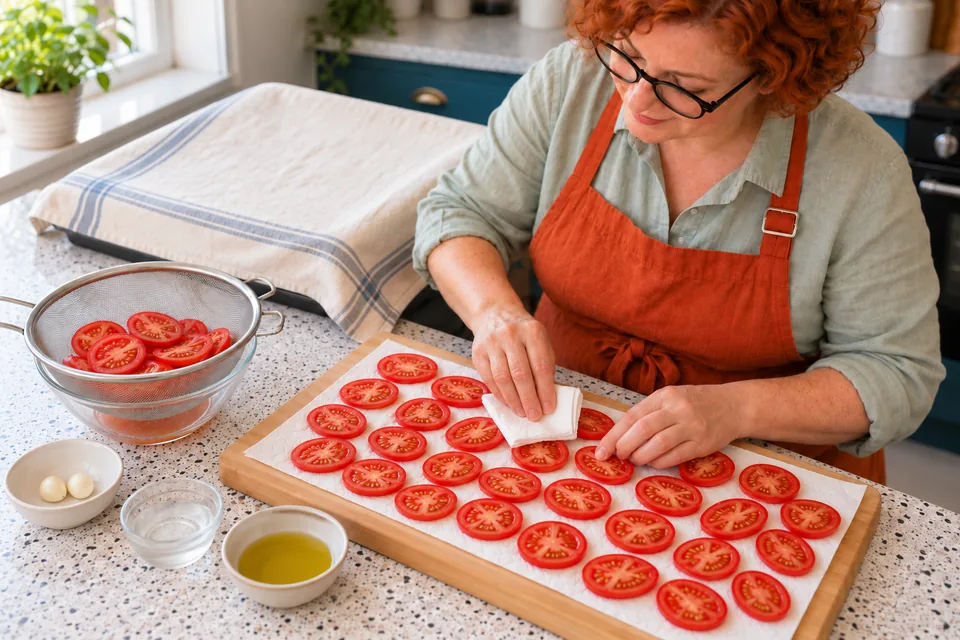
05 Tomato and garlic focacciaDrain and dry the tomato slices. 06 · Dimple and add the measured topping
5–10 minUse: Extra-virgin olive oil for topping; Peeled garlic; Water for the surface brine; Fine salt for the brine; Plum tomatoes
Finely grate the garlic and stir it into the measured topping oil immediately before use. Spread it over the puffy dough, add the light brine and make fingertip dimples without tearing. Arrange the drained tomato slices in a single loose layer with gaps. Tuck exposed garlic under tomato edges to limit scorching. Bake immediately; do not keep the fresh garlic-oil mixture for later.Ready when: The surface is evenly dimpled and lightly topped, with no heavy mound or large pool of liquid.
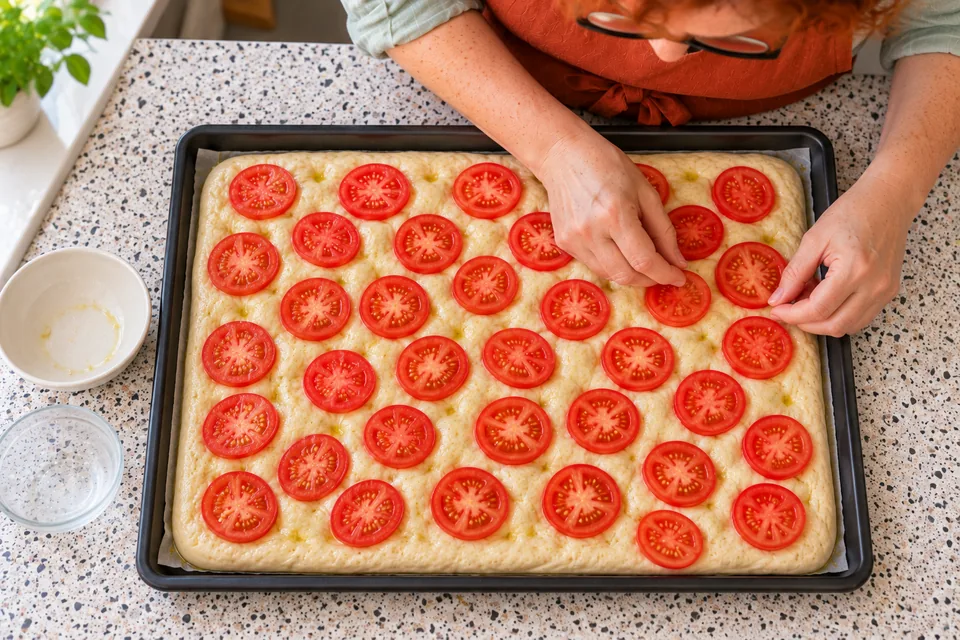
06 Tomato and garlic focacciaDimple and add the light topping. 07 · Bake until the base and topping are set
25–30 minUse:
Bake on the lower-middle rack for 15 minutes at 230°C conventional. Reduce to 220°C and continue for 10–15 minutes. If the top darkens before the middle cooks, cover loosely with foil. Lift an edge with a spatula to check the base, and probe a thick bread area away from the topping.Ready when: The underside is browned and firm, the bread is set with no wet dough, and its centre reaches about 96°C.
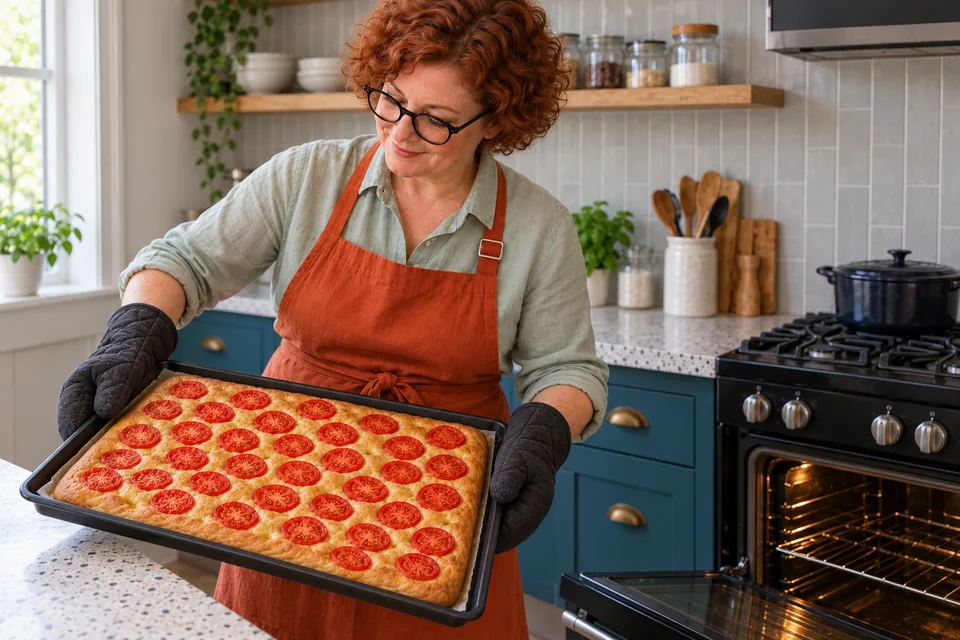
07 Tomato and garlic focacciaBake until the base is browned and firm. 08 · Cool before slicing
20 minUse:
Leave on the tray for 10 minutes. Lift or slide the bread onto a rack, remove the baking paper, and rest for at least 10 minutes more before cutting into twelve pieces.Ready when: The base stays firm and the bread can be cut without crushing the crumb.
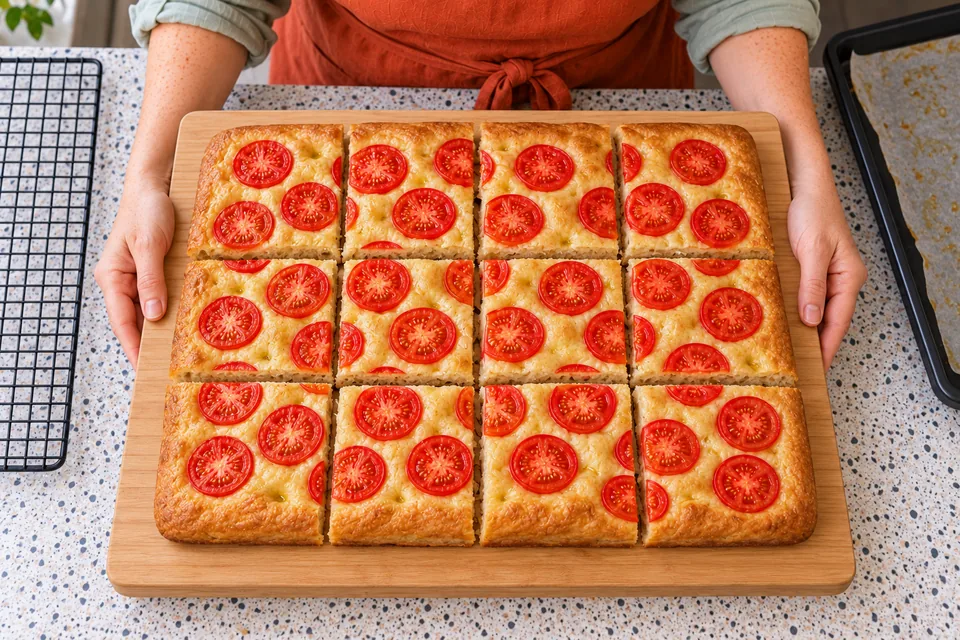
08 Tomato and garlic focacciaCool, then cut into twelve pieces.
What to look for
| Stage | Look / feel for | Needs attention |
|---|---|---|
| Mix the wet focaccia dough | The dough is sticky but cohesive, and begins to stretch rather than break. | |
| Fold during the bulk rise | The dough is aerated, elastic and noticeably expanded. | |
| Ease the dough into the oiled pan | The tray holds an evenly spread layer, with no torn thin patches. | |
| Begin the pan proof | The dough has begun expanding and its surface is softer; the final part of proof follows in the next step. | |
| Complete proof while draining tomatoes and heating the oven | The tomatoes are drained and dry on the surface. The dough is puffy, jiggles when nudged and holds a light fingertip dent. | |
| Dimple and add the measured topping | The surface is evenly dimpled and lightly topped, with no heavy mound or large pool of liquid. | |
| Bake until the base and topping are set | The underside is browned and firm, the bread is set with no wet dough, and its centre reaches about 96°C. | |
| Cool before slicing | The base stays firm and the bread can be cut without crushing the crumb. |
Troubleshooting
| If you see this | Likely cause | What to do now | Next time |
|---|---|---|---|
| The dough springs back during spreading. | Its gluten is still tight. | Cover and rest briefly, then ease outward again without tearing. | Keep the dough covered and include the stated pan relaxation. |
| The top is browned but bread beneath the topping is wet. | The topping held excess moisture or the bread needs more time. | Cover the top loosely with foil and continue baking until the bread reaches its stated cue. | Drain wet ingredients, use the shallow tray and check the base and bread centre. |
Storage: Best eaten on the day. Cool promptly, then refrigerate covered leftovers within 2 hours of baking and use within 2 days. Reheat until hot through. Freeze wrapped pieces for up to 1 month.; Contains: wheat.; This Nepedia version has not been kitchen-tested.
Other approaches to this recipe
| Cook / recipe | Use | What differs |
|---|
The working ingredients and method form one recipe. Different formulas are compared without averaging their quantities or rise schedules.